(Undo revision 910187 by Boondocks4ever (talk)) |
|||
| Line 281: | Line 281: | ||
==Unanswered questions== |
==Unanswered questions== |
||
{{NavMinor-Unanswered}} |
{{NavMinor-Unanswered}} |
||
| − | ===Construction=== |
||
| − | * What was the purpose of the black lights? |
||
| − | * Why was the station designed with blast doors? |
||
| − | * Why does the Swan logo appear on DHARMA items far more often than any other logos? |
||
===The Incident=== |
===The Incident=== |
||
* Why did [[Pierre Chang|Dr. Candle]] state any other use of the computer could lead to another Incident? |
* Why did [[Pierre Chang|Dr. Candle]] state any other use of the computer could lead to another Incident? |
||
| − | * Why was the ladder inside the shaft broken? |
||
| − | |||
| − | ===Lockdown=== |
||
| − | * How was the [[lockdown incident]] triggered? |
||
| − | * Was the lockdown related to the [[periodic resupply drop]]? |
||
===Recent events=== |
===Recent events=== |
||
Revision as of 02:55, 5 June 2010
"Swan" redirects here. For the character in the Project, see Black Swan.
The Swan was an underground facility on the Island built by the DHARMA Initiative during the late 1970's. It was located somewhere in the southwest region of the Island, about a mile inland from the survivors' camp. Constructed in secret inside Hostile territory (termed Grid 334), the facility was also referred to as Station #3 by the Initiative.
The station was originally designed to be a laboratory where DHARMA scientists would study and manipulate the "unique electromagnetic fluctuations" emanating from this sector of the Island. However, after a mysterious "incident", a special protocol was enacted to prevent a potential global catastrophe. ("Lost: The Answers") Two individuals manning the station would take shifts pressing a button (entering the Numbers into a computer) every 108 minutes. These two operators would live and work at the station, continuing this task for shifts lasting 540 days.
On November 27, 2004, the Swan imploded on activation of the fail-safe by Desmond Hume. A large crater now resides in its place. ("Live Together, Die Alone, Part 1") ("Further Instructions")
History
DHARMA Initiative
Construction


The Swan construction site. ("Some Like It Hoth")

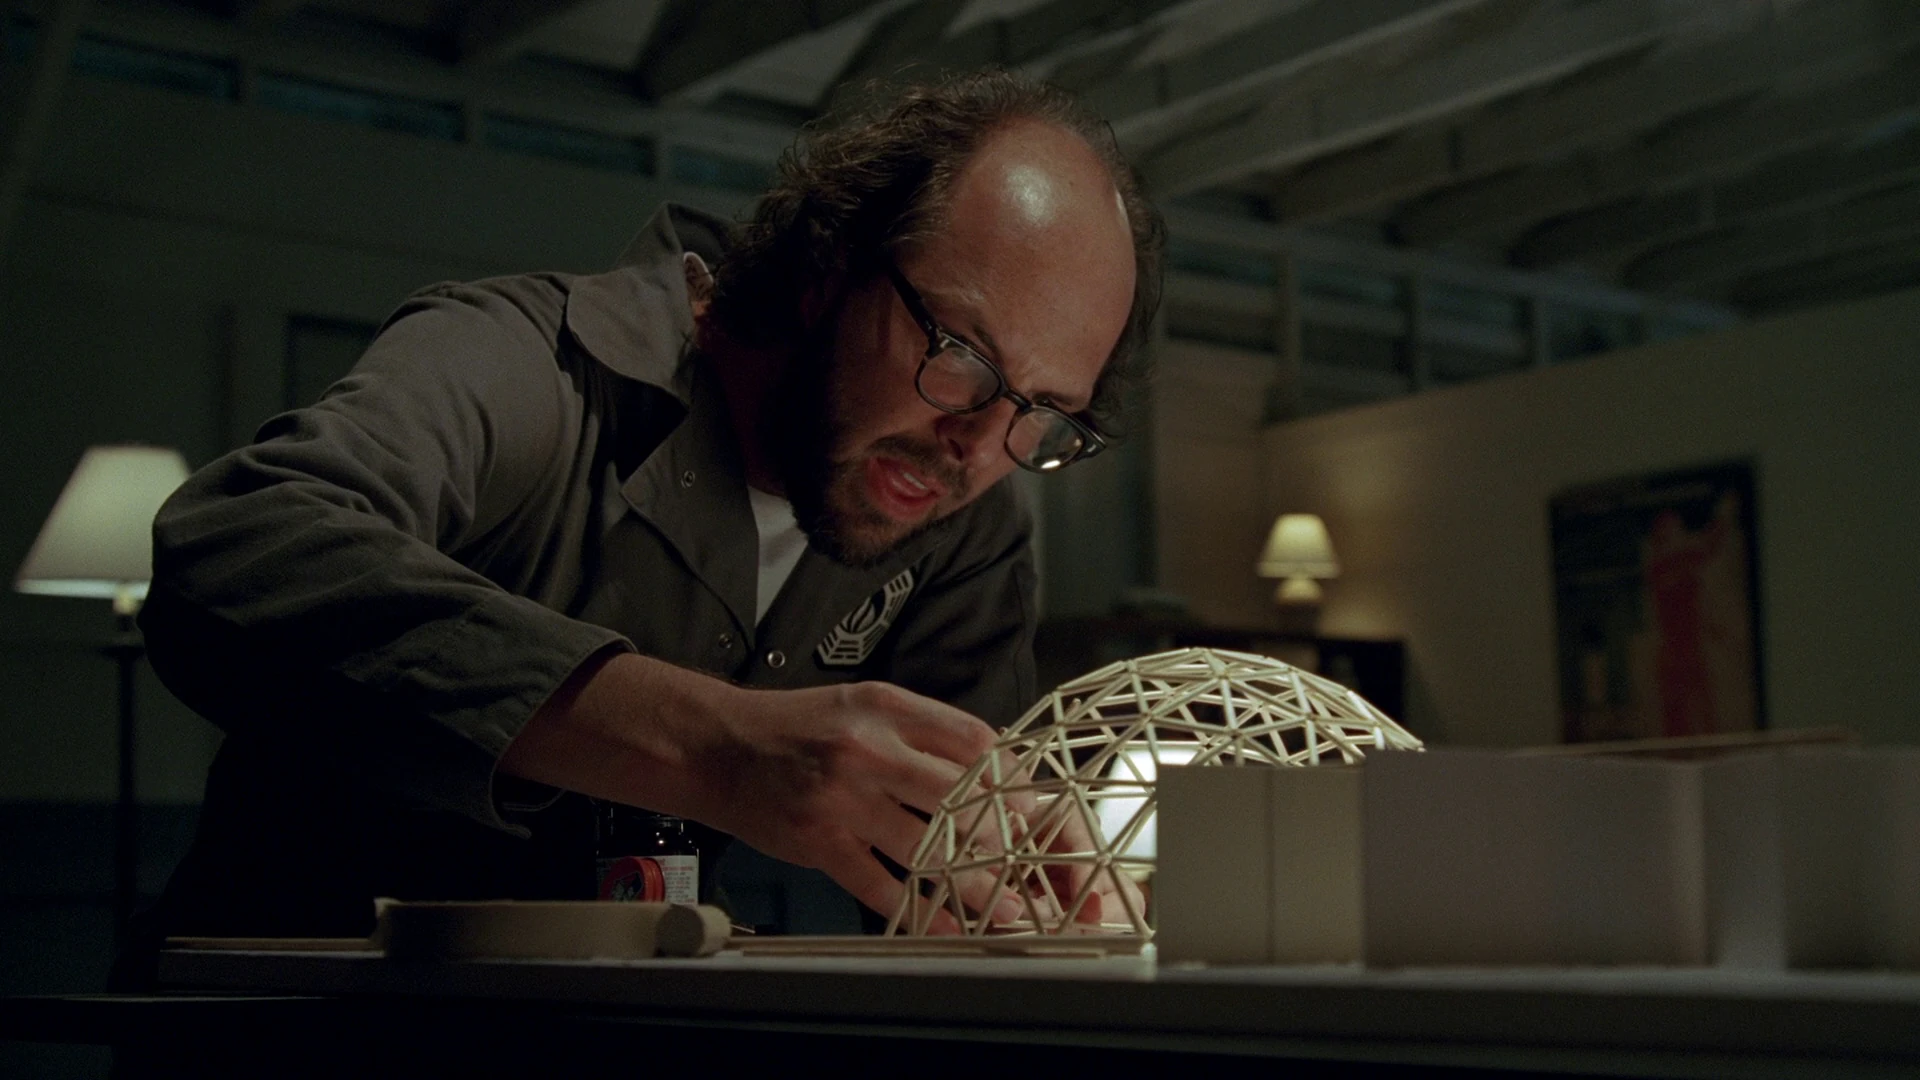
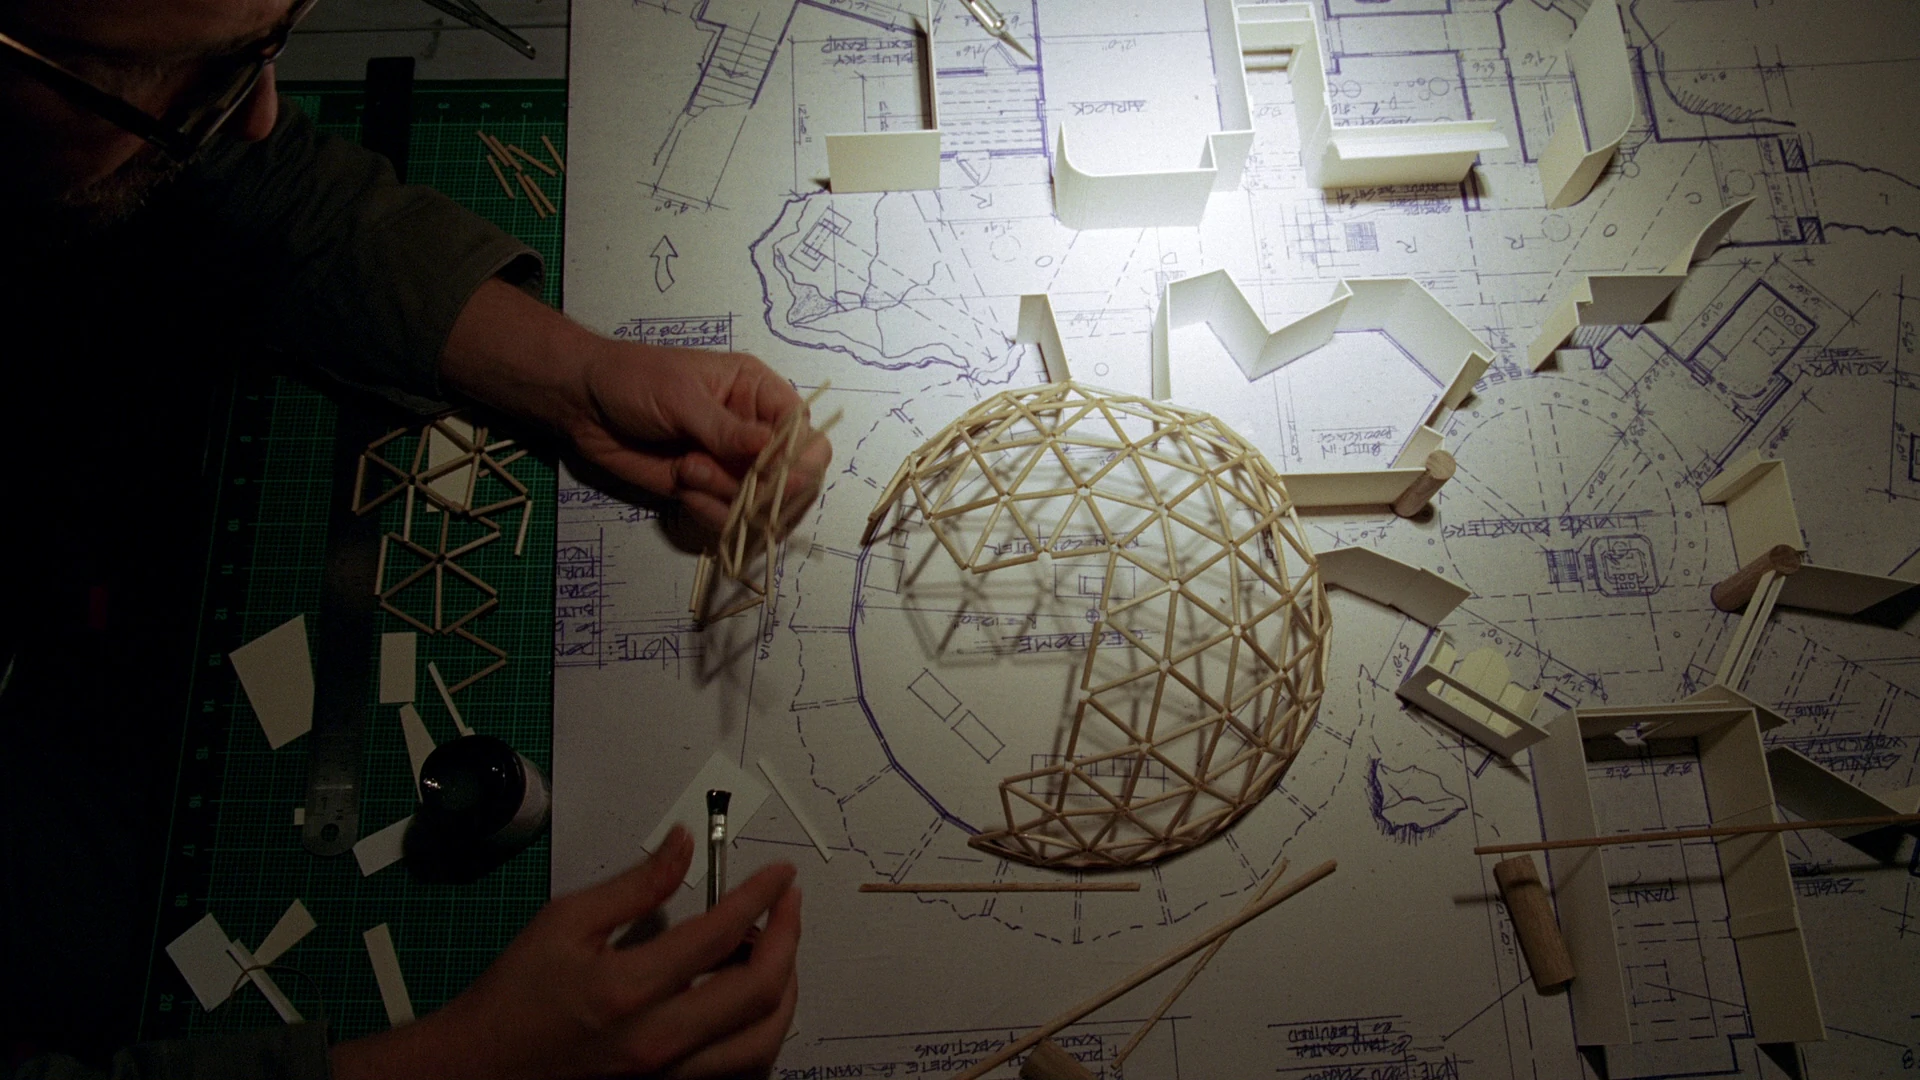
Radzinsky carefully building the model of the geodesic dome of the Swan station's computer room. ("Namaste")
The DHARMA Initiative somehow detected a pocket of anomalous energy beneath this sector of the Island and planned to create a facility to study and to try to harness its power. Stuart Radzinsky was the architect of this facility, which would later be known as The Swan, having started planning and designing the station as early as 1971. This energy pocket was similar to that beneath The Orchid only said to be 30,000 times stronger.
Construction of the Swan began sometime before July of 1977 and Radzinsky was seen with full blueprints of the station and a survey map when he was stationed at the Flame that same year. Radzinsky's goal was to manipulate electromagnetism through experiments at the station, believing the results would fundamentally change the world. According to Pierre Chang, the Swan project was "confidential" as the station was located inside Hostile territory. The station's existence needed to be kept secret per the stipulations of The Truce forbidding deep drilling.
During the construction of the station, one worker was killed when one of his dental fillings was pulled through his forehead by a huge electromagnetic force. Another worker at the construction site was seen hammering the Numbers into the hatch as serial numbers. ("Some Like It Hoth") ("Namaste") ("The Incident, Parts 1 & 2") When Daniel Faraday returned to the Island in 1977, he immediately warned Pierre Chang that continued drilling would lead to a release of a highly unstable energy, causing the Incident. ("The Variable")
The Incident/aftermath
Little is known of what DHARMA hoped to achieve via experiments at the Swan. According to the Orientation film, the station was originally constructed to be a laboratory where scientists could study electromagnetism. The film claims that not long after the experiments began, an "incident" occurred requiring the establishment of a protocol where two men living at the station would push a button every 108 minutes. Failure to do so would result in dire consequences. Desmond described entering the Numbers and pressing "Execute" as being an action necessary to save the world. ("Orientation")

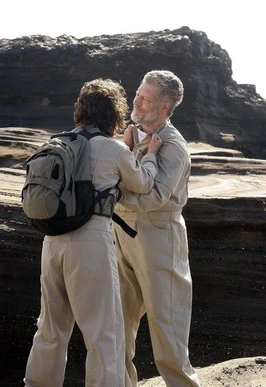
Desmond and Kelvin fighting at the cove. ("Live Together, Die Alone, Part 2")
At some point after the Incident, Radzinsky came to be stationed at the Swan, where he was later joined by Kelvin Inman after the Gulf War in 1991. It is not known when these events occurred in relation to the Purge, but it seems likely that it was sometime post-Purge when Radzinsky shot himself while Kelvin was sleeping. ("Live Together, Die Alone, Part 2")
Kelvin continued to man the station alone until Desmond's arrival on the Island aboard the Elizabeth. Kelvin and Desmond, as partners, continued pressing the button for three years, until the day of Flight 815's arrival when Desmond accidentally killed Kelvin at the cove. ("Live Together, Die Alone")
Being away at the cove, Desmond failed to enter the Numbers in a timely fashion, which resulted in a "system failure" and a huge electromagnetic buildup. Although the system was eventually reset, the electromagnetic force was strong enough to be able to tear Flight 815 apart in mid-air in passing over the Island. Desmond would not come to realize his role in the crash until more than two months later. He continued to live alone for another 44 days before the survivors blasted open the Swan's hatch with dynamite. Shortly afterwards, Desmond fled the Swan, leaving it to the survivors. ("Live Together, Die Alone, Part 2") ("Man of Science, Man of Faith") ("Adrift")
The Others
It is unclear when the Others first learned of the Swan. The Others seemed initially to be unaware of the station's existence and that that DHARMA personnel continued to staff the station well after the Purge. The Others clearly had learned of the Swan's existence by November 2004 as Tom was making use of The Pearl station to conduct surveillance of the survivors at The Swan. On November 9, Ben and Juliet also visited The Pearl briefly to observe Jack and were overheard by Paulo. ("Exposé")
Per the Lost producers, the Others were largely unaware of the Swan station and its inhabitants until the survivors discovered it. (Official Lost Podcast/March 20, 2007)
Clues pointing to the Swan's existence
It is unclear how the DHARMA Initiative managed to keep the station's existence a secret for so long:
- In 1977, Sayid clearly mentioned the name of the station in front of Richard Alpert and Eloise Hawking. ("The Incident, Part 1")
- The sheer size of the Swan construction site, noise of the drilling, and the presence of at least one road leading to the site from the Barracks would make the project very difficult to conceal from the Others, whom Roger Linus described as "lords of the jungle." ("Some Like It Hoth") ("The Incident, Parts 1 & 2")
- Although the DHARMA Initiative was attempting to keep the construction of the Swan a secret, their security procedures seem rather lax given Dr. Chang appears to have no problem letting individuals such as Hurley (a relative newcomer to the Island) know about the existence of the site. ("Some Like It Hoth")
- A quite large number of DHARMA Initiative members knew of the Swan, including Horace, Radzinsky, Pierre Chang, Phil, the construction staff and other security personnel. After the station was complete a rotating staff at the Pearl also monitored ongoing activity at the Swan for years prior to the Purge. Additionally the Swan itself had a change of personnel approximately every 1.5 years. ("Orientation") ("?")
- A model of the Swan and a number of blueprints pertaining to its construction were kept at the Flame in 1977. ("Namaste")
- Numerous notebooks from the Pearl containing detailed observations on the activities of the Swan personnel were dumped unceremoniously in the jungle at the capsule dump. ("Live Together, Die Alone, Part 2")
- The prevelance of Swan logos throughout the DHARMA Initiative.
- It is unclear if the DHARMA Initiative would have bothered to continue their campaign of secrecy after the Incident - believing that the site had already been found and attacked by the Hostiles. ("The Incident, Part 2")
- Eloise Hawking was clearly aware of the Swan and the protocol per her encounter with Desmond in 1996. Likely this is per a time-shifting Daniel's journal falling into her hands in 1977 which contained numerous references to The Swan. ("Flashes Before Your Eyes") ("The Incident, Part 1")
- On November 9, 2004, Walt was somehow able to make use of another computer on the Island - very likely at a station controlled by the Others - to contact Michael at the Swan. ("What Kate Did")
- Periodic resupply drops continued to be made by an unknown party to the Swan after the Purge. ("Lockdown")
- Richard Alpert tells Sun in 2007 that he watched all the time-shifting survivors die in 1977. His exact meaning is unclear, although it implies knowledge of what happened at the Swan site. ("The Incident, Part 2")
The Hatch was a major mystery in the first season.
Recent events
Season One (Days 1–44)
During the first season of Lost, one of the central plotlines was gaining access to the Swan, which they referred to as "the Hatch". The hatch entrance was first discovered by Locke and Boone by accident when Locke dropped his flashlight and the sound of metal was heard from beneath the foliage covering the ground. ("All the Best Cowboys Have Daddy Issues")
The two of them proceeded to excavate the hatch entrance and employ various means of opening it. One of their first attempts was the construction of a large trebuchet, designed to swing a large piece of shrapnel from the crash of Flight 815 into the hatch's window. The plan failed and a sharp piece of the shrapnel broke off on impact and buried itself in Locke's leg. ("Deus Ex Machina")
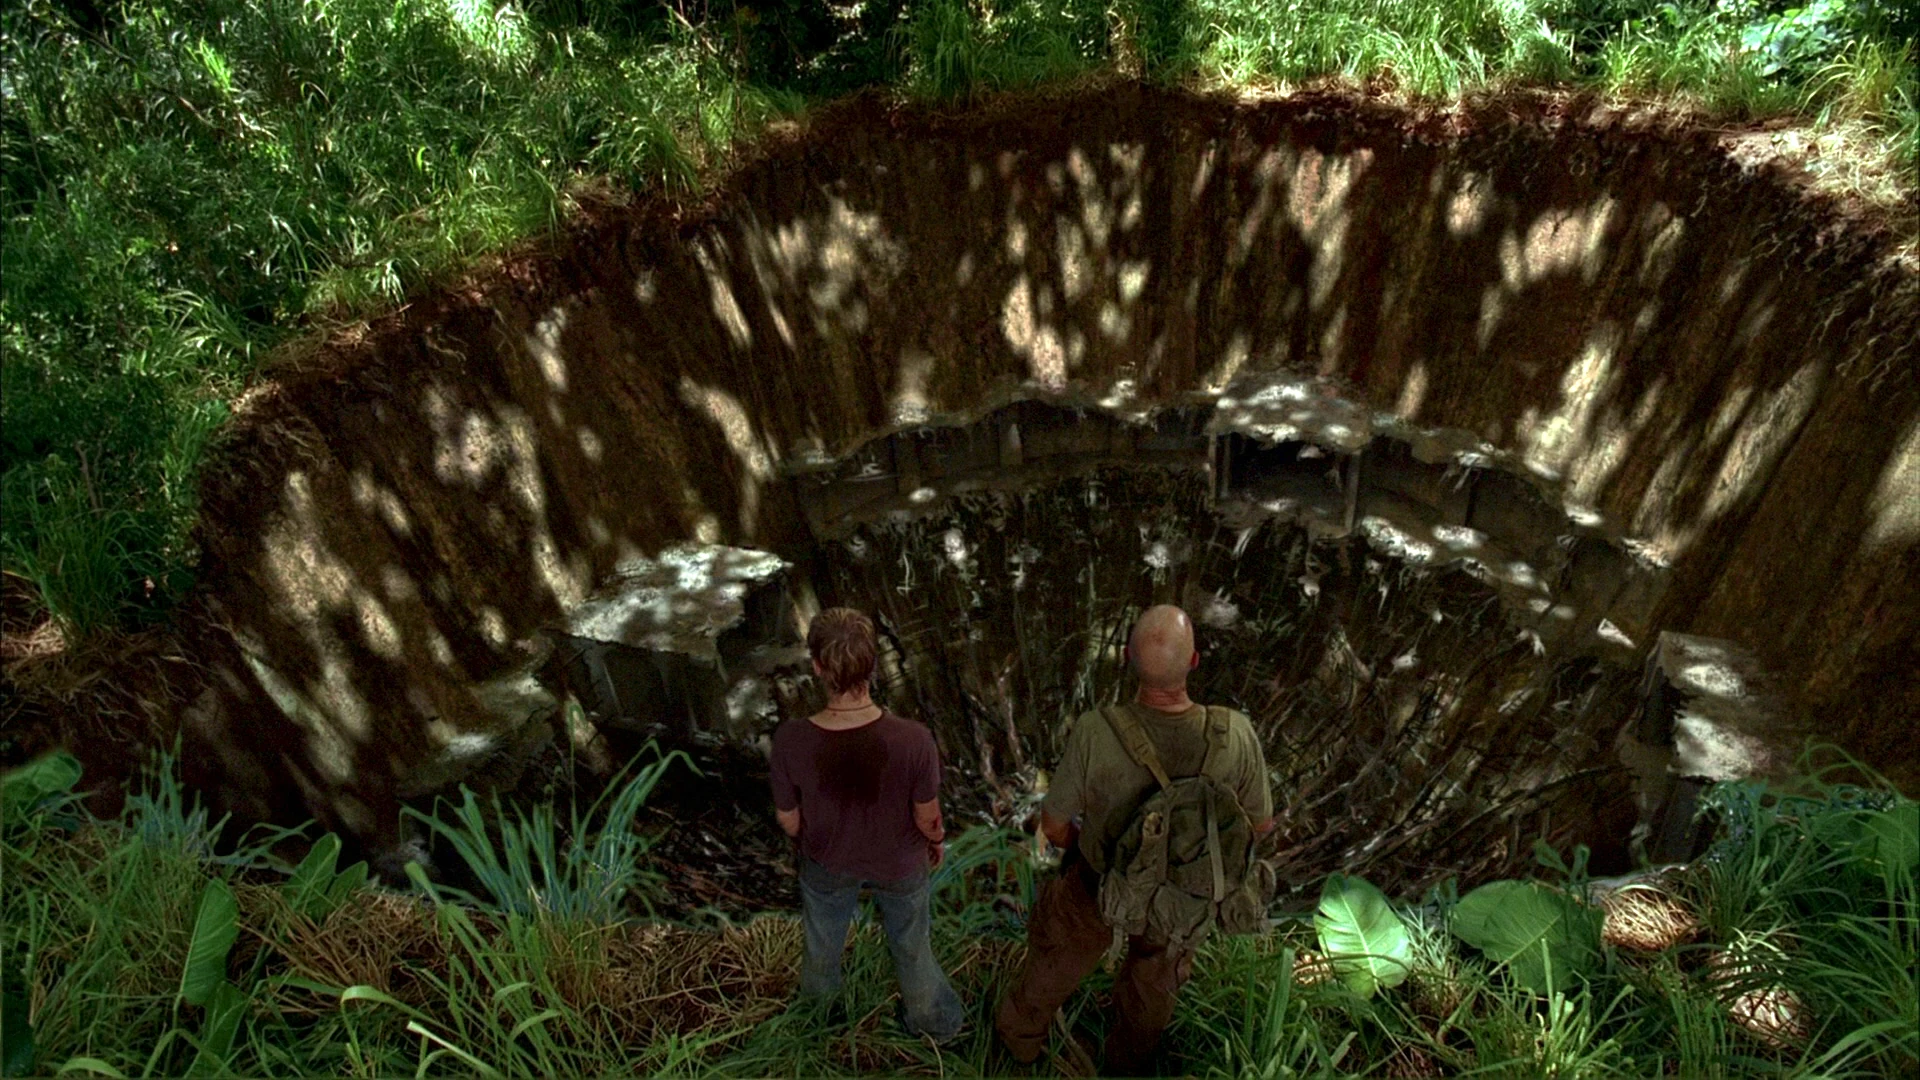
A later attempt was successful, using dynamite obtained from the Black Rock to blow open the hatch. As they were setting up the dynamite, Hurley noticed the Numbers engraved in the side of the Hatch and made an unsuccessful attempt to stop them. The season ended with Locke and Jack looking down into the long shaft into the Swan. ("Exodus, Part 3")

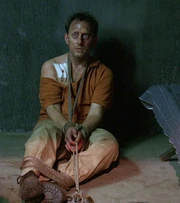
"Henry Gale" in the gun vault. ("Two for the Road")
Season Two (Days 44–67)
In the second season, the survivors descended into the Hatch and encountered Desmond, learning also of the computer and the protocol of "pushing the button". Jack and Locke eventually took over Desmond's task of setting up a rotation of responsibility, wherein everyone would take shifts entering the Numbers, which Locke initially believed to be of great importance. ("Orientation")
During Ben's period of captivity at the Swan, a lockdown event occurred in which the blast doors throughout the Swan were lowered. Locke was accidentally trapped beneath one of the doors and sent Ben through the air ducts to push the button. At first, Ben claimed to have pushed the button, but later changed his story in telling Locke he had not pushed it. It seems clear, however, that Ben must have entered the Numbers as no system failure occurred. During the lockdown, supplies were dropped by parachute to a location just outside the Swan. It is unclear if the two events were connected. ("Lockdown") ("Dave")
Upon discovery of the Pearl Orientation video, Locke lost all faith in the Swan, believing the entire setup at the Swan was nothing more than a psychological experiment being run by the DHARMA Initiative. Eko came to a different conclusion, however: he became convinced that pushing the button was of the utmost importance. ("?")
At the conclusion of the season, Locke and Desmond, both frustrated by the station's ambiguity, conceived of a plan to not enter the Numbers to see what happened, believing they would prove once and for all that the station was merely a psychological test. Eko's protests fell on deaf ears and he was shut out of the computer room when Desmond brought down the blast doors. Inside, they let the countdown timer run down to zero, causing a system failure. The countdown timer flipped to five red hieroglyphs. The two of them came to the horrible realization that the system was real as a huge magnetic force surged up behind the sealed portion of the Swan, causing the entire station to shake. Metallic objects across the station were yanked across the room by tremendous force, some bent and twisted out of shape, including the countdown timer. Forced to act, Desmond entered the crawlspace beneath the floor of the Swan and turned the fail-safe key. ("Live Together, Die Alone")

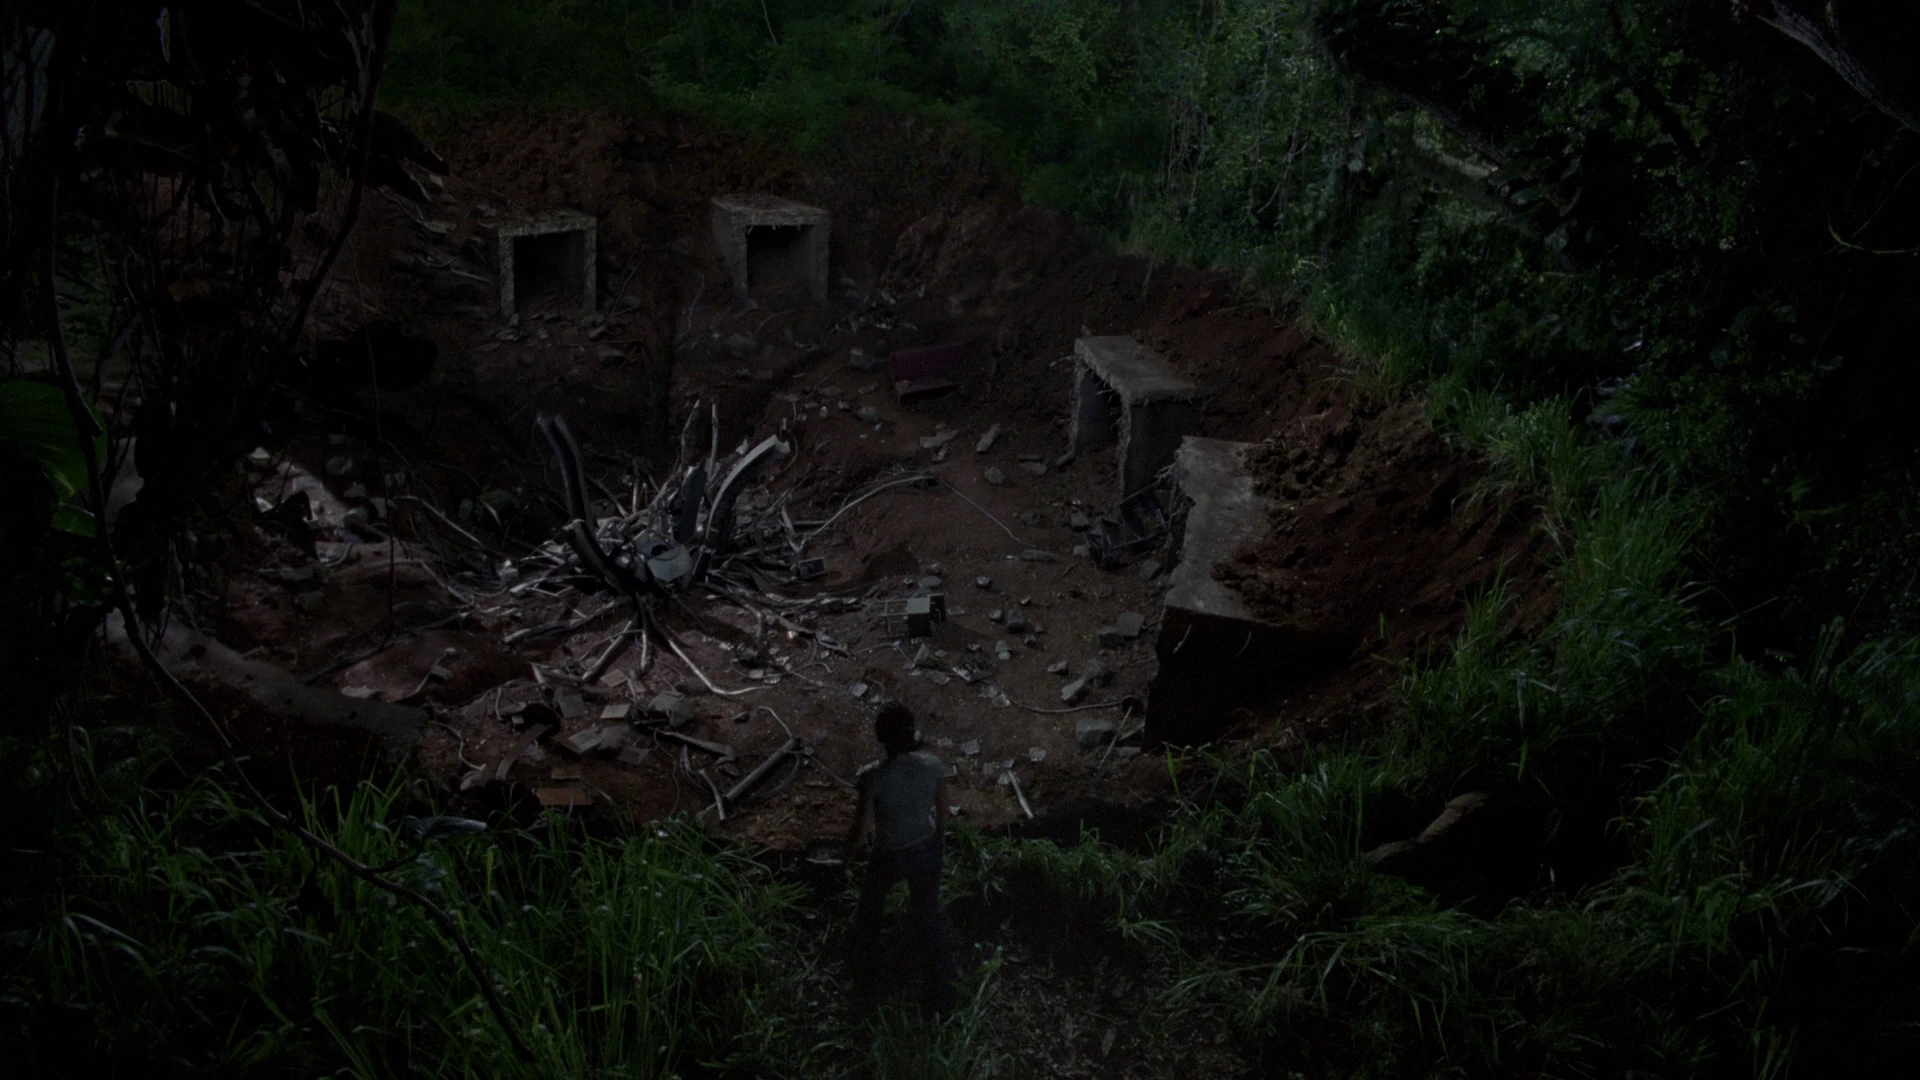
The crater resulting from the Hatch implosion. ("Further Instructions")
Season Three (Days 68–91)
As a result of activating the fail-safe, the Swan was completely destroyed, imploding in upon itself and leaving a wide gaping crater behind. Bits and pieces were also thrown clear of the site, including the hatch door, the pingpong table and other odds and ends. Locke, Eko, and Desmond all survived, despite being inside the station at the time of the discharge. ("Further Instructions")
Season Five


Daniel and Desmond outside the Swan. ("Because You Left")
After the moving of the Island, Daniel Faraday and a number of the other time-shifting survivors returned to the Swan for clues to the date. They first found the Swan as a gaping crater in the ground, which returned to its original state before the implosion upon their next time shift. Although no one initially responded to Sawyer's banging on the Swan's front door, Daniel later proved successful and had a brief encounter with a highly suspicious Desmond. ("Because You Left")
Later in the season, the time shifting survivors became stuck in the 1970s at the time of the DHARMA Initiative's presence on the Island. At one point in 1977, Pierre Chang brought Miles and Hurley to the site where the Swan was being constructed. The two of them witnessed the stamping of the Numbers into the hatch. ("Some Like It Hoth")
The time-stranded survivors, ironically, may have been responsible for the incident at the site referred to by Dr. Chang. In an attempt to prevent the station from ever being built, and thus, to prevent Flight 815 from ever crashing on the island, Jack dropped the "Jughead" bomb's core down the drill shaft at the Swan site, where it was later detonated by Juliet. ("The Incident, Part 2")
Season Six

Remains of the Swan in 2007. ("LA X, Part 1")
It is not clear precisely what happened when the Jughead detonated. Upon awakening, the time-shifting survivors found themselves in 2007 around the implosion crater of the Swan. In the center of the crater, beneath a twisted mass of metal, Kate heard Juliet calling for help. Using the DHARMA van that was also transported with them from 1977, they were able to shift the debris and Sawyer was able to climb downwards to find a dying Juliet. Moments before her death Juliet tried to tell Sawyer "something important" but she died before she could relate it. Miles helped Sawyer bury her close to the Swan site - and, in contacting her beyond the grave, related her last message: "it worked." ("LA X, Part 1")

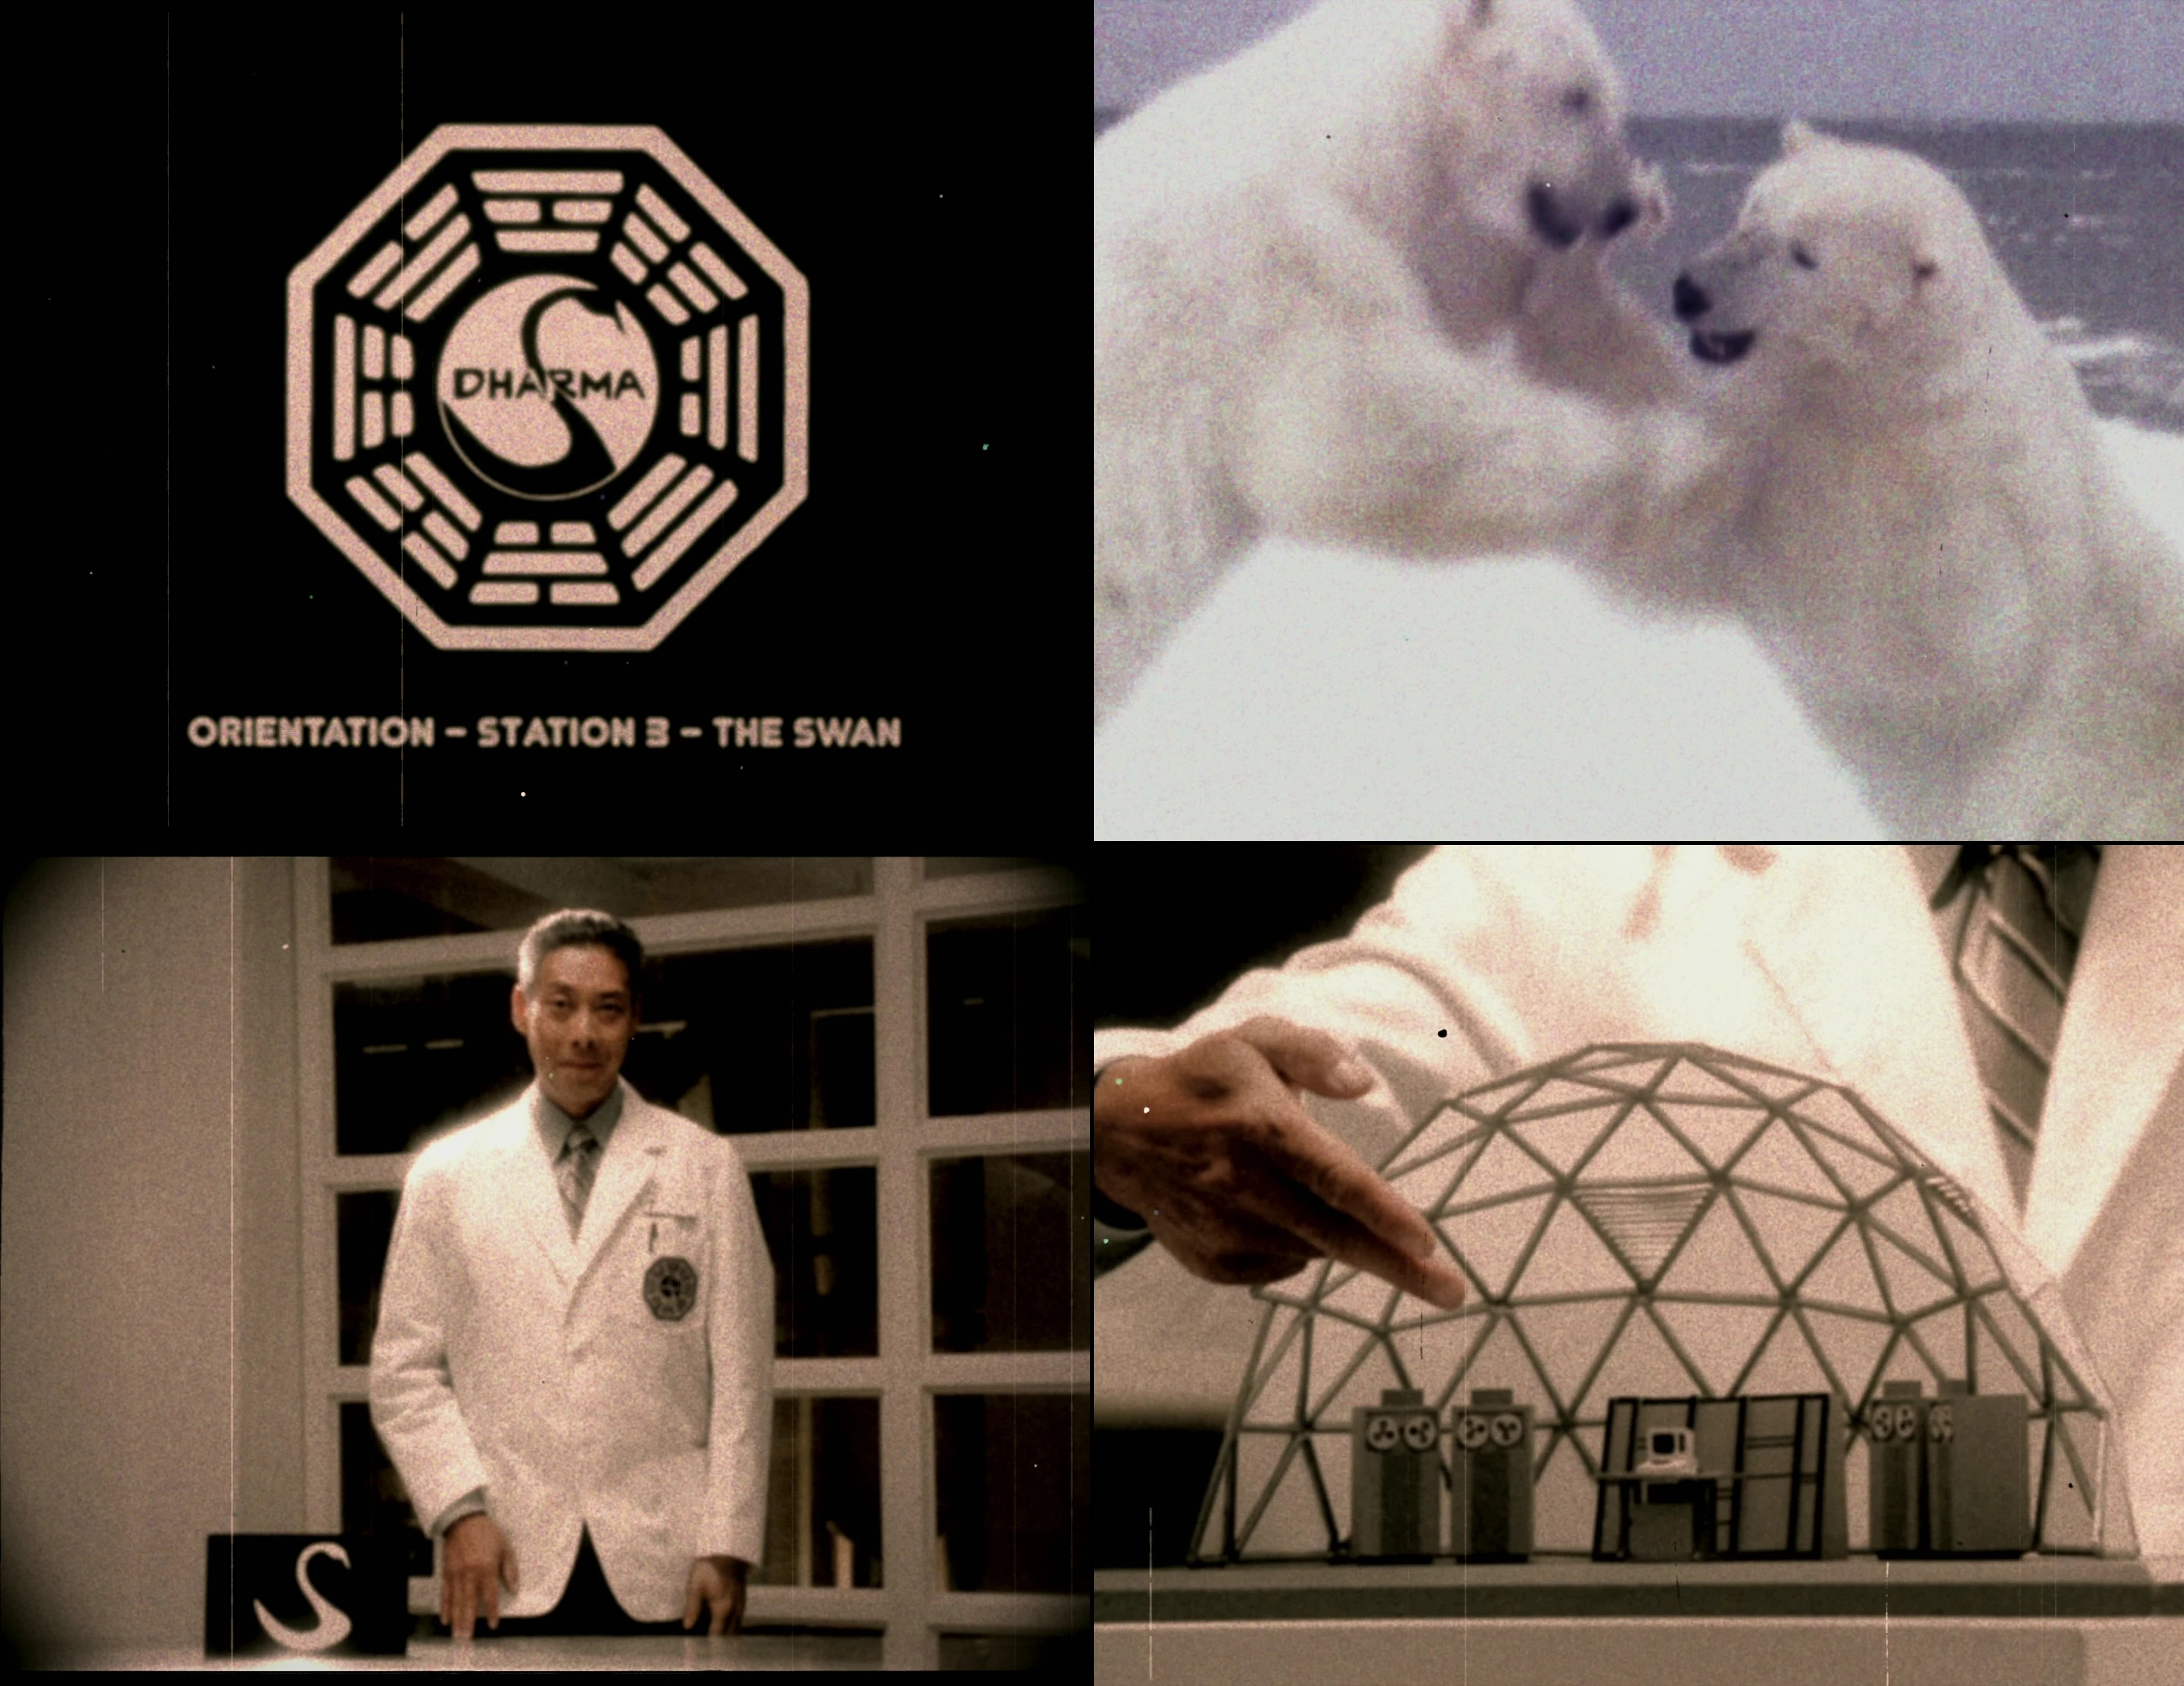
Scenes from the Orientation film
Orientation film
Inside the Swan the survivors discovered an orientation film produced in 1980 by the Hanso Foundation - describing the origin and purpose of the station for new arrivals. In the film, Dr. Pierre Chang, using the alias Dr. Marvin Candle, gave a brief overview of the founding of the DHARMA Initiative. According to Dr. Candle, the Swan was originally designed to be a laboratory "where scientists could work to understand the unique electromagnetic fluctuations emanating from this sector of the Island". However, after an "incident", a protocol was introduced in which two individuals manning the station would take alternating shifts pressing a button (i.e. entering the Numbers into a computer) every 108 minutes for 540 days, at the end of which replacements would arrive.
After the reunification of the Flight 815 tail section survivors and middle section survivors, Mr. Eko revealed a cut-out piece of the film to Locke, which he had discovered at the Arrow. The two of them were able to splice back in the missing section, and in reviewing it found an additional section where Dr. Candle warned that using the Swan computer for any other purpose other than entering the code every 108 minutes was strictly forbidden and could potentially lead to another incident. ("The 23rd Psalm")
The station
The Swan was originally conceived and designed to be a scientific laboratory, but after the incident it became a continually manned post with apparently the sole purpose of pushing the button. Dating from the 1970s, the subterranean station still had the conveniences and technology from that era when the survivors discovered it.
The Swan also contains one or more concealed cameras allowing video surveillance to be carried out from the Pearl. There is at least one camera in the main living area. ("?") ("Exposé")
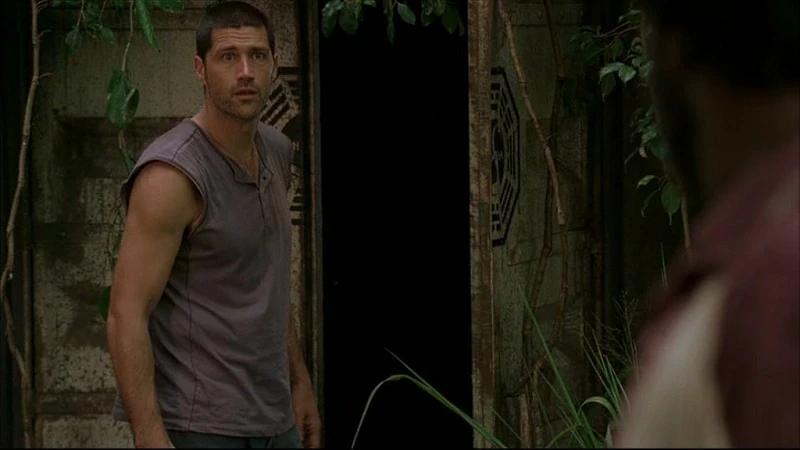

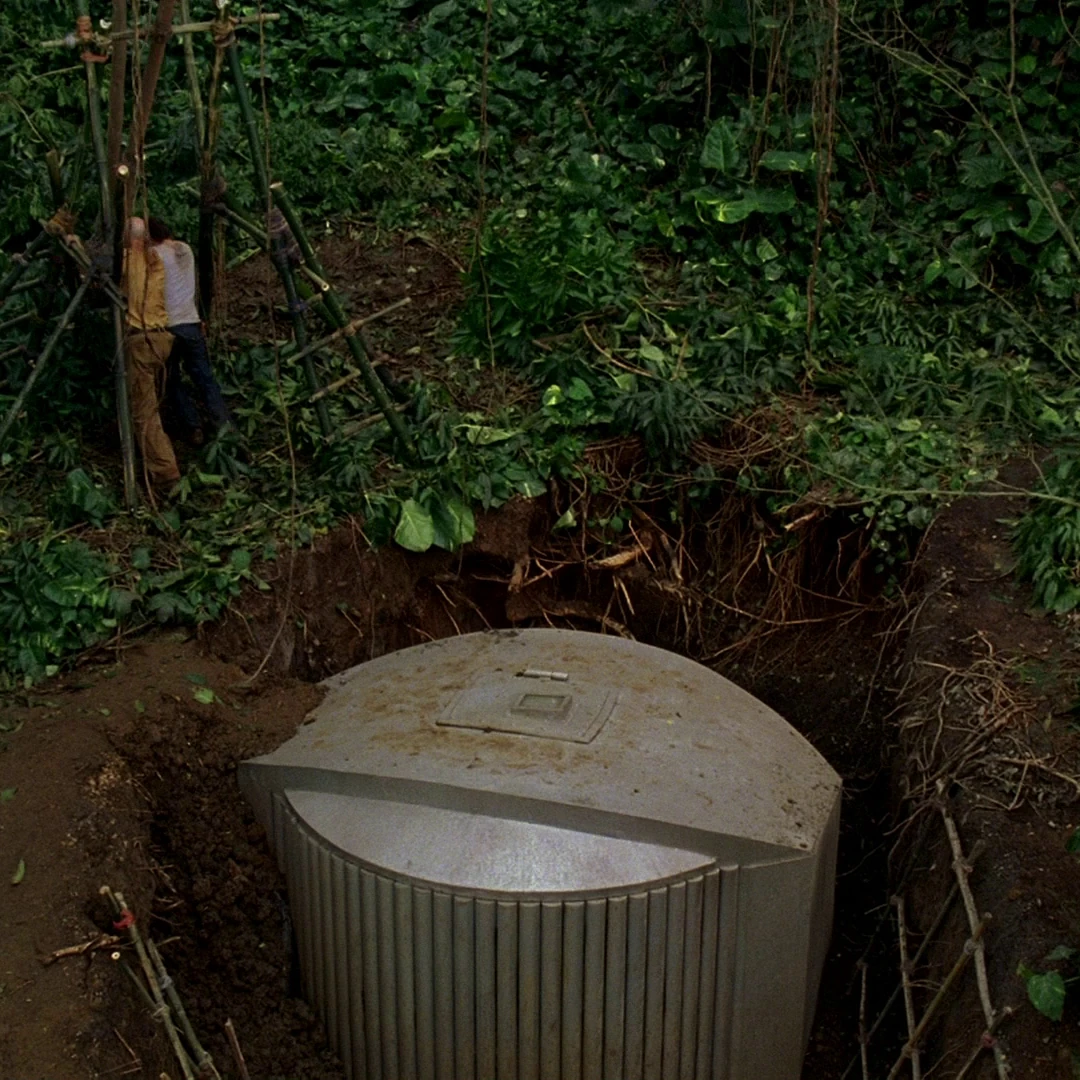
The Swan's door entrance
Entrances
There were two known entrances to the Swan:
The Hatch
The first entrance discovered by the survivors was a steel hatch, set atop a long vertical shaft some 50 feet deep. A ladder previously led down into the depths, but it was broken and the rest missing a short distance down from the top. The inside of the hatch had the word "QUARANTINE" stenciled on it. The Numbers were also imprinted on the outside of the hatch; apparently the serial number of the Swan station or possibly of the hatch itself. A large spotlight was affixed to the wall at the base allowing illumination of the shaft above. ("Exodus, Part 3") ("Live Together, Die Alone, Part 2") ("Some Like It Hoth")
Main Entrance
The main entrance to the Swan was a walk-in set of double doors emblazoned with the Swan logo concealed behind a curtain of vines and roots. Beyond the doors, a ramp led down a short distance to a pneumatic style door opening into an airlock. A second similar door permitted access to the station. The airlock appears to contain several lockers and several HAZMAT suits. The Swan architect, Stuart Radzinsky, is presumed to be buried somewhere close to the main entrance.("Everybody Hates Hugo") ("Live Together, Die Alone, Part 2")


The mural
Main corridor
Both entrances provided access to a primary corridor running the length of the station. About halfway along the corridor (across from the entryway to the living area) were two large obvious doors which had been hurriedly sealed with concrete, blocking access to the area of the station where the incident occurred. The area exhibited a high degree of magnetic attraction to metals, such as Jack's key and Eko's cross. Sayid attempted entry briefly and estimated the concrete behind the door was eight to ten feet thick ("Man of Science, Man of Faith") ("Everybody Hates Hugo") ("What Kate Did")
Along the wall between the entrance corridor and the living area, was a large mural created by Desmond. (Secrets From the Hatch) Painted in an expressionist style, it contained an assortment of images and writing, including the Numbers 108 and 42, a boat, an arrow, and depictions of a black man and white woman. The mural also contains the phrase: "I am sick."
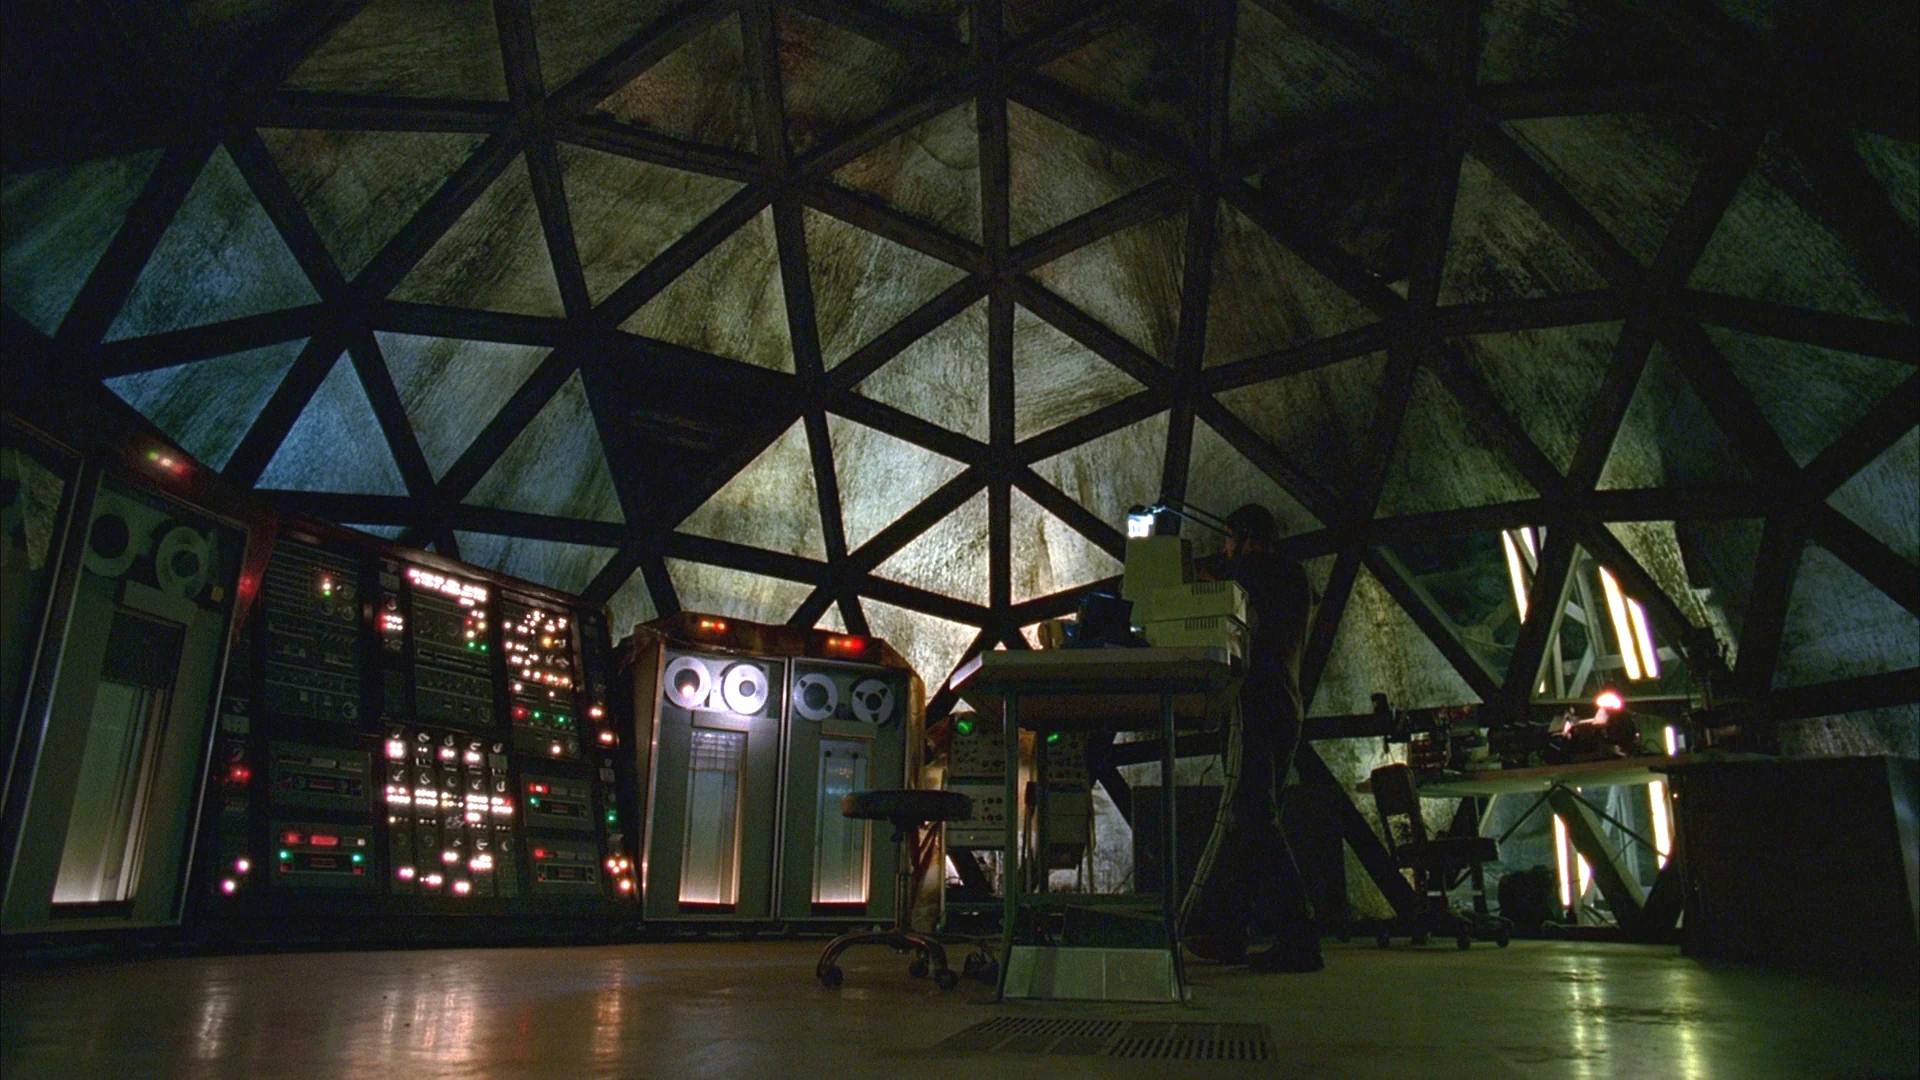

The computer room
Computer room
Enclosed in a geodesic dome, apart from the main living area, the computer room was where the occupants of the station would carry out the task of pushing the button. Situated in the middle of the room was the Swan computer, into which The Numbers had to be entered every 108 minutes, according to the protocol set forth in the Orientation film. Around the perimeter of the room were various other machines, including mainframe computer components, reel-to-reel tape drive units, and two oscilloscopes. A countdown timer located on the wall above displayed the remaining time before entry of the Numbers was required.
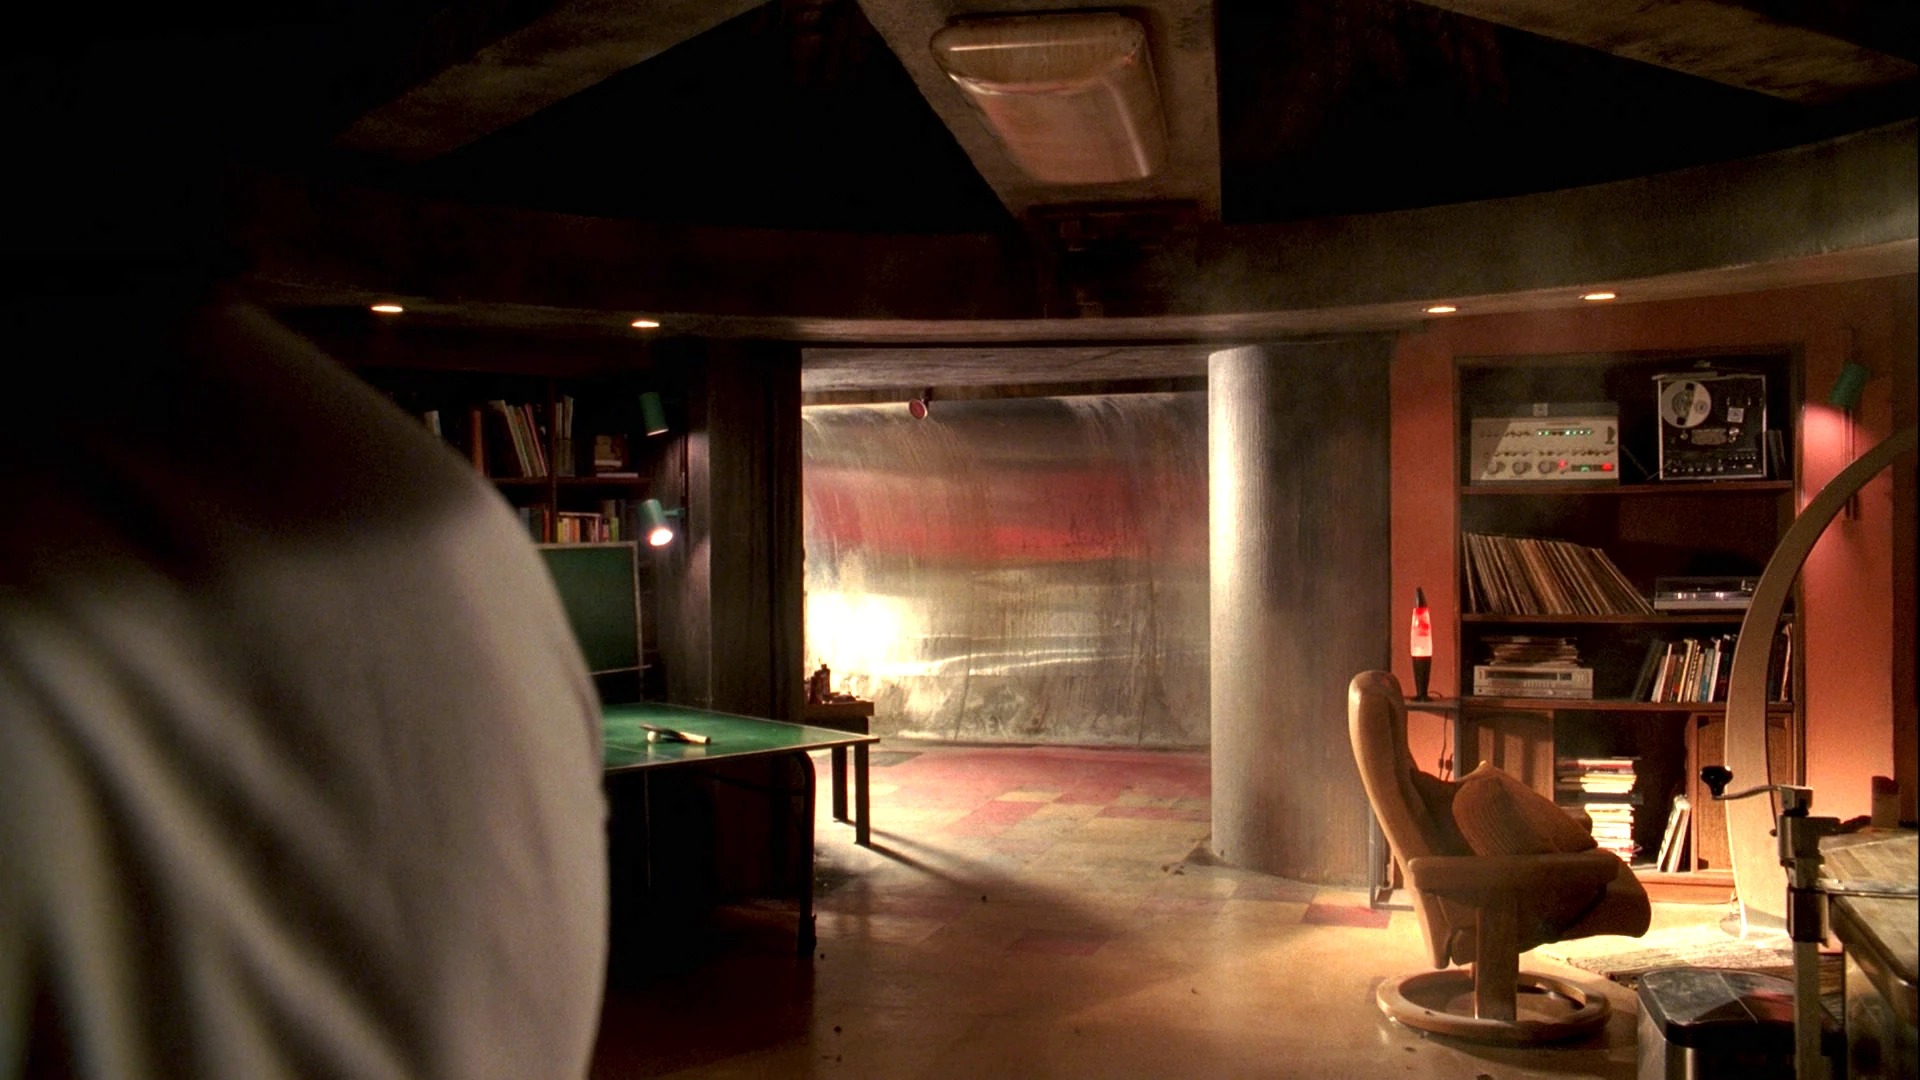

The living area
Living area
The living space was the largest part of the Swan where the occupants of the station would spend their time when not working. This area had many conveniences: a bedroom with a set of bunk beds; a bathroom with working sink, shower and hot running water described by Kate as having a sulphur smell; miscellaneous exercise equipment; a washer and dryer; a dining nook; a central kitchen area equipped with an oven, stove-top and sink; and a lounge area equipped with a record player, LP collection, well stocked bookshelves, a ping-pong table, and a painting of a tree. A small cabinet contained an injector and a number of vials of a strange DHARMA vaccine. On the ceiling near the armory is a blood stain from Radinsky's suicide.
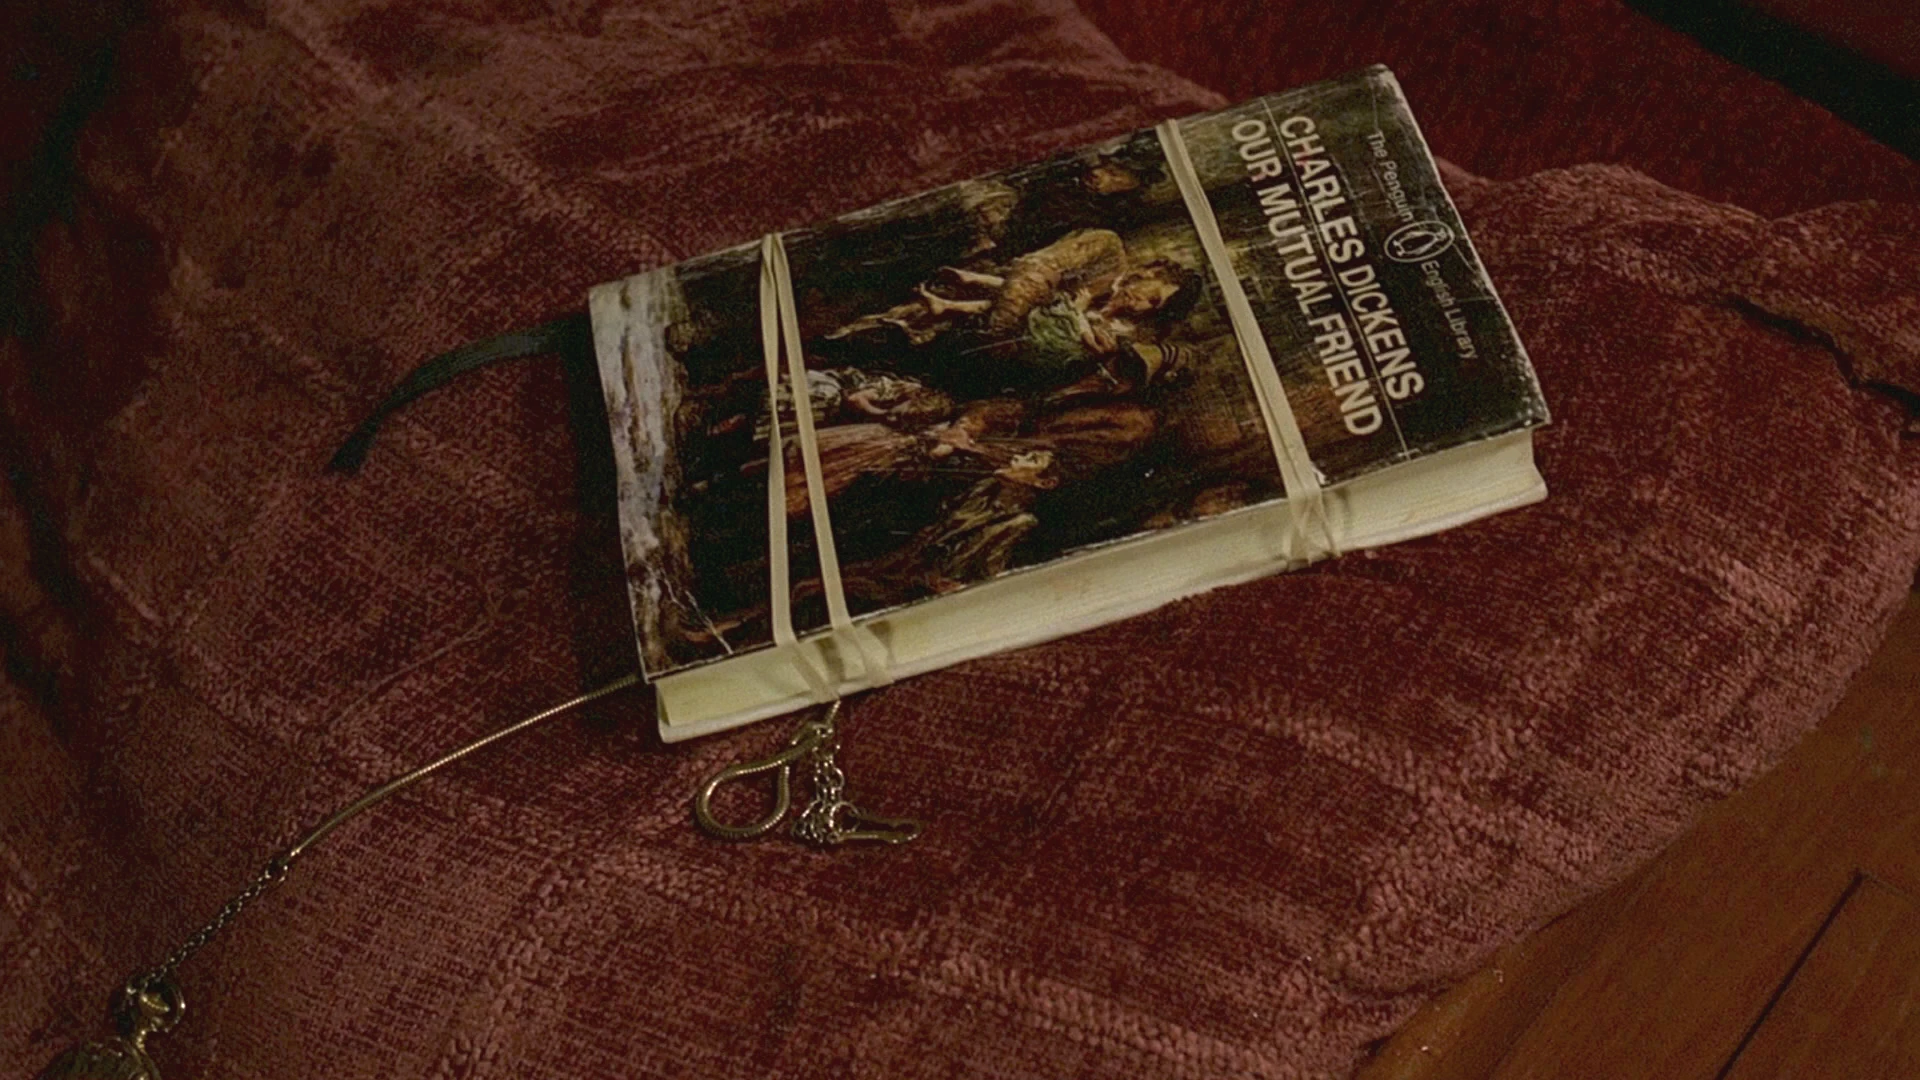

Desmond's copy of Our Mutual Friend
Bookshelf
The Swan's bookshelves contained a number of titles, including:
- After All These Years
- Dirty Work
- High Hand
- An Occurrence at Owl Creek Bridge
- Our Mutual Friend (brought there by Desmond)
- Rainbow Six
- The Brothers Karamazov
- The Third Policeman
- The Turn of the Screw
Surveillance telescope
The living space also was equipped with a system used for surveillance of the facility. A telescope could be pulled down out of a small opening in the ceiling. A small control panel nearby allowed the manipulation and movement of mirrors throughout the facility. An operator could look through the telescope via the mirrors and observe all parts of the station. A separate mirror was stationed at the foot of the shaft at an angle allowing the operator to observe the hatch opening far above. ("Man of Science, Man of Faith")
Why a telescope would be installed instead of some sort of security camera system similar to other stations on the Island is unknown. While the telescope would be unaffected by the station's latent electromagnetism, the control panel operating the mirrors clearly would be affected. The Swan also was equipped with hidden cameras that could be monitored from The Pearl. ("?")

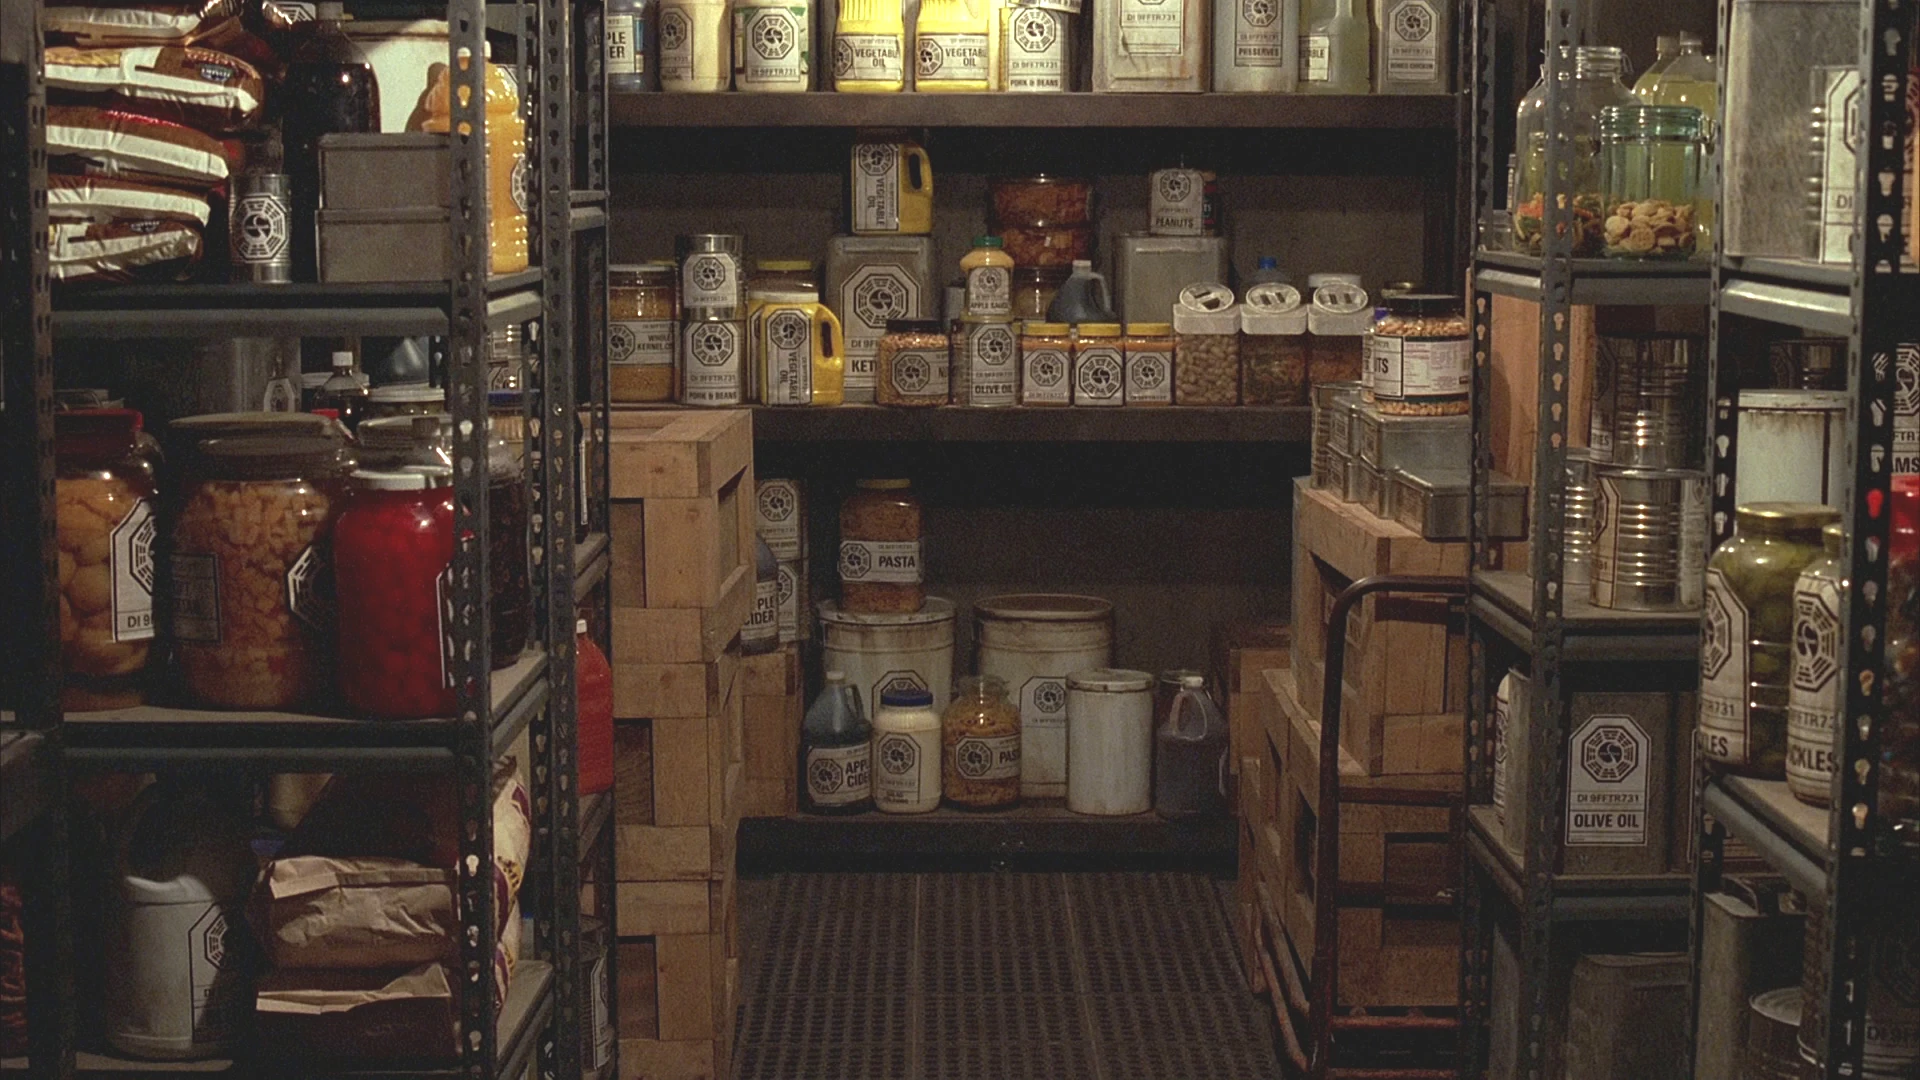
The pantry
Pantry
The pantry was opposite of the living space's lounge area. The pantry's shelves were well stocked with food and other supplies from the periodic resupply drop, including notable products such as Apollo Bars, DHARMA Ranch Composite, peanut butter and shampoo. ("Orientation") ("Everybody Hates Hugo")

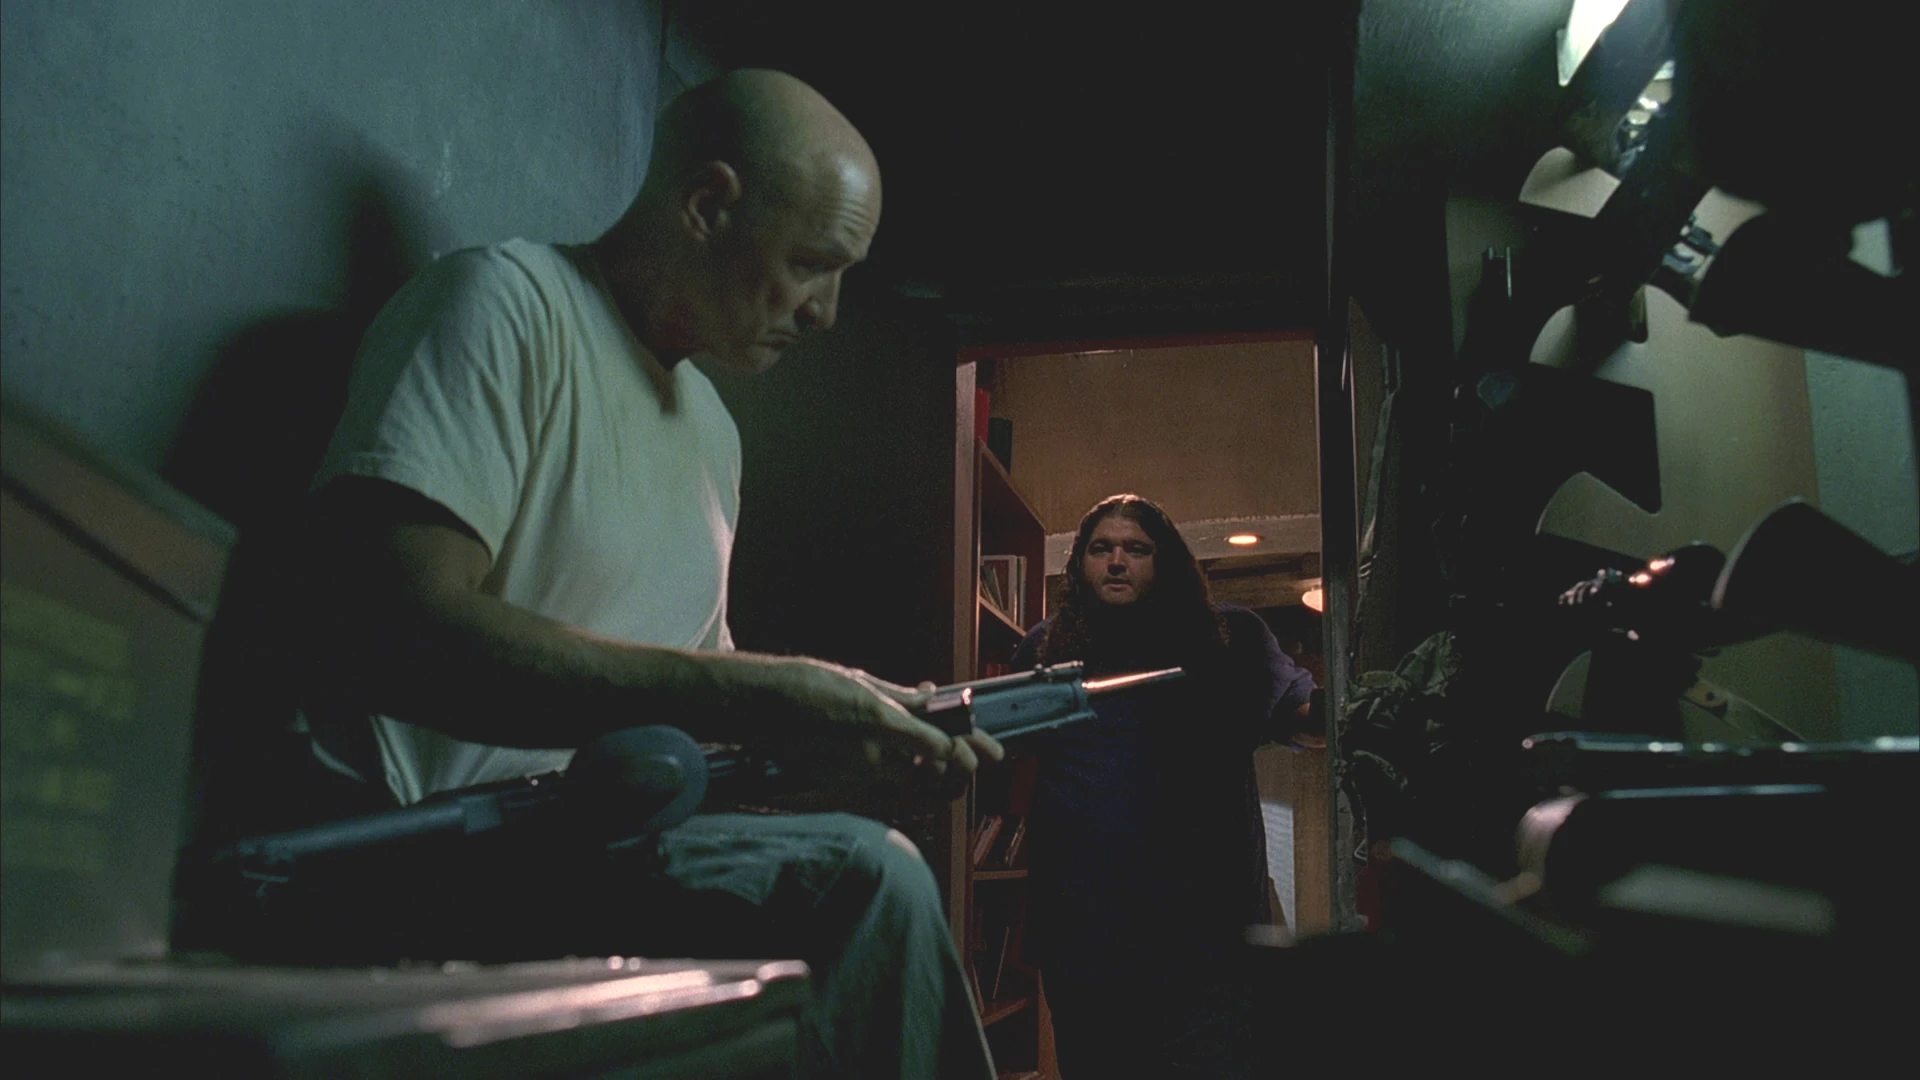
The gun vault
Armory
Adjoining the living space's lounge area was a gun vault. It contained a wide and formidable array of weapons, including pistols, semi-automatic rifles, bolt action rifles, assault weapons, shotguns, and grenades. The door had a combination lock that was changed several times by Locke. ("Three Minutes")
After the weapons were removed, the room served as a holding cell for Ben, starting with the episode "One of Them".

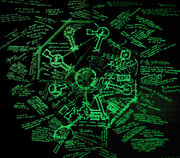
The blast door map
Blast doors
Inside the Swan were a series of blast doors designed to seal off the living space and the computer room during a lockdown incident. A message would sound over the speakers notifying the occupants of the upcoming event, after which the blast doors would descend and the electrical power would be interrupted, causing the lights to flicker. Such a lockdown occurred in "Lockdown". What triggered the incident is unknown, but it was theorized by Charlie that it may have had something to do with the periodic resupply drop that occured outside the station about the same time. ("Lockdown")
It later was revealed that a lockdown incident could be faked by the station personnel by touching two bare wires together from a console in the computer room. ("Live Together, Die Alone, Part 2")
Blast door map
During "Lockdown", a lockdown incident occurred unexpectedly. Locke was trapped beneath one of the blast doors while Ben crawled through the vents seeking to push the button before the timer expired. During this episode, the station's normal lighting cut out entirely and a different set of ultraviolet "black-lights" turned on. The new lighting revealed a large hand-drawn map on the blast door entering the living quarters. The map appeared to be of the Island, supplemented with numerous equations and notations written in English and Latin. ("Lockdown") In the video game Lost: Via Domus, there is a second layer of notation that can be seen under different lighting conditions. This "second spectrum" of the map includes additional information regarding other island locations including the Barracks, the Hydra, and the Looking Glass. ("Forty-Two")
Ducts and crawlspaces
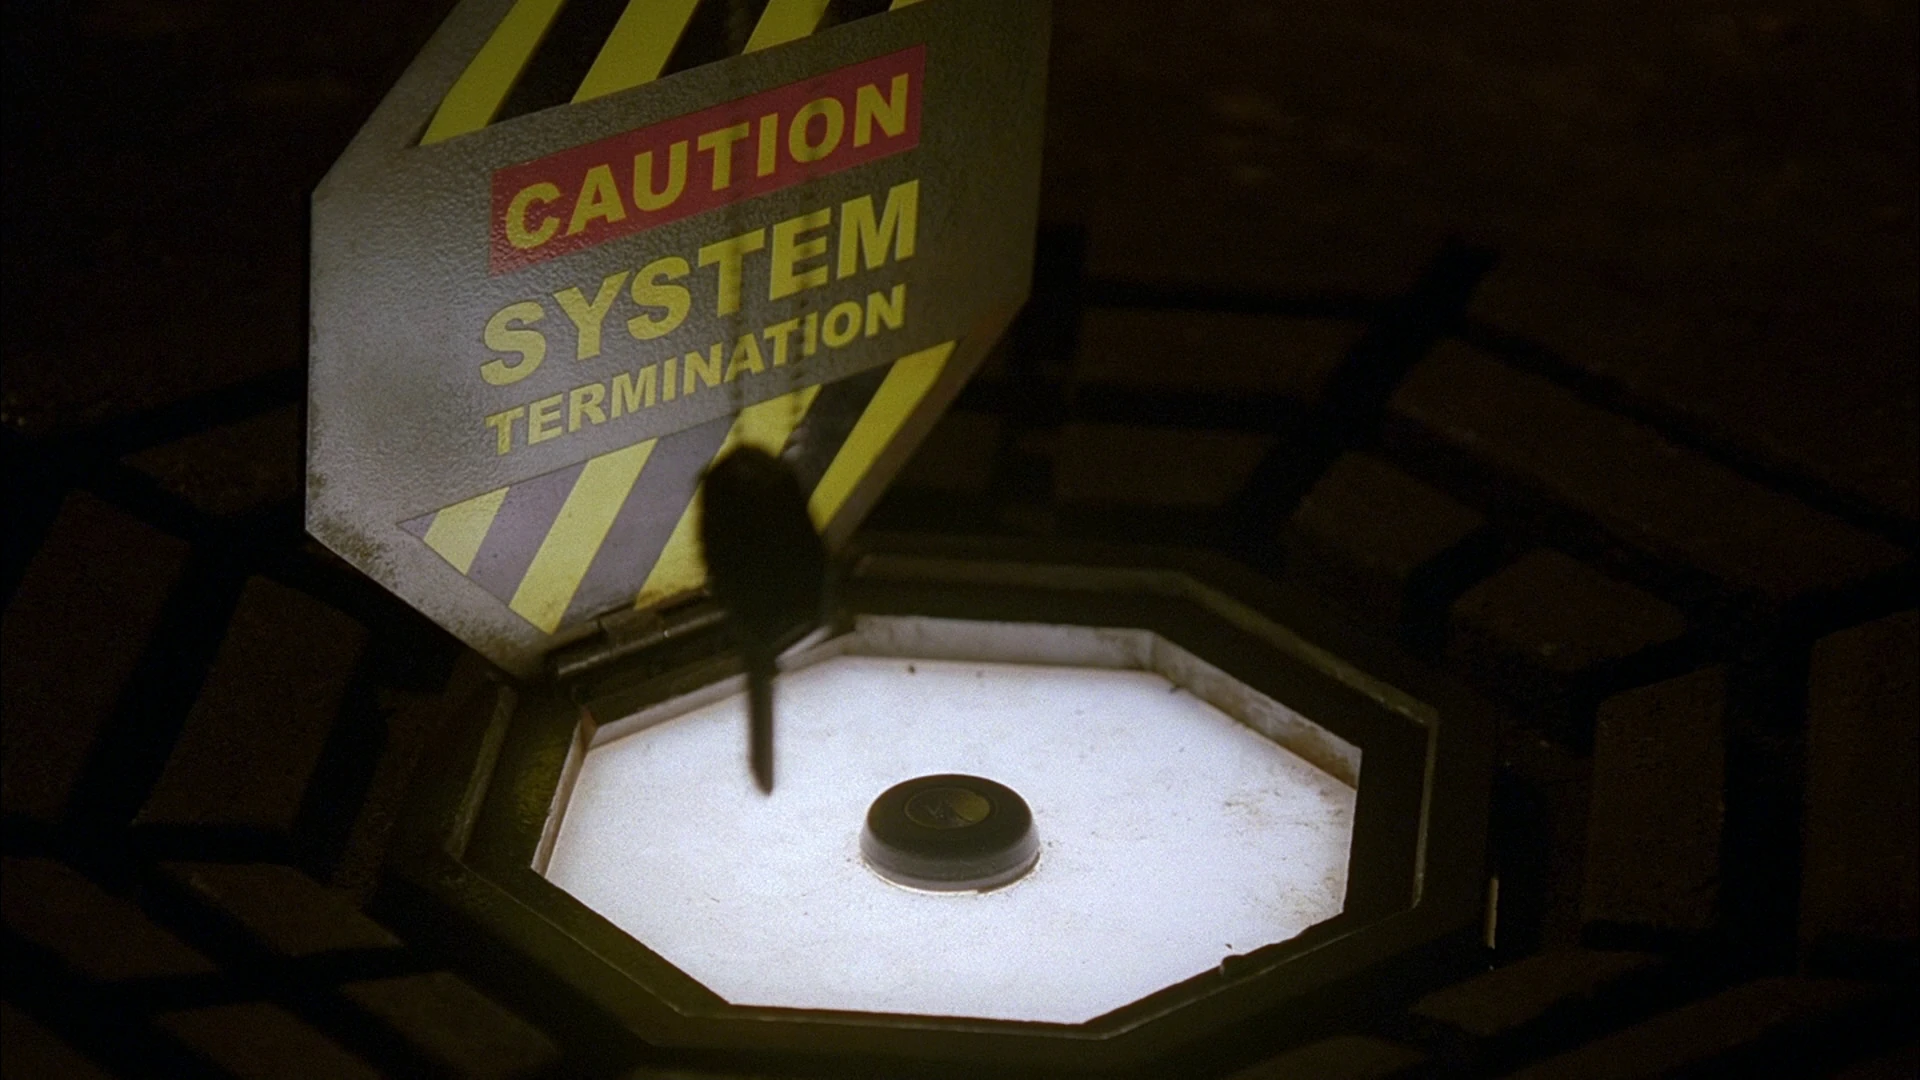

The fail-safe
The Swan also possessed a number of airducts and crawlspaces. Ducts large enough for a person connected the armory, computer room and pantry via the ceiling. Several floor openings in various parts of the station also allowed entrance to a fairly extensive underfloor crawlspace. Numerous pipes and cabling were seen in this crawlspace area. There appeared, at one time, to be a means of access to the sealed-off area of the station, although this too was found to be blocked with concrete. Sayid guessed that this crawlspace area was part of a geothermal generator providing power for the station. ("Orientation") ("Everybody Hates Hugo")
Also in a small alcove down in the crawlspace area was the station's fail-safe switch. In the event of a system failure (i.e., failure or inability to follow the protocol), by turning a special key the fail-safe would terminate the electromagnetic anomaly. Desmond was forced to activate the fail-safe after Locke destroyed the Swan's computer. The resulting discharge caused the entire station to implode. ("Live Together, Die Alone, Part 2")
The Incident Room


The reactor behind the concrete wall
In the video game Lost: Via Domus, Elliott Maslow discovers "The Incident Room" on the other side of the door sealed by concrete. The Incident Room was accessed by a tunnel and a large locked door near the exterior of the Swan. ("Hotel Persephone") The Incident Room can be seen on the blast door map and is located a very short distance away from the Swan. ("Lockdown") On one of the blast doors in the Swan, a small map showing the route to the Incident Room's entrance can be seen on the second spectrum. ("Forty-Two")
The room contained a large reactor surrounded by severely damaged equipment. The reactor was tilted to one side, and discharging arcs of electricity and a watery fluid. The reactor had the appearance of two large electromagnetic coils suspended over an excavation into the Island. Unlike the Swan, the Incident Room's machinery is in a state of disrepair, possibly due to the Incident. The Incident Room also has its own computer. ("Hotel Persephone")
Blueprints

Radzinsky builds a scale model of the geodome on a set of Swan blueprints.
Radzinsky was building a scale model of the geodesic dome on a set of Swan blueprints in the Flame when interrupted by the arrival of Jin. ("Namaste")
- A number of blueprints of the Swan station's interior design are found on the Season 2 DVD special featurette "Secrets From the Hatch".
- There also appears to be a blueprint on the DHARMA van road map. ("Tricia Tanaka Is Dead")
- A floor-plan blueprint appears in "Love Island" of Lost: The Official Magazine in an advertisement for a free poster that comes as a subscription reward.
- The Incident Room appears in the video game Lost: Via Domus. The room's look and design was made to look like what the creator's had envisioned, through never-before-seen blueprints given to the game developers by the Lost set crew.
Blueprint gallery
")
")
")
")
")
")
")
")
")
")
")
")
")
")
")
")
")
")
")
")
")
Electromagnetism
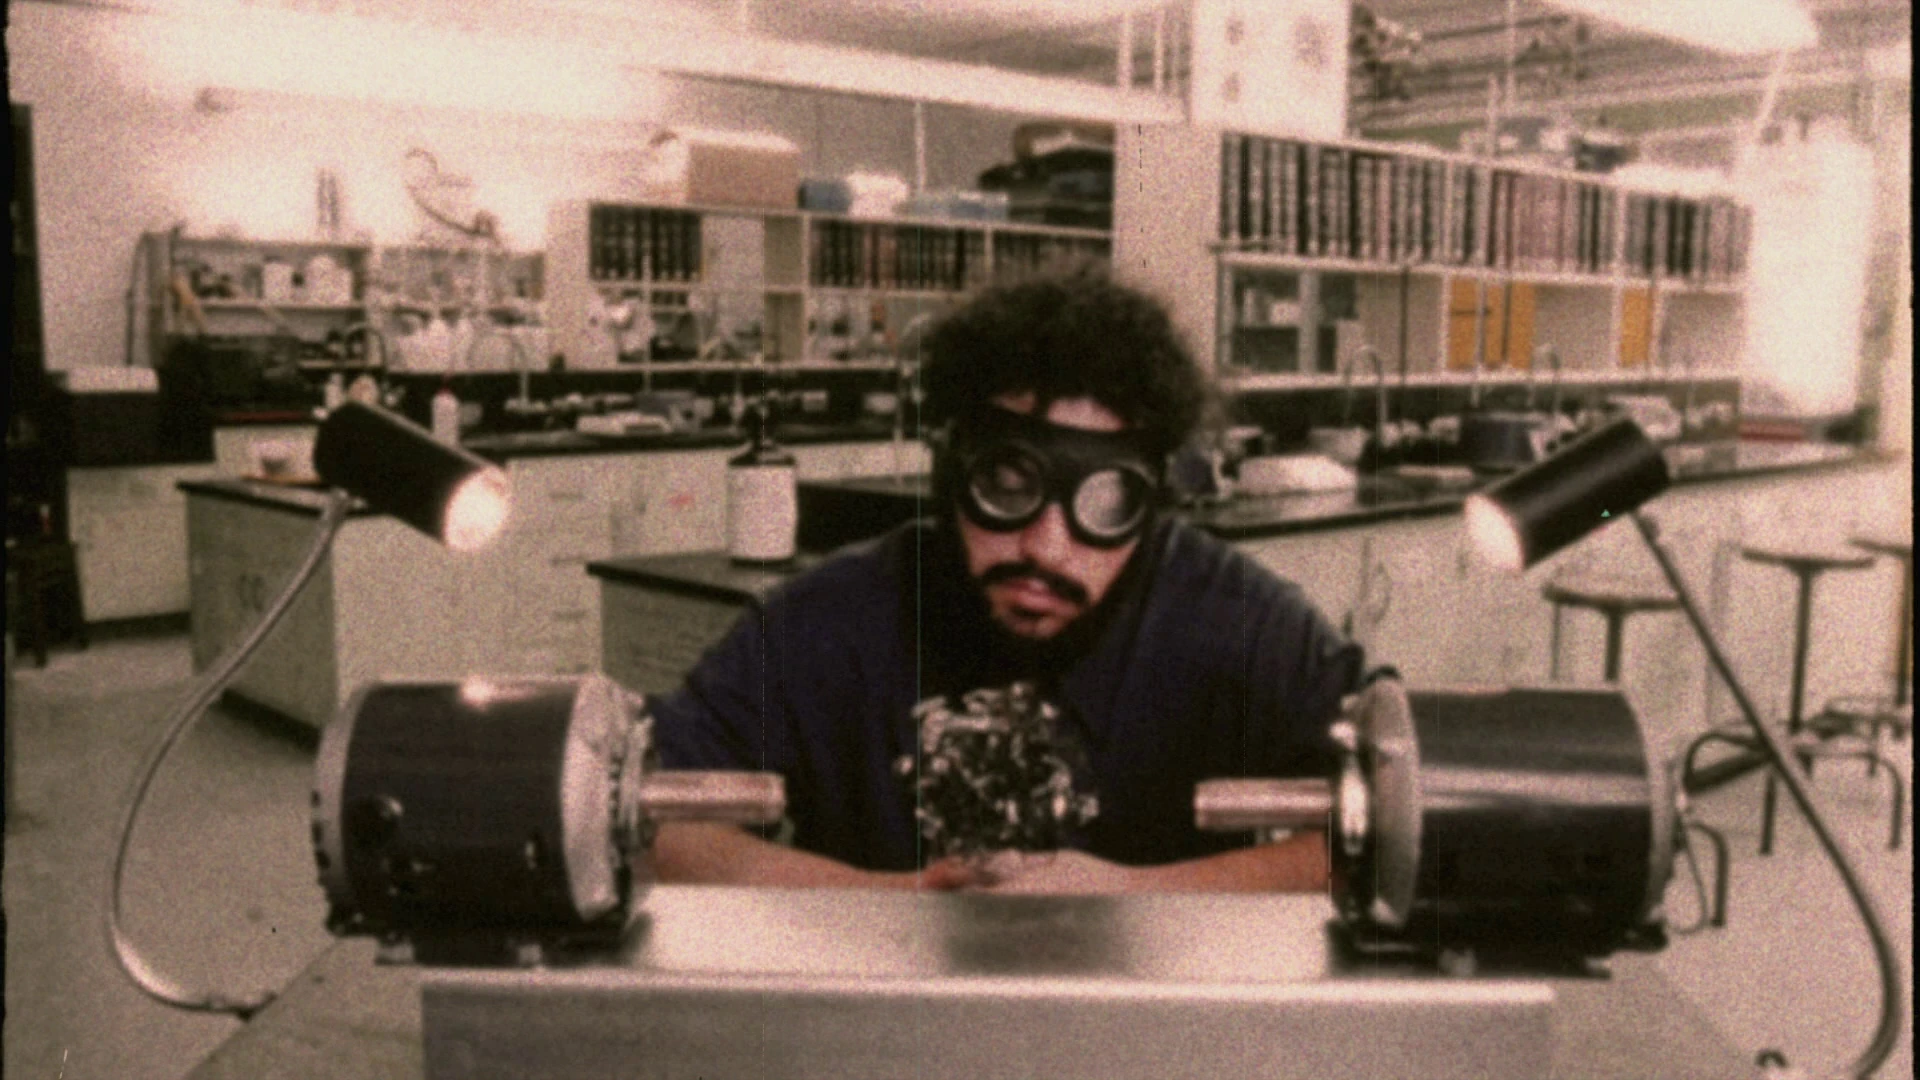
An electromagnetic experiment, as shown in the Orientation film
Under normal conditions, the Swan is adjacent to an unusually strong magnetic field. The field is noticeably stronger in the main corridor near the door that was sealed off with concrete. The concrete is estimated by Sayid to be eight to ten feet thick. Even sealed away, the magnetic source behind the concrete was strong enough to attract the key around Jack's neck, making it visibly move towards the wall. ("Man of Science, Man of Faith") On several occasions, the field has grown to immense strength during "system failures" capable of destroying the station. ("Live Together, Die Alone, Part 1")
It is not clear exactly what took place when Desmond turned the fail-safe key, although it appears the magnetic source was completely destroyed. The drastic shift in the magnetic field resulted in the discharge, the implosion of the station and caused Desmond to temporarily shift in time ("Flashes Before Your Eyes").
In the Season 2 DVD featurette "Secrets from the Hatch", Damon Lindelof described the Swan station:
| “ |
The function of the Hatch, what it is built for, is because there was this accident here. Basically, if you were to perceive the fact that the Hatch is a structure that is essentially a big thumb, and that thumb is sticking in a dike. And that dike is holding back this massive electromagnetic anomaly that is just sort of illustrated on the other side of this wall that makes Jack's key rise. That's what the design is. |
” |
In the Season 3 DVD featurete "Access: Granted", Damon Lindelof described the electromagnetism:
| “ |
Let's just say, theoretically, inside the Island there was this ball of electromagnetic energy. And, let's just say, there was a group of people—we’ll call them the DHARMA Initiative—sort of drilling around, and doing general futzing on the Island, and they accidentally drilled into this hole, and suddenly that entire ball of electromagnetism became untapped, so they built this Swan station above it, in an effort that it wouldn’t get completely out of control. So, by plugging that hole, you don’t actually do away with all the electromagnetism. It's still there. |
” |
Trivia
General
- Of the Season 2 main cast, only Claire and Shannon never appeared in any scenes in the Swan.
- For the first four seasons, the survivors generally referred to The Swan as "the Hatch". Notable exceptions were made by Eko], in looking at Locke's map, and Sayid, while being interrogated by Oldham. ("?") ("He's Our You")
- In the special feature Access: Granted on the Lost: The Complete Third Season (DVD) Blu-ray edition, Damon Lindelof and Carlton Cuse said that it was indeed Walt who communicated with Michael via the Swan computer.
- The skeletal remains of Roger Linus were found wearing a Swan jumpsuit in the DHARMA van, but it is unclear if he was ever an inhabitant of the station. Also found in the van was a road map showing a dirt road leading to the Swan station. ("Tricia Tanaka Is Dead") ("The Man Behind the Curtain")
Cultural references
- The names of the stations seem to be related to the god Apollo from Greek mythology. Swans are sacred to Apollo, and circled around him when he was born.


Tomorrowland
Production notes
- According to the Season 2 DVD featurette "Secrets from the Hatch", the Swan interior was originally inspired by Tomorrowland at Disneyworld. The featurette describes Tomorrowland how the future would look as imagined by people in the 1970's.
- The set dressing of the Swan is somewhat different between the opening scene of "Man of Science, Man of Faith" and subsequent appearances. This included things such as the type and placement of lamps, the style of record player and arrangement of records, as well as the relative cleanliness of the living quarters. These discrepancies led some fans to incorrectly conclude that there were two separate time lines. In reality, the producers simply decided to dress the Swan differently between its first and subsequent appearances.
- In the Season 2 DVD featurette "Secrets from the Hatch", production designer Jim Spencer says about the hash marks seen covering the wall in ("Adrift"): "These may be the days, they may be the weeks. But there's 9,000 hatchmarks here." If these marks represent days, then pressing the button could have begun in early 1980.
- The armory was subsequently enlarged when Henry Gale became a prisoner.
- Hurley at one point comments that the washer and dryer are newer than the rest of the appliances in the station. This is an in-joke reference/cover to a prop error in the design of the Swan. [source needed]
- The Swan's implosion crater appears somewhat different in "LA X, Part 1" than it did when first seen in "Further Instructions". This is likely dramatic license.
Unanswered questions
| Unanswered questions |
|---|
|
- For fan theories about these unanswered questions, see: The Swan/Theories
The Incident
- Why did Dr. Candle state any other use of the computer could lead to another Incident?
Recent events
- Why was the word "Quarantine" written on the interior of the hatch?
See also
| |||||||||||||||||