No edit summary |
(Page format fix) Tag: Visual edit |
||
| (36 intermediate revisions by 12 users not shown) | |||
| Line 1: | Line 1: | ||
| ⚫ | |||
| − | {{cleanup|Many missing categories/information in the infoboxes}} |
||
| + | '''"A-Missions"''' is a term for when the primary [[survivors]] undertook a mission, such as capturing [[Ethan Rom]] {{crossref|1x15}} or escaping from [[the Hydra Island]] {{crossref|3x07}}. |
||
| − | {{update|Missions from 6x15, 6x16 and 6x17}} |
||
| ⚫ | The term was coined by [[Charlie]] (a frequent mission-goer who, in his own opinion, fell short of being a member of the "A-Team") {{crossref|2x04}} and later referenced by [[Sawyer]] {{crossref|3x14}}. An "A-Mission" refers to a mission undertaken by the [[Nicknames#The_A-Team|''Lost'' "A-Team"]], which usually included a combination of [[Jack]], [[Kate]], [[Sawyer]], [[Locke]], and [[Sayid]]. |
||
| ⚫ | |||
| ⚫ | |||
| ⚫ | |||
| − | |||
| ⚫ | |||
| ⚫ | |||
{{quote |
{{quote |
||
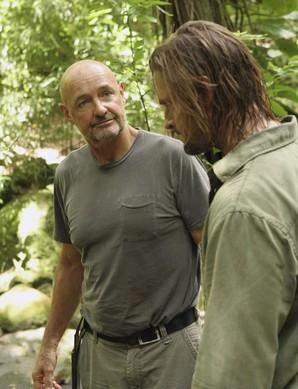
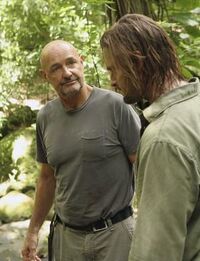
|text=LOCKE: You want to tell me why you've been following me, Charlie?<BR><BR> |
|text=LOCKE: You want to tell me why you've been following me, Charlie?<BR><BR> |
||
| Line 14: | Line 11: | ||
=Definition= |
=Definition= |
||
| ⚫ | |||
| − | [[Charlie]]'s definition is used for the purposes of this article. To be considered an "A-Mission", at least one "A-Team" member must be present for the entirety of the mission. The "A-Team" consists initially of Jack, Kate, Sawyer, Locke and Sayid. [[Sun]] became powerful after the Oceanic 6 and soon began to participate more actively in the off-Island "A-Missions." [[Ana Lucia]], [[Ben]], [[Juliet]], [[Charlotte]], [[Miles]], [[Daniel]], and [[Ilana]] soon joined them from the [[Tailies]], [[the Others]], the [[Freighter]], and [[Jacob's bodyguards]] |
+ | [[Charlie]]'s definition is used for the purposes of this article. To be considered an "A-Mission", at least one "A-Team" member must be present for the entirety of the mission. The "A-Team" consists initially of Jack, Kate, Sawyer, Locke and Sayid. [[Sun]] became powerful after the Oceanic 6 and soon began to participate more actively in the off-Island "A-Missions." [[Ana Lucia]], [[Ben]], [[Juliet]], [[Charlotte]], [[Miles]], [[Daniel]], and [[Ilana]] soon joined them from the [[Tailies]], [[the Others]], the [[Freighter]], and [[Jacob's bodyguards]], respectively. |
| − | An "A-Mission" is further defined here as a quest which departs from the main body of the survivors |
+ | An "A-Mission" is further defined here as a quest which departs from the main body of the survivors and involves either rescue, assistance to another, or betterment of the survivor community as a whole. Therefore, missions such as when [[Sawyer]] went hunting for the [[boar]] or [[tree frog]] do not fall on the term "A-Mission" as these were personal quests. |
| − | A mission by supportive or independent [[survivors]] is a "B-Mission"; an [[Others]] mission is an "[[O-Missions|O-Mission]]"; |
+ | A mission by supportive or independent [[survivors]] is a "B-Mission"; an [[Others]] mission is an "[[O-Missions|O-Mission]]"; a [[Freighter]] mission is an "[[F-Missions|F-Mission]]", and a mission by [[Widmore]]'s team in [[Season 6]] is an [[S-Missions|S-Mission]]. All are interpreted as reactions in the form of supplements or responses to the "A-Missions". |
==Members== |
==Members== |
||
| Line 177: | Line 175: | ||
| o-team=Opposing: [[Ben]] |
| o-team=Opposing: [[Ben]] |
||
| f-team=[[Miles]] Opposing: [[Danielle]] |
| f-team=[[Miles]] Opposing: [[Danielle]] |
||
| + | | other=[[Hurley]], [[Ben]], [[Miles]], [[Danielle]] |
||
| ⚫ | |||
| background= [[Sayid]] makes a deal with [[Frank]] that if he retrieves Charlotte safely from [[Locke]], he will take him off the Island to [[the freighter]]. |
| background= [[Sayid]] makes a deal with [[Frank]] that if he retrieves Charlotte safely from [[Locke]], he will take him off the Island to [[the freighter]]. |
||
| mission= To retrieve Charlotte from Locke and take her back safely to [[Frank]], [[Daniel Faraday|Daniel]] and [[the helicopter]]. |
| mission= To retrieve Charlotte from Locke and take her back safely to [[Frank]], [[Daniel Faraday|Daniel]] and [[the helicopter]]. |
||
| Line 220: | Line 218: | ||
| o-team=None |
| o-team=None |
||
| f-team=None |
| f-team=None |
||
| − | | other= |
+ | | other=[[Desmond]] |
| background=The [[survivors]] were for-warned by [[Charlie]]'s [[Through the Looking Glass|dying message]] that the [[Kahana|freighter]] people weren't here to neccessarily [[rescue]] them. Also, [[Locke]] was warned by a vision of [[Walt]] that they were here to kill them, but it's likely [[Sayid]] only partly believed this. |
| background=The [[survivors]] were for-warned by [[Charlie]]'s [[Through the Looking Glass|dying message]] that the [[Kahana|freighter]] people weren't here to neccessarily [[rescue]] them. Also, [[Locke]] was warned by a vision of [[Walt]] that they were here to kill them, but it's likely [[Sayid]] only partly believed this. |
||
| mission=To discover the freighter's true mission and everything regarding it's purpose. |
| mission=To discover the freighter's true mission and everything regarding it's purpose. |
||
| Line 241: | Line 239: | ||
| o-team= |
| o-team= |
||
| f-team=[[Daniel]] & [[Charlotte]] |
| f-team=[[Daniel]] & [[Charlotte]] |
||
| − | | other= |
+ | | other=[[Daniel]] & [[Charlotte]] |
| background=When [[Daniel]] and [[Charlotte]] disappear into the jungle at night, suspicions are raised and [[Jack]], [[Juliet]] and later [[Kate]] begin to track them to see what they're up to. |
| background=When [[Daniel]] and [[Charlotte]] disappear into the jungle at night, suspicions are raised and [[Jack]], [[Juliet]] and later [[Kate]] begin to track them to see what they're up to. |
||
| mission=To discover where [[Daniel]] and [[Charlotte]] have gone and why. |
| mission=To discover where [[Daniel]] and [[Charlotte]] have gone and why. |
||
| Line 259: | Line 257: | ||
| image=4x09 sawyer.jpg |
| image=4x09 sawyer.jpg |
||
| episode={{ep|4x08}}, {{ep|4x09}} |
| episode={{ep|4x08}}, {{ep|4x09}} |
||
| − | | a-team=[[Locke]] & [[Sawyer]] |
+ | | a-team=[[Locke]] & [[Sawyer]], [[Hurley]] |
| b-team=[[Hurley]] |
| b-team=[[Hurley]] |
||
| o-team=[[Ben]] |
| o-team=[[Ben]] |
||
| f-team=[[Miles]] |
| f-team=[[Miles]] |
||
| − | | other=[[Claire]] & [[Aaron]] |
+ | | other= [[Ben]], [[Miles]], [[Claire]] & [[Aaron]] |
| background=[[Ben]] showed [[Locke]] a video of [[Charles Widmore]], the man who sent the freigher to kill everyone on the Island and capture [[Ben|him]]. The [[mercenaries]] have arrived for [[Ben]]. |
| background=[[Ben]] showed [[Locke]] a video of [[Charles Widmore]], the man who sent the freigher to kill everyone on the Island and capture [[Ben|him]]. The [[mercenaries]] have arrived for [[Ben]]. |
||
| mission=For the survivors, they need to defend themselves from attack. For Ben, he needed to protect himself. |
| mission=For the survivors, they need to defend themselves from attack. For Ben, he needed to protect himself. |
||
| Line 280: | Line 278: | ||
| image=ChristianJacob.JPG |
| image=ChristianJacob.JPG |
||
| episode={{ep|4x11}} |
| episode={{ep|4x11}} |
||
| − | | a-team=[[Locke]] |
+ | | a-team=[[Locke]], [[Hurley]] |
| b-team=[[Hurley]] |
| b-team=[[Hurley]] |
||
| o-team=[[Ben]] |
| o-team=[[Ben]] |
||
| f-team=None |
| f-team=None |
||
| − | | other= |
+ | | other=[[Ben]] |
| background=After the assault at [[the Barracks]], [[Locke]] and [[Ben]] decide to find [[Jacob]] and receive orders, but they need [[Hurley]] to find the [[cabin]]. |
| background=After the assault at [[the Barracks]], [[Locke]] and [[Ben]] decide to find [[Jacob]] and receive orders, but they need [[Hurley]] to find the [[cabin]]. |
||
| mission=To find [[Jacob]]. |
| mission=To find [[Jacob]]. |
||
| Line 306: | Line 304: | ||
| o-team=[[Ben]], [[Juliet]], [[Richard]] and [[the Others]] as a whole (excluding [[Ben]]) |
| o-team=[[Ben]], [[Juliet]], [[Richard]] and [[the Others]] as a whole (excluding [[Ben]]) |
||
| f-team=[[Daniel]], [[Frank]], [[Hendricks]] & many remaining crew aboard |
| f-team=[[Daniel]], [[Frank]], [[Hendricks]] & many remaining crew aboard |
||
| − | | other=[[Sun]], [[Aaron]] & some other survivors |
+ | | other=[[Sun]],[[Hurley]], [[Jin]], [[Desmond]], [[Michael]], [[Ben]], [[Juliet]], [[Richard]] and [[the Others]] as a whole, [[Aaron]] & some other survivors |
| background=The [[helicopter]] lands on [[the Island]] and the [[survivors]] make a last bid for freedom. [[The Others]] finally combat the [[mercenaries]] with [[Kate]] and [[Sayid]] in tow. [[Desmond]], [[Jin]] and [[Michael]] try desperately to disarm the bomb on board so people can escape. |
| background=The [[helicopter]] lands on [[the Island]] and the [[survivors]] make a last bid for freedom. [[The Others]] finally combat the [[mercenaries]] with [[Kate]] and [[Sayid]] in tow. [[Desmond]], [[Jin]] and [[Michael]] try desperately to disarm the bomb on board so people can escape. |
||
| mission=To finally escape [[the Island]] safely. |
| mission=To finally escape [[the Island]] safely. |
||
| Line 323: | Line 321: | ||
| image=Islandmoves.jpg |
| image=Islandmoves.jpg |
||
| episode={{ep|4x12}}, {{ep|4x13}} |
| episode={{ep|4x12}}, {{ep|4x13}} |
||
| − | | a-team=[[Locke]] |
+ | | a-team=[[Locke]], [[Hurley]] |
| b-team=[[Hurley]] |
| b-team=[[Hurley]] |
||
| o-team=[[Ben]] |
| o-team=[[Ben]] |
||
| f-team=[[Keamy]] and his [[mercenaries]] (prepared to stop Ben from doing so) |
| f-team=[[Keamy]] and his [[mercenaries]] (prepared to stop Ben from doing so) |
||
| − | | other= |
+ | | other=[[Ben]], Opposing: [[Keamy]] |
| background=[[Jacob]], through [[Christian]], ordered [[Locke]] to move the Island to protect it from [[Widmore]]. |
| background=[[Jacob]], through [[Christian]], ordered [[Locke]] to move the Island to protect it from [[Widmore]]. |
||
| mission=To successfully move the Island and hide it from [[Widmore]]. |
| mission=To successfully move the Island and hide it from [[Widmore]]. |
||
| Line 340: | Line 338: | ||
}} |
}} |
||
| − | == |
+ | ==Season Breakdown== |
| − | *'''Percentage Successful''' |
+ | *'''Season 4 - Percentage Successful''' |
| − | + | 45.5% (5/11) |
|
| + | |||
| ⚫ | |||
| + | *'''Season 4 - Percentage Half-accomplished''' |
||
| ⚫ | |||
| + | 45.5% (5/11) |
||
| ⚫ | |||
| + | |||
| ⚫ | |||
| + | *'''Season 4 - Percentage Failed''' |
||
| + | 9.9% (1/11) |
||
='''Season 5'''= |
='''Season 5'''= |
||
| Line 379: | Line 379: | ||
| b-team= |
| b-team= |
||
| o-team=None |
| o-team=None |
||
| + | | f-team=[[Faraday]], [[Miles]], [[Charlotte]], |
||
| ⚫ | |||
| − | | other= |
+ | | other=[[Richard]], [[Charles Widmore|Widmore]], [[Eloise Hawking|Ellie]] |
| − | | background= |
+ | | background= |
| + | | mission=To infiltrate the camp while saving the science team. |
||
| ⚫ | |||
| O-mission=None |
| O-mission=None |
||
| B-mission=None |
| B-mission=None |
||
| Line 502: | Line 502: | ||
| image=Groupshot509.png |
| image=Groupshot509.png |
||
| episode={{ep|5x09}} |
| episode={{ep|5x09}} |
||
| − | | a-team=[[Sawyer]], [[Jack]], [[Hurley]], [[Kate |
+ | | a-team=[[Sawyer]], [[Jack]], [[Hurley]], [[Kate]], [[Sayid]] |
| b-team= |
| b-team= |
||
| o-team=None |
| o-team=None |
||
| f-team=None |
| f-team=None |
||
| − | | other= |
+ | | other=[[Juliet]], [[Jin]] |
| background= |
| background= |
||
| mission= |
| mission= |
||
| Line 523: | Line 523: | ||
| image=Welcomephoto.jpg |
| image=Welcomephoto.jpg |
||
| episode={{ep|5x09}} |
| episode={{ep|5x09}} |
||
| − | | a-team= |
+ | | a-team= |
| b-team=[[Sun]] |
| b-team=[[Sun]] |
||
| o-team=None |
| o-team=None |
||
| f-team=[[Frank]] |
| f-team=[[Frank]] |
||
| − | | other= |
+ | | other= [[Sun]], [[Frank]] |
| background= |
| background= |
||
| + | | mission= Investigate the Dharma Barracks for any sign of Jin or the other survivors. |
||
| ⚫ | |||
| O-mission=None |
| O-mission=None |
||
| B-mission= None |
| B-mission= None |
||
| Line 550: | Line 550: | ||
| other= Richard Alpert |
| other= Richard Alpert |
||
| background= A young Benjamin Linus was shot by a time traveling Sayid. Jack refused to stitch Ben up. |
| background= A young Benjamin Linus was shot by a time traveling Sayid. Jack refused to stitch Ben up. |
||
| + | | mission= Bring Ben to the Others so they can save his life. |
||
| ⚫ | |||
| O-mission=None |
| O-mission=None |
||
| B-mission= None |
| B-mission= None |
||
| Line 569: | Line 569: | ||
| o-team=[[Richard]], [[Eloise]] |
| o-team=[[Richard]], [[Eloise]] |
||
| f-team=None |
| f-team=None |
||
| − | | other= |
+ | | other=[[Richard]], [[Eloise]] |
| background= Daniel Faraday returned to the island and proposed that they could stop Oceanic Flight 815 from ever crashing. Faraday was unfortunately killed by Eloise at the Other's Camp. Jack and Eloise decided to continue the mission. Sayid later came across their group and joined them. |
| background= Daniel Faraday returned to the island and proposed that they could stop Oceanic Flight 815 from ever crashing. Faraday was unfortunately killed by Eloise at the Other's Camp. Jack and Eloise decided to continue the mission. Sayid later came across their group and joined them. |
||
| + | | mission= To Find the Hydrogen Bomb the Others buried in the 1950s. |
||
| ⚫ | |||
| O-mission=None |
| O-mission=None |
||
| B-mission= None |
| B-mission= None |
||
| Line 585: | Line 585: | ||
| name=Detonate Jughead (1977) |
| name=Detonate Jughead (1977) |
||
| image=5x16 JackWithTheJughead.jpg |
| image=5x16 JackWithTheJughead.jpg |
||
| − | | episode={{ep|5x16}} |
+ | | episode={{ep|5x16-17}} |
| a-team=[[Jack]], [[Sayid]], [[Kate]], [[Sawyer]], [[Juliet]], [[Jin]], [[Hurley]], [[Miles]] |
| a-team=[[Jack]], [[Sayid]], [[Kate]], [[Sawyer]], [[Juliet]], [[Jin]], [[Hurley]], [[Miles]] |
||
| b-team=None |
| b-team=None |
||
| o-team=None |
| o-team=None |
||
| − | | f-team= |
+ | | f-team=, |
| − | | other=[[Richard]], [[Eloise]] |
+ | | other= [[Daniel]] [[Richard]], [[Eloise]] |
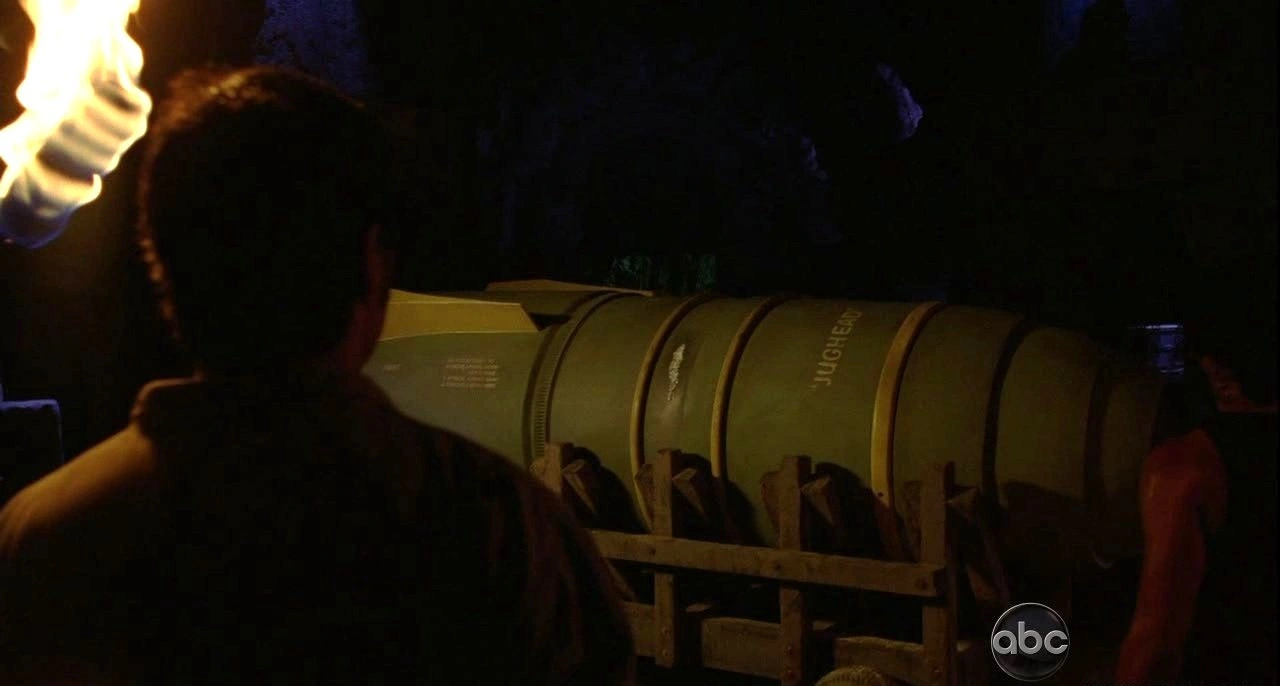
| background=After explaining time travel and the ability to change the past, Daniel tells Kate and Jack they can make it so that the Flight 815 plane will never crash on the island, that Desmond will never have to push the button in the hatch, and that everything can be "reset". Using the Judghead that was buried underground by the others in 1954, they could detonate it and change the past. |
| background=After explaining time travel and the ability to change the past, Daniel tells Kate and Jack they can make it so that the Flight 815 plane will never crash on the island, that Desmond will never have to push the button in the hatch, and that everything can be "reset". Using the Judghead that was buried underground by the others in 1954, they could detonate it and change the past. |
||
| mission=Take the core of Jughead and bring it to the future Swan site and drop it into the pocket of electromagnetism that is being drilled into before "The Incident" occurs. |
| mission=Take the core of Jughead and bring it to the future Swan site and drop it into the pocket of electromagnetism that is being drilled into before "The Incident" occurs. |
||
| Line 619: | Line 619: | ||
| image=6x01_GoodbyeJules.jpg |
| image=6x01_GoodbyeJules.jpg |
||
| episode={{ep|6x01}} |
| episode={{ep|6x01}} |
||
| − | | a-team=[[Sawyer |
+ | | a-team=[[Sawyer]], [[Jack]], [[Kate]] |
| b-team= |
| b-team= |
||
| o-team= |
| o-team= |
||
| f-team= |
| f-team= |
||
| − | | other= |
+ | | other= [[Juliet]], [[Miles]], [[Jin]] |
| background= Juliet was pulled into the Swan drilling spot when attempting to detonate Jughead. |
| background= Juliet was pulled into the Swan drilling spot when attempting to detonate Jughead. |
||
| mission= |
| mission= |
||
| Line 657: | Line 657: | ||
}} |
}} |
||
| + | |||
| ⚫ | |||
| + | {{Sectionbox A-mission |
||
| + | | name=Find Sawyer |
||
| + | | image=Vlcsnap-2010-11-01-17h22m51s29.jpg |
||
| + | | episode={{ep|6x03}} |
||
| + | | a-team= [[Kate Austen]] |
||
| + | | b-team= |
||
| + | | o-team= |
||
| ⚫ | |||
| + | | other= [[Jin]], [[Aldo]], [[Justin]] |
||
| + | | background=[[Sawyer]] escapes from [[the Temple]] and Kate volunteers to get him back |
||
| ⚫ | |||
| + | | O-mission=[[O-Missions#Get Sawyer back to the Temple|Get Sawyer back to the Temple]] |
||
| ⚫ | |||
| + | | F-mission= None |
||
| + | | outcome=success |
||
| + | | discoveries= [[Claire]] |
||
| + | | storyline= In the jungle Kate knocks out Aldo and Justin and leaves Jin. Kate tracks Sawyer to [[the barracks]] where he mourns [[Juliet|Juliet's]] death. Kate asks for help finding [[Claire]],but Sawyer is devastated and can't help her. Meanwhile, in the jungle, Jin is caught by Aldo and Justin. Jin tries to flee, but has his foot caught in a trap. Aldo rises his gun to kill him, but gets shot by Claire. |
||
| + | | align=left |
||
| + | }} |
||
<h3 style="display: none;">Find the Lighthouse</h3> |
<h3 style="display: none;">Find the Lighthouse</h3> |
||
| Line 724: | Line 745: | ||
| image=6x09 We'reTogether.jpg |
| image=6x09 We'reTogether.jpg |
||
| episode={{ep|6x09}} |
| episode={{ep|6x09}} |
||
| − | | a-team=[[Hurley]] |
+ | | a-team=[[Hurley]] |
| b-team= |
| b-team= |
||
| o-team= |
| o-team= |
||
| Line 749: | Line 770: | ||
| o-team= |
| o-team= |
||
| f-team= |
| f-team= |
||
| − | | other=[[Man in Black]] |
+ | | other=[[Man in Black|Locke]], [[Desmond]] |
| background= Sawyer sees a locked room on Charles Widmore's submarine. |
| background= Sawyer sees a locked room on Charles Widmore's submarine. |
||
| + | | mission= [[The Man in Black|Locke]] sends Sayid to Hydra Island to discover what Widmore is keeping secret. |
||
| ⚫ | |||
| O-mission=None |
| O-mission=None |
||
| B-mission= None |
| B-mission= None |
||
| Line 757: | Line 778: | ||
| outcome=success |
| outcome=success |
||
| discoveries= Desmond is back on the island |
| discoveries= Desmond is back on the island |
||
| + | | storyline= Sayid swims to Hydra Island in the dead of night. He sees Widmore's team taking Desmond from the submarine to the Hydra Station. Later as Widmore's team escorts Desmond away from the cabin where he was blasted with electromagnatism, Sayid attacks Widmore's team and takes Desmond with him back to the Main Island. |
||
| − | | storyline= |
||
| align=left |
| align=left |
||
}} |
}} |
||
| − | <h3 style="display: none;"> |
+ | <h3 style="display: none;">Destroy the Plane</h3> |
{{Sectionbox A-mission |
{{Sectionbox A-mission |
||
| − | | name= |
+ | | name=Destroy the Plane |
| − | | image= |
+ | | image=6x12 IlanaIsGone.jpg |
| − | | episode={{ep| |
+ | | episode={{ep|6x10}},{{ep|6x12}} |
| − | | a-team=[[ |
+ | | a-team=[[Hurley]], [[Jack]] |
| − | | b-team= |
+ | | b-team=[[Sun-Hwa Kwon]] |
| o-team= |
| o-team= |
||
| f-team= |
| f-team= |
||
| − | | other=[[ |
+ | | other=[[Richard Alpert]], [[Ilana]], [[Benjamin Linus]], [[Miles]], [[Sun]] |
| − | | background= |
+ | | background= Richard Alpert tells Jack everyone at the temple is dead. |
| ⚫ | |||
| ⚫ | |||
| O-mission=None |
| O-mission=None |
||
| B-mission= None |
| B-mission= None |
||
| F-mission= None |
| F-mission= None |
||
| − | | outcome=fail |
+ | | outcome=fail |
| discoveries= |
| discoveries= |
||
| ⚫ | | storyline= Richard Alpert thinks that they need to get dynamite from the Black Rock to destroy the plane and prevent MIB from leaving the island. The dynamite proves to be unstable and Ilana is killed in an explosion. Richard and the others return to the boat to retrieve more dynamite. Hurley however blows up the Black Rock because he is told that it's dangerous. The group splits Hurley, Jack, Sun, and Frank go on to visit MIB. Richard, Ben, and Miles continue to the DHRAMA barracks to get more explosives. At the barracks they meet up with Widmore who reveals that he already rigged the plane with explosives. Later they decide to fly the plane off the island. |
||
| ⚫ | | storyline= "Locke" tells Sayid to go to the well and kill Desmond. Sayid hesitates prompting "Locke" to check that he still wants what he asked for. Sayid says that he does and heads to the well. At the well Desmond is sitting in water at the bottom as Sayid points his gun. Desmond calmly asks what Locke offered Sayid. Sayid says he him he could get the woman he loved back, even though she was dead. Desmond asks why he would believe Locke could help. Sayid says that he was dead. Finally Desmond asks what Sayid will say to his beloved when she asks what he had to do to be with her again. Later it is revealed that Sayid didn't kill Desmond. |
||
| align=left |
| align=left |
||
}} |
}} |
||
| + | <h3 style="display: none;">Go talk to "Locke"</h3> |
||
| − | |||
| ⚫ | |||
{{Sectionbox A-mission |
{{Sectionbox A-mission |
||
| − | | name= |
+ | | name=Go talk to "Locke" |
| − | | image=6x12 |
+ | | image=6x12-Passing.jpg |
| − | | episode= |
+ | | episode={{ep|6x12}} |
| a-team=[[Hurley]], [[Jack]] |
| a-team=[[Hurley]], [[Jack]] |
||
| − | | b-team= |
+ | | b-team= |
| o-team= |
| o-team= |
||
| f-team= |
| f-team= |
||
| − | | other=[[ |
+ | | other=[[Sun]], [[Frank]] |
| − | | background= |
+ | | background=Hurley is visited by [[Michael]],who tells that going after the explosives,so they can blow up the Ajira plane, is dangerous. |
| − | | mission= |
+ | | mission= |
| O-mission=None |
| O-mission=None |
||
| B-mission= None |
| B-mission= None |
||
| F-mission= None |
| F-mission= None |
||
| − | | outcome= |
+ | | outcome=success |
| + | | discoveries= The nature of the [[whispers]] |
||
| + | | storyline= Hurley blows up the [[Black Rock]] and Richard comes with the idea to use the C-4 left in the DHARMA barracks. Hurley tries to convince Richard to stay away from the explosvies by telling that [[Jacob]] told them to go talk to [[Man in Black]]. Richard doesn't believe he's telling the truth and goes with Ben and Miles after the C-4. Jack, Sun and Frank decide to follow Hurley. |
||
| + | | align=left |
||
| + | }} |
||
| + | |||
| + | <h3 style="display: none;">Kill Desmond</h3> |
||
| + | {{Sectionbox A-mission |
||
| + | | name=Kill Desmond |
||
| + | | image=6x13 SittingInAWell.jpg |
||
| + | | episode={{ep|6x13}} |
||
| + | | a-team=[[Sayid]] |
||
| + | | b-team= |
||
| + | | o-team= |
||
| + | | f-team= |
||
| + | | other=[[Man in Black]], [[Desmond]] |
||
| + | | background= The Man in Black throws Desmond into a well. |
||
| ⚫ | |||
| ⚫ | |||
| + | | B-mission= None |
||
| + | | F-mission= None |
||
| + | | outcome=fail |
||
| discoveries= |
| discoveries= |
||
| ⚫ | | storyline= "Locke" tells Sayid to go to the well and kill Desmond. Sayid hesitates prompting "Locke" to check that he still wants what he asked for. Sayid says that he does and heads to the well. At the well Desmond is sitting in water at the bottom as Sayid points his gun. Desmond calmly asks what Locke offered Sayid. Sayid says he him he could get the woman he loved back, even though she was dead. Desmond asks why he would believe Locke could help. Sayid says that he was dead. Finally Desmond asks what Sayid will say to his beloved when she asks what he had to do to be with her again. Later it is revealed that Sayid didn't kill Desmond. |
||
| ⚫ | | storyline= Richard Alpert thinks that they need to get dynamite from the Black Rock to destroy the plane and prevent MIB from leaving the island. The dynamite proves to be unstable and Ilana is killed in an explosion. Richard and the others return to the boat to retrieve more dynamite. Hurley however blows up the Black Rock because he is told that it's dangerous. The group splits Hurley, Jack, Sun, and Frank go on to visit MIB. Richard, Ben, and Miles continue to the DHRAMA barracks to get more explosives. At the barracks they meet up with Widmore who reveals that he already rigged the plane with explosives. Later they decide to fly the plane off the island. |
||
| align=left |
| align=left |
||
}} |
}} |
||
| Line 809: | Line 850: | ||
| image=6x13 RelaxClaire.jpg |
| image=6x13 RelaxClaire.jpg |
||
| episode={{ep|6x13}} |
| episode={{ep|6x13}} |
||
| − | | a-team=[[ |
+ | | a-team=[[Kate]], [[Sawyer]], [[Hurley]] |
| b-team= |
| b-team= |
||
| o-team= |
| o-team= |
||
| Line 815: | Line 856: | ||
| other=[[Sun-Hwa Kwon]], [[Claire Littleton]], [[Frank Lapidus]] |
| other=[[Sun-Hwa Kwon]], [[Claire Littleton]], [[Frank Lapidus]] |
||
| background= |
| background= |
||
| + | | mission= To Get away from [[Man in Black| "Locke"]] and escape to Widmore's group on Hydra Island using the Elizabeth. |
||
| ⚫ | |||
| O-mission=None |
| O-mission=None |
||
| B-mission= None |
| B-mission= None |
||
| Line 830: | Line 871: | ||
| image=6X14Illkilher-ihavealist.png |
| image=6X14Illkilher-ihavealist.png |
||
| episode={{ep|6x14}} |
| episode={{ep|6x14}} |
||
| − | | a-team=[[Sayid |
+ | | a-team=[[Sayid]], [[Jack]] |
| b-team= |
| b-team= |
||
| o-team= |
| o-team= |
||
| f-team= |
| f-team= |
||
| − | | other= [[Man in Black]] |
+ | | other= [[Man in Black|"Locke"]] |
| background= Sawyer, Kate, Frank, Sun, Jin, Hurley, and Claire are taken prisoner by Charles Widmore. |
| background= Sawyer, Kate, Frank, Sun, Jin, Hurley, and Claire are taken prisoner by Charles Widmore. |
||
| + | | mission= To Free the Survivors captured by Widmore and escape for the Ajira Plane. |
||
| ⚫ | |||
| O-mission=None |
| O-mission=None |
||
| B-mission= None |
| B-mission= None |
||
| Line 851: | Line 892: | ||
| image=6X14TakingSub.jpg |
| image=6X14TakingSub.jpg |
||
| episode={{ep|6x14}} |
| episode={{ep|6x14}} |
||
| − | | a-team=[[Sayid |
+ | | a-team=[[Sayid]], [[Jack]], [[Sawyer]], [[Kate]], [[Hurley]], |
| b-team= |
| b-team= |
||
| o-team= |
| o-team= |
||
| f-team= |
| f-team= |
||
| − | | other= [[Man in Black]] |
+ | | other= [[Man in Black|"Locke"]], [[Frank]], [[Jin]], [[Claire]], [[Sun]] |
| background= The Man in Black rescues the survivors from Widmore's camp |
| background= The Man in Black rescues the survivors from Widmore's camp |
||
| + | | mission= To commandeer the Sub so the Survivors can escape The Island. |
||
| ⚫ | |||
| O-mission=None |
| O-mission=None |
||
| B-mission= None |
| B-mission= None |
||
| Line 872: | Line 913: | ||
| image=6x14 Bomb.jpg |
| image=6x14 Bomb.jpg |
||
| episode={{ep|6x14}} |
| episode={{ep|6x14}} |
||
| − | | a-team=[[Sayid |
+ | | a-team=[[Sayid]], [[Sawyer]], [[Jack]] |
| o-team= |
| o-team= |
||
| f-team= |
| f-team= |
||
| − | | other= [[Man in Black]] |
+ | | other= [[Man in Black|"Locke"]] |
| + | | background= Before the Survivors board the submarine, [[The Man in Black|"Locke"]] gives the backpack with a bomb to Jack; knowing that Jack will end up on the Submarine. |
||
| − | | background= |
||
| − | | mission= |
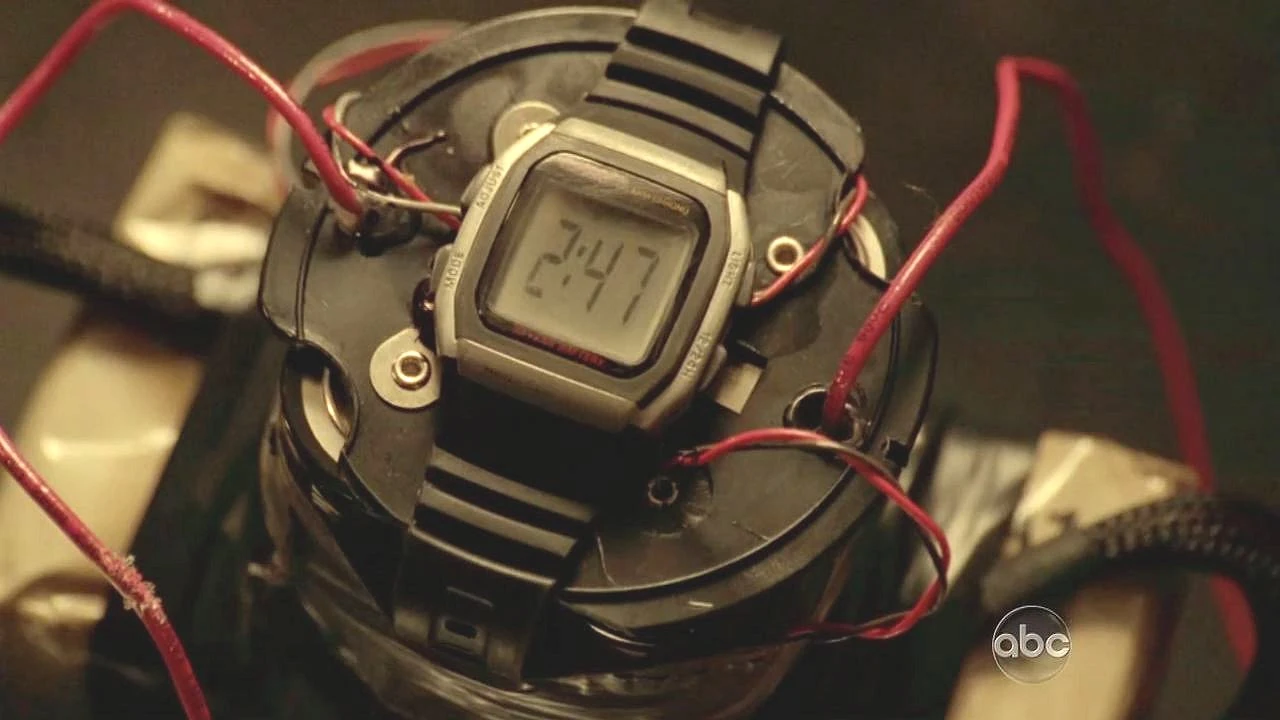
+ | | mission= To Prevent the Bomb from detonating. |
| O-mission=None |
| O-mission=None |
||
| B-mission= None |
| B-mission= None |
||
| Line 895: | Line 936: | ||
| o-team= |
| o-team= |
||
| f-team= |
| f-team= |
||
| − | | other= |
+ | | other= [[Jin]] |
| background= The bomb on the submarine goes off. |
| background= The bomb on the submarine goes off. |
||
| + | | mission= To Save Sun from drowning in the sinking Submarine. |
||
| ⚫ | |||
| O-mission=None |
| O-mission=None |
||
| B-mission= None |
| B-mission= None |
||
| Line 903: | Line 944: | ||
| outcome=fail |
| outcome=fail |
||
| discoveries= |
| discoveries= |
||
| − | | storyline= Sun is pinned against the side of the chamber by a metal cabinet. Jin, Sawyer and Jack struggle to move the heavy cabinet but when they do, Sun is still trapped by a bar. A metal bar falls and strikes Sawyer on the head, knocking him out. |
+ | | storyline= Sun is pinned against the side of the chamber by a metal cabinet. Jin, Sawyer and Jack struggle to move the heavy cabinet but when they do, Sun is still trapped by a bar. A metal bar falls and strikes Sawyer on the head, knocking him out. Jack grabs him but still wants to help Jin free Sun. Jin refuses the last emergency air cylinder and insists that he leave and save Sawyer. Jack has a long last look at Jin and Sun and swims out of the submarine with Sawyer. Jin continues to try to free Sun despite her pleas for him to go, but to no avail. He holds her and says that he won't leave her. They embrace as water floods the submarine. The sub sinks and their hands drift apart in death. |
| align=left |
| align=left |
||
}} |
}} |
||
| Line 913: | Line 954: | ||
| image=6x16-The_Four_Amigos.jpg |
| image=6x16-The_Four_Amigos.jpg |
||
| episode={{ep|6x14}}, {{ep|6x16}}, {{ep|6x17}} |
| episode={{ep|6x14}}, {{ep|6x16}}, {{ep|6x17}} |
||
| − | | a-team= [[Jack]], [[ |
+ | | a-team= [[Jack]], [[Kate]], [[Sawyer]], [[Hurley]], |
| o-team= |
| o-team= |
||
| f-team= |
| f-team= |
||
| Line 922: | Line 963: | ||
| B-mission= None |
| B-mission= None |
||
| F-mission= None |
| F-mission= None |
||
| − | | outcome=Half-accomplished; "Locke" finds Desmond first,however the survivors join them on their way to the Bamboo forest. |
+ | | outcome=<font color=blue>'''Half-accomplished'''</font>; "Locke" finds Desmond first,however the survivors join them on their way to the Bamboo forest. |
| discoveries= Why [[Jacob]] brought [[Candidates|them]] to the Island |
| discoveries= Why [[Jacob]] brought [[Candidates|them]] to the Island |
||
| − | | storyline= On their way,the survivors are met by [[Jacob]] and discuss why they are candidates. Jack agrees to be his [[Protector|successor]]. Meanwhile, [[Man in Black]] and [[Benjamin Linus]] return to the well in order to recover Desmond, |
+ | | storyline= On their way,the survivors are met by [[Jacob]] and discuss why they are candidates. Jack agrees to be his [[Protector|successor]]. Meanwhile, [[Man in Black]] and [[Benjamin Linus]] return to the well in order to recover Desmond, but discover that [[Rose]] and [[Bernard]] have helped him escape by lowering him a rope. |
| align=left |
| align=left |
||
}} |
}} |
||
| + | |||
| − | =See also= |
||
| + | <h3 style="display: none;">Kill [[Man in Black]] </h3> |
||
| − | *[[F-Missions]] |
||
| + | {{Sectionbox A-mission |
||
| − | *[[O-Missions]] |
||
| + | | name=Kill [[Man in Black]] |
||
| − | *[[Survivor factions]] |
||
| + | | image=6x17mib-blood.jpg |
||
| − | *[[Conflict]] |
||
| + | | episode={{ep|6x16}}, {{ep|6x17}} |
||
| + | | a-team= [[Jack]], [[Kate]] |
||
| + | | b-team= |
||
| + | | o-team= |
||
| + | | f-team= |
||
| + | | other= [[Desmond]] |
||
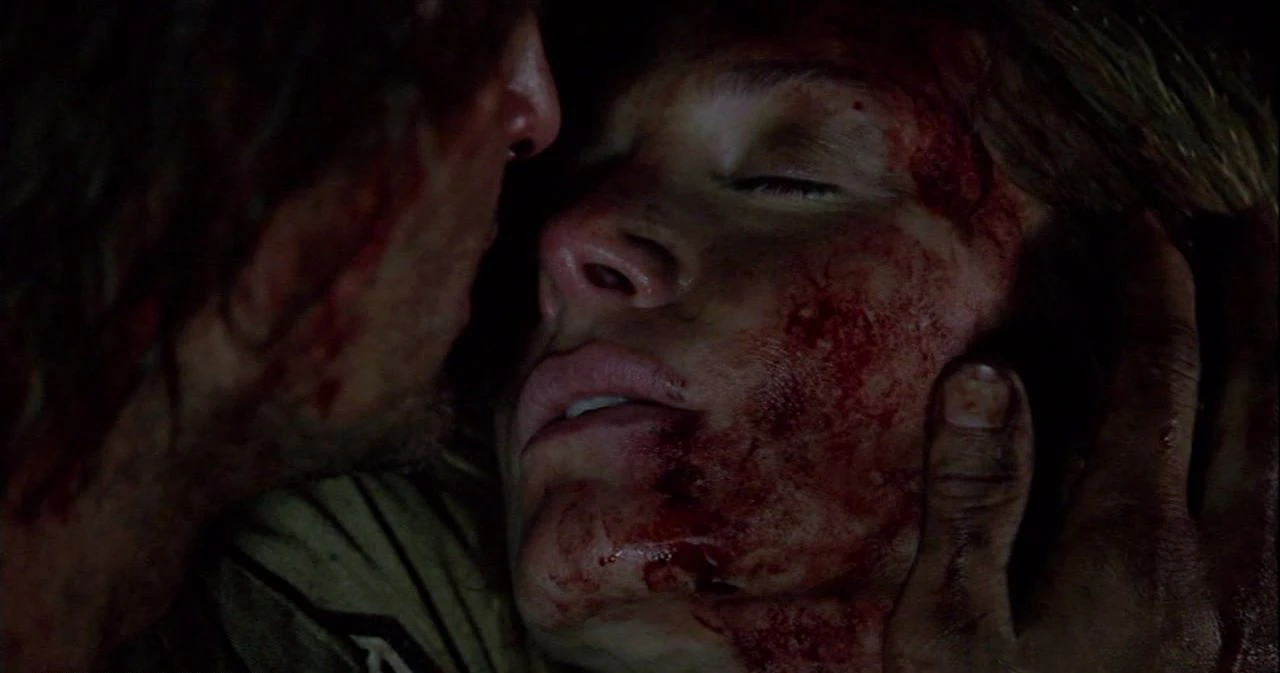
| + | | background= The remaining survivors want to avenge their friends, killed by [[Man in Black|"Locke"]] |
||
| + | | mission= To Kill [[The Man in Black|"Locke"]] so that he won't leave the Island. |
||
| ⚫ | |||
| + | | B-mission= None |
||
| + | | F-mission= None |
||
| + | | outcome=success |
||
| + | | discoveries= [[Heart of the Island]] |
||
| + | | storyline= With the light gone, [[Man in Black]] became mortal again, but now stuck in [[Locke|Locke's]] form. Outside the cave Jack punches "Locke" and he bleeds from the mouth. Locke finds a rock nearby and hits Jack over the back of the head with it, gets up and runs off to the cliffs,where [[Elizabeth]] is anchored a short distance offshore. Jack stops him,"Locke" pulls out his knife and the two engage in a fight. Jack pinned down "Locke", but he stabbed Jack in the abdomen and tried to stab him in the neck. Before "Locke" can finish off Jack, [[Kate]] shoots him in the back. Man in Black told Jack he was too late, Jack then kicked him off the cliff in response, finally killing him. |
||
| + | | align=left |
||
| + | }} |
||
| + | |||
| + | <h3 style="display: none;">Leave the Island </h3> |
||
| + | {{Sectionbox A-mission |
||
| + | | name=Leave the Island |
||
| + | | image=6x17 ModelPlaneToRealityPlane.png |
||
| + | | episode={{ep|6x17}} |
||
| + | | a-team=[[Kate]], [[Sawyer]] |
||
| + | | b-team= |
||
| + | | o-team= |
||
| + | | f-team= |
||
| + | | other= [[Claire]], [[Miles]], [[Richard]], [[Frank]] |
||
| + | | background= Instead of destroying the [[Ajira 316|plane]], so "Locke" couldn't leave the Island, Frank,the pilot, suggested they could fly away with it and Man in Black would still be trapped on the Island. |
||
| + | | mission= To Escape the Island before on the plane before The Island is destroyed. |
||
| ⚫ | |||
| + | | B-mission= None |
||
| + | | F-mission= None |
||
| + | | outcome=success |
||
| + | | discoveries= |
||
| + | | storyline=As Richard and Miles were rowing to Hydra Island, they found Frank, who had survived the explosion and sinking of Widmore's submarine; Frank suggested that they escape the Island in the Ajira plane instead of destroying it. Upon reaching the plane, they repaired its broken windshield and damaged hydraulic systems. This brought the plane into good working condition, allowing Frank to prepare for takeoff. As the plane was taxiing down the fissuring Hydra Island runway, it managed to slow down so that Claire, Kate and Sawyer could be pulled aboard. The Ajira plane safely took off just as the runway began to crack; its occupants managed to escape the initially self-destructing Island. |
||
| + | | align=left |
||
| + | }} |
||
| + | |||
| + | |||
| + | <h3 style="display: none;">Save the Island </h3> |
||
| + | {{Sectionbox A-mission |
||
| + | | name=Save the Island |
||
| + | | image=6x17LightReturns.jpg |
||
| + | | episode={{ep|6x18}} |
||
| + | | a-team= [[Jack]], [[Hurley]] |
||
| + | | b-team= |
||
| + | | o-team= |
||
| + | | f-team= |
||
| ⚫ | |||
| + | | background= When Desmond pulled the ancient cork in the [[Heart of the Island]] the Island became to slowly crumble to the ocean. |
||
| + | | mission= Put the Cork back in the Light to save The Island from destruction. |
||
| ⚫ | |||
| + | | B-mission= None |
||
| + | | F-mission= None |
||
| + | | outcome=success |
||
| + | | discoveries= |
||
| + | | storyline= [[Jack]], now the new [[protector]] of light, accompanied by Hurley and Ben, went back to the source to turn the light back on. Mortally wounded,Jack named Hurley his [[protector|successor]] and then was lowered down into the cave. Jack woke Desmond, tied the rope around him so he could be pulled up and put the stone cork back into the hole. He collapsed near the edge of the pool, slowly falling to depression,when nothing happen. Then the water started flowing again. Jack placed his hand on a stream and the water, that he touched, reached the stone, and the light was reignited, saving the Island. Hugo and Ben haul on the rope and find Desmond on the end of it. Below, Jack sobs with relief as he is engulfed in the light |
||
| + | | align=left |
||
| + | }} |
||
| + | |||
| + | ==Season Breakdown== |
||
| + | *'''Season 6 - Percentage Successful''' |
||
| + | 70.0% (14/20) |
||
| + | |||
| + | *'''Season 6 - Percentage Half-accomplished''' |
||
| + | 5.0% (1/20) |
||
| + | |||
| + | *'''Season 6 - Percentage Failed''' |
||
| ⚫ | |||
| + | |||
| + | ='''Overall Breakdown'''= |
||
| + | *'''Percentage Successful''' |
||
| + | 53.9% (48/89) |
||
| + | |||
| ⚫ | |||
| + | 28.1% (25/89) |
||
| + | |||
| ⚫ | |||
| + | 18.0% (16/89) |
||
| + | |||
==External links== |
==External links== |
||
| Line 938: | Line 1,059: | ||
<br> |
<br> |
||
| − | {{Nav- |
+ | {{Nav-Missions}} |
{{featured article}} |
{{featured article}} |
||
| Line 944: | Line 1,065: | ||
[[de:A-Missionen]] |
[[de:A-Missionen]] |
||
| + | [[es:Misiones A]] |
||
[[fr:Missions des survivants]] |
[[fr:Missions des survivants]] |
||
[[pl:Misje "A"]] |
[[pl:Misje "A"]] |
||
| Line 950: | Line 1,072: | ||
[[Category:Analysis]] |
[[Category:Analysis]] |
||
[[Category:Fan terminology]] |
[[Category:Fan terminology]] |
||
| − | [[Category:Storyline]] |
||
[[Category:Lists]] |
[[Category:Lists]] |
||
Latest revision as of 13:09, 9 March 2020
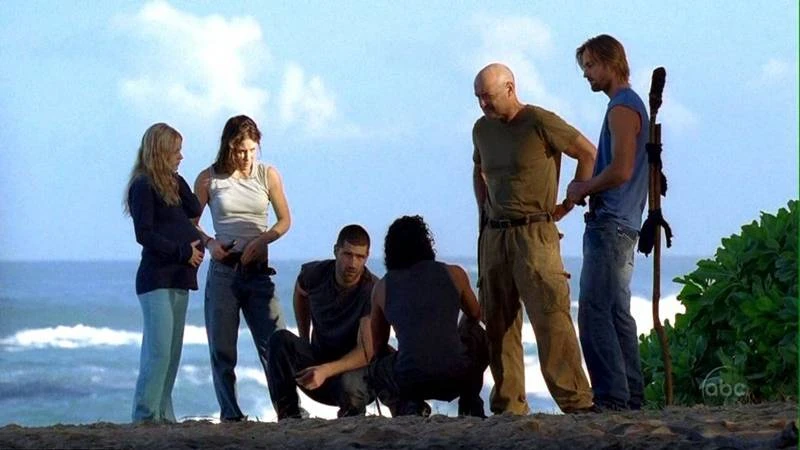
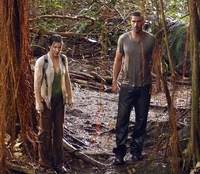
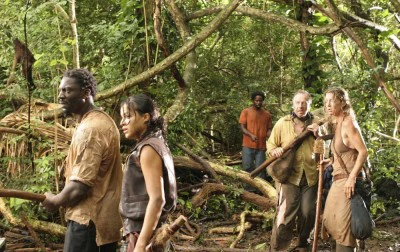
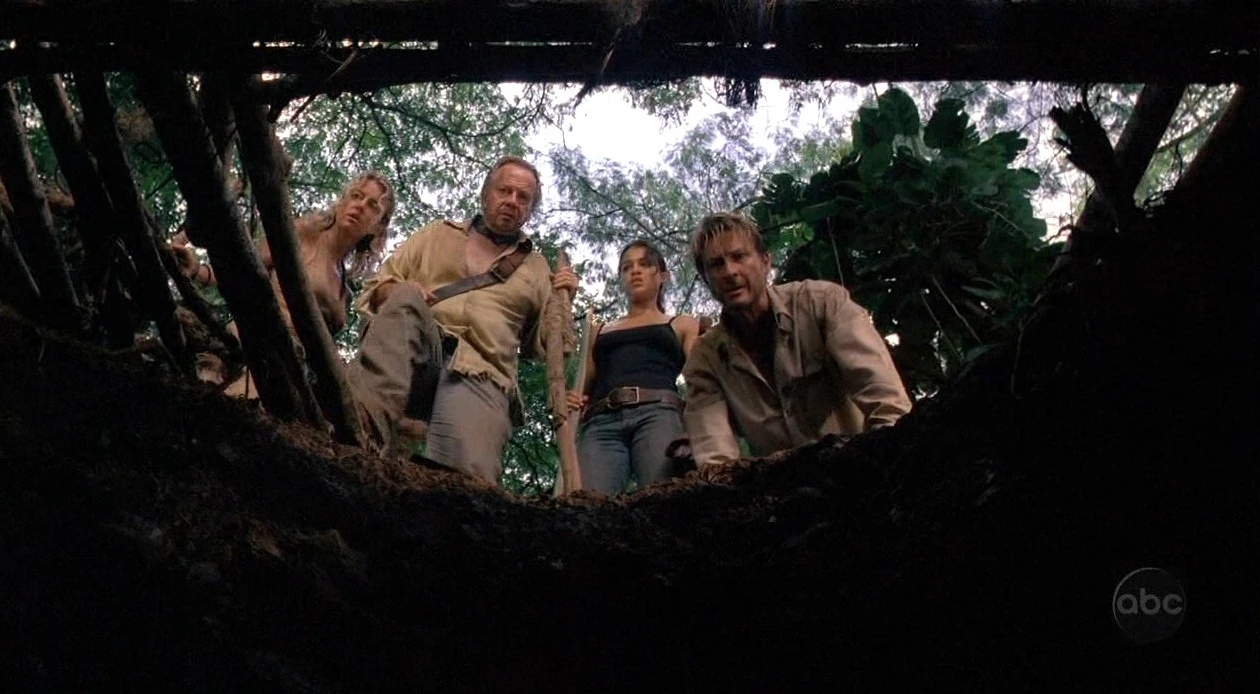
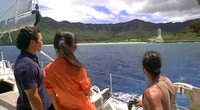
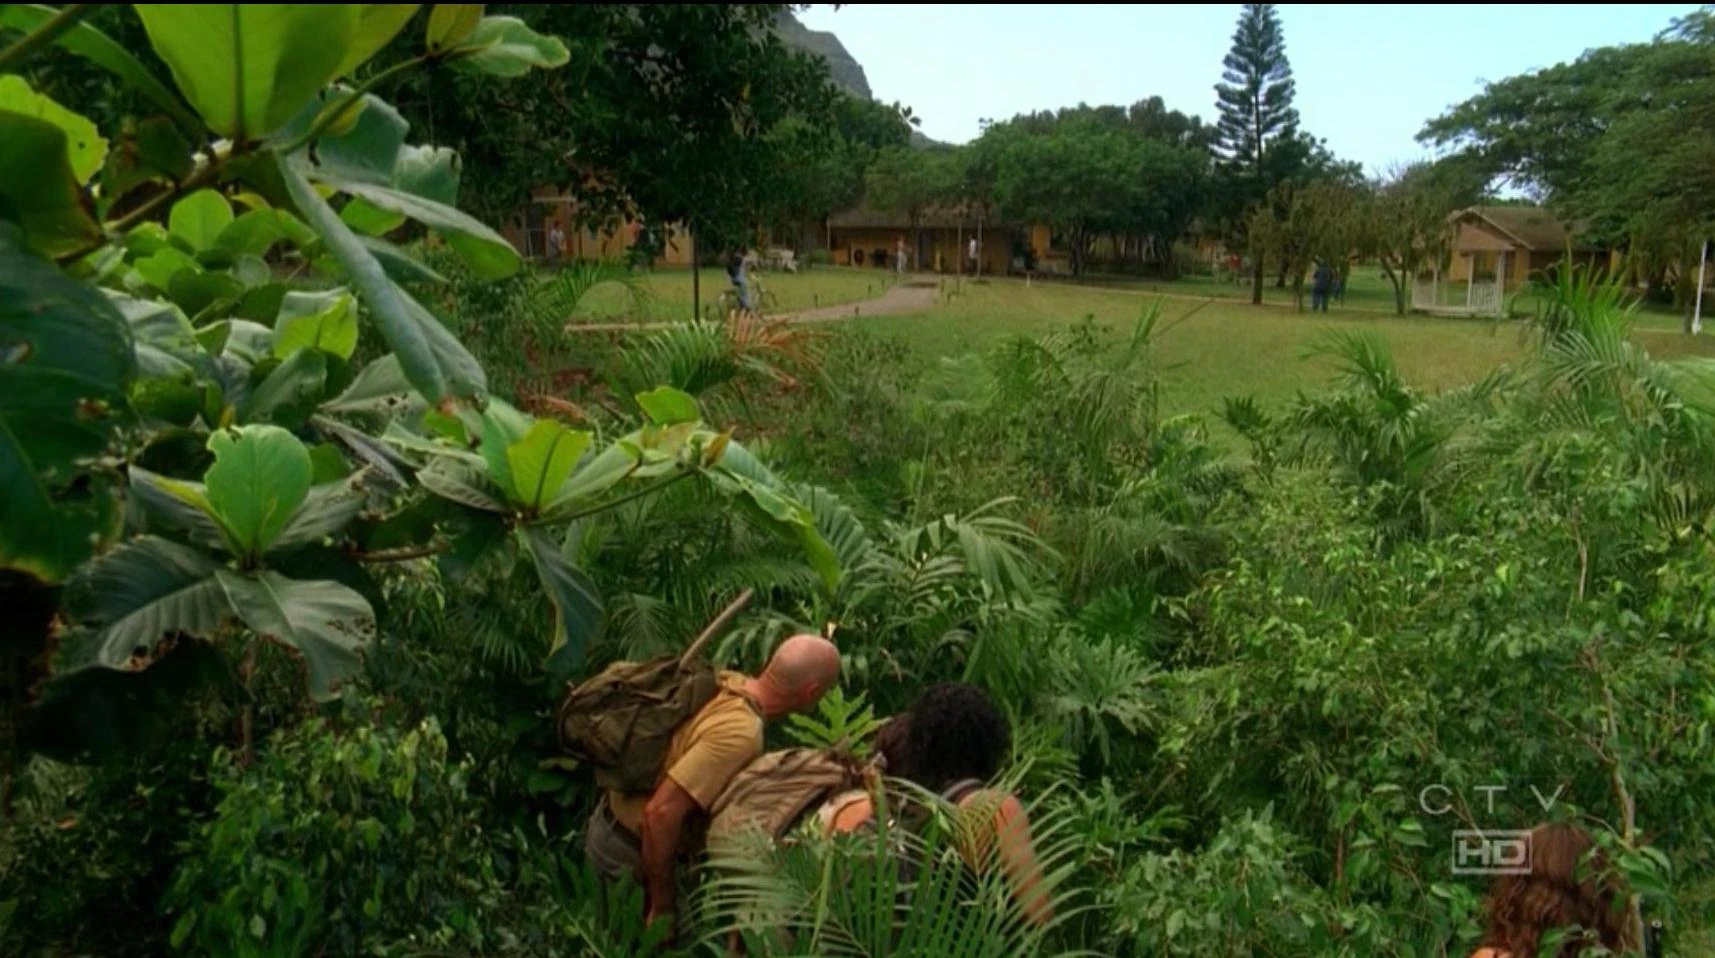
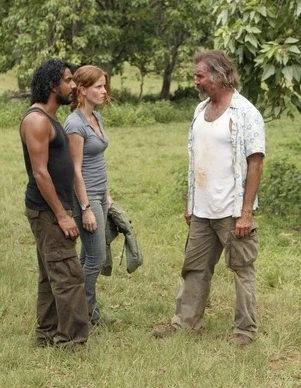
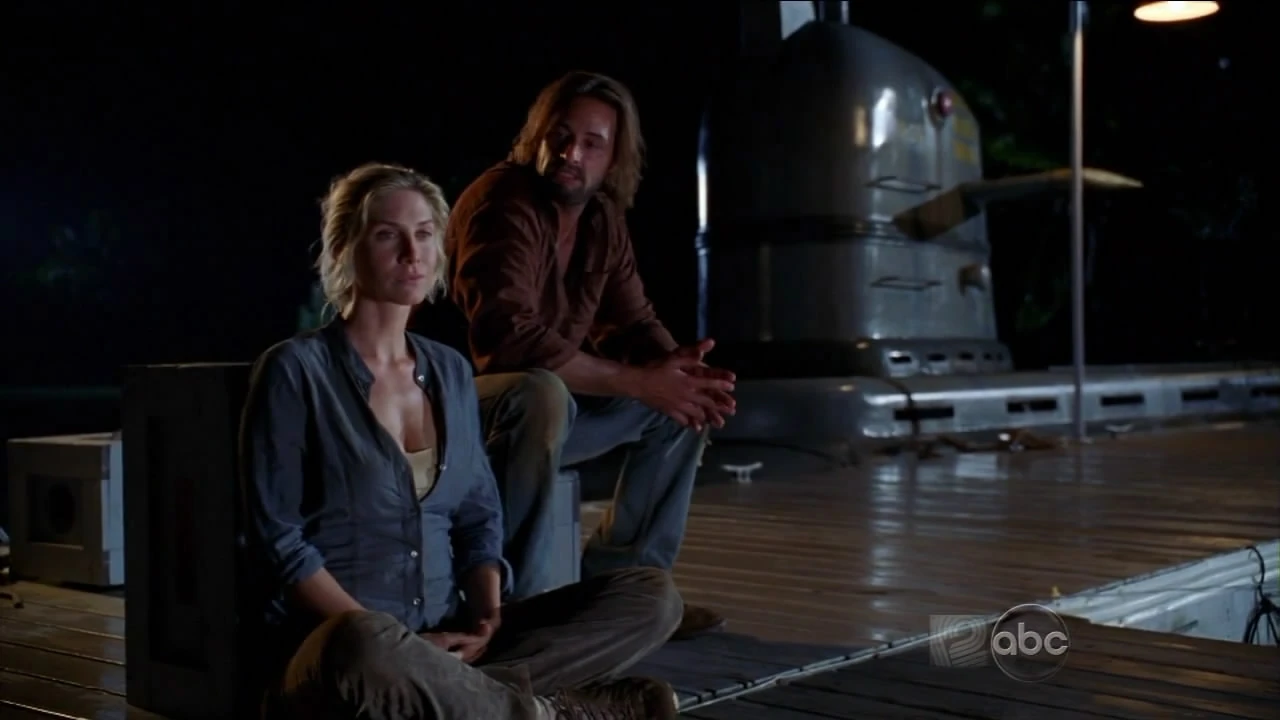
The typical "A-Team," consisting of Jack, Kate, Sawyer, Locke and Sayid, with Claire.
"A-Missions" is a term for when the primary survivors undertook a mission, such as capturing Ethan Rom ("Homecoming") or escaping from the Hydra Island ("Not in Portland").
The term was coined by Charlie (a frequent mission-goer who, in his own opinion, fell short of being a member of the "A-Team") ("Everybody Hates Hugo") and later referenced by Sawyer ("Exposé"). An "A-Mission" refers to a mission undertaken by the Lost "A-Team", which usually included a combination of Jack, Kate, Sawyer, Locke, and Sayid.
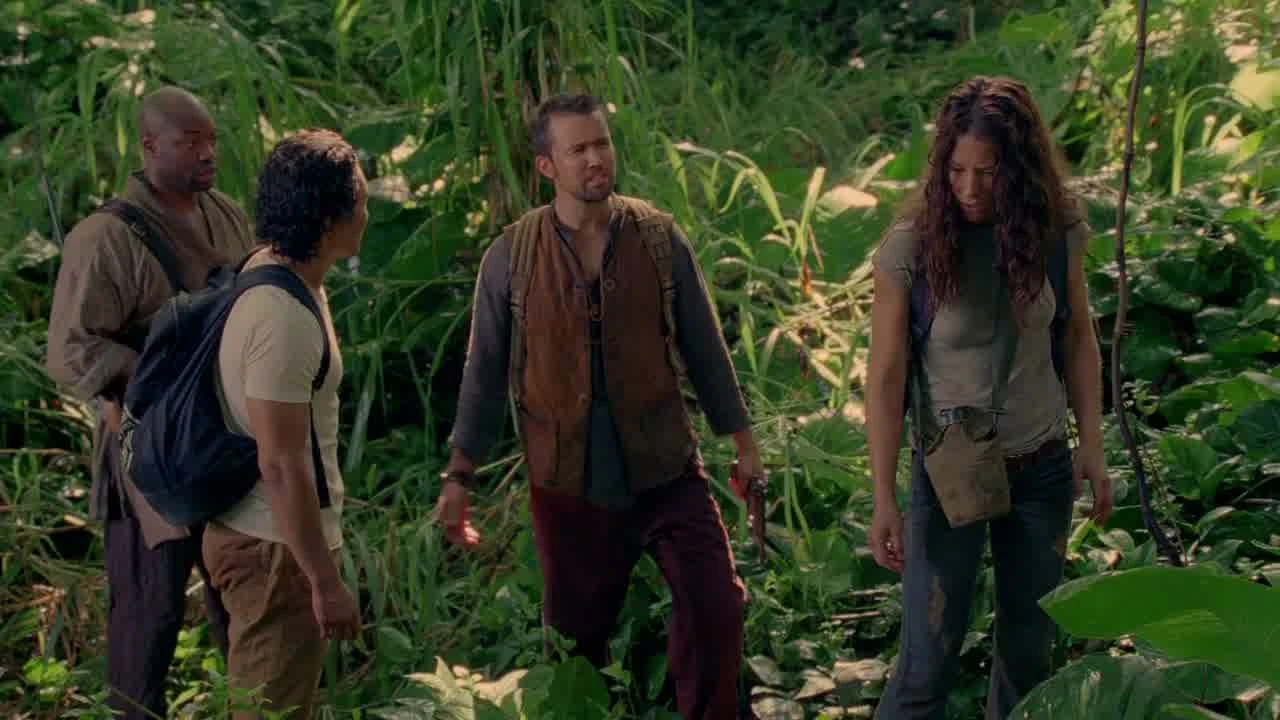
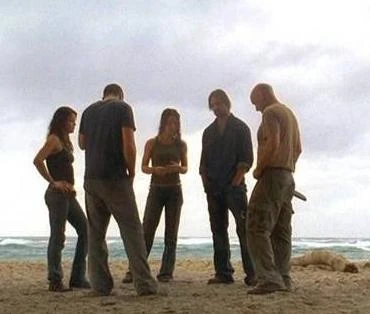
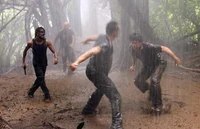
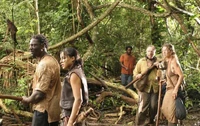
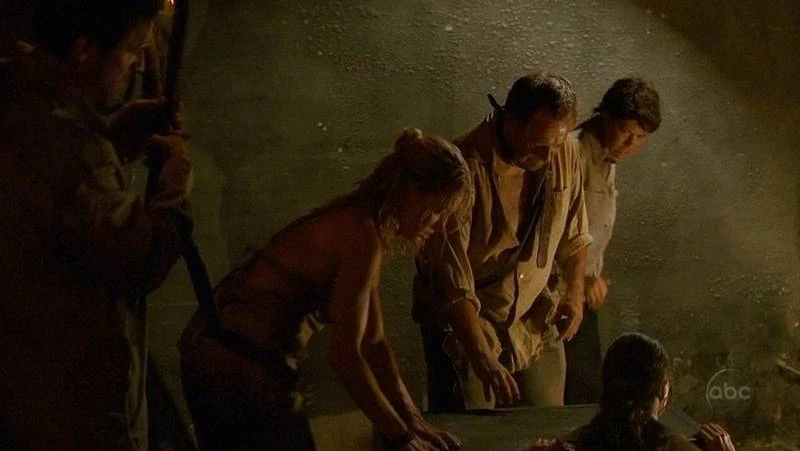
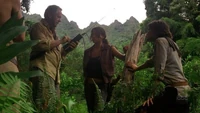
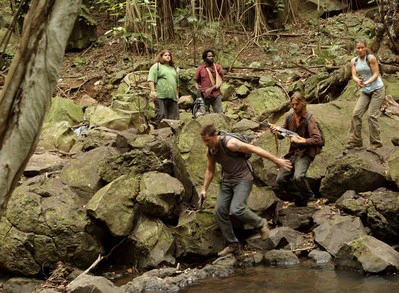
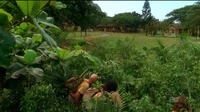
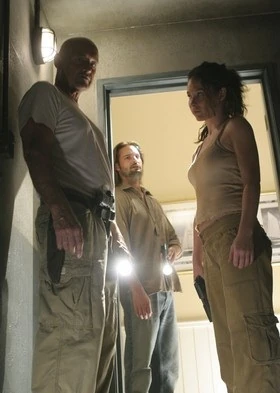
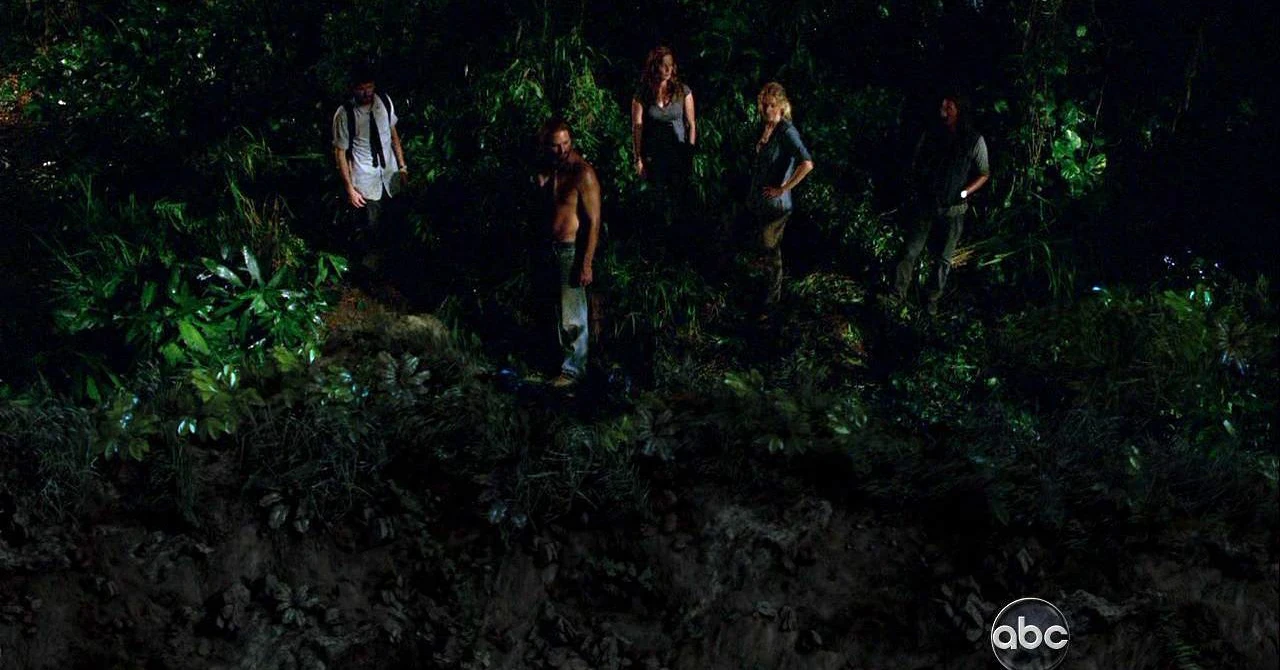
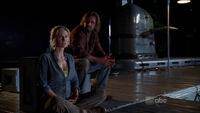
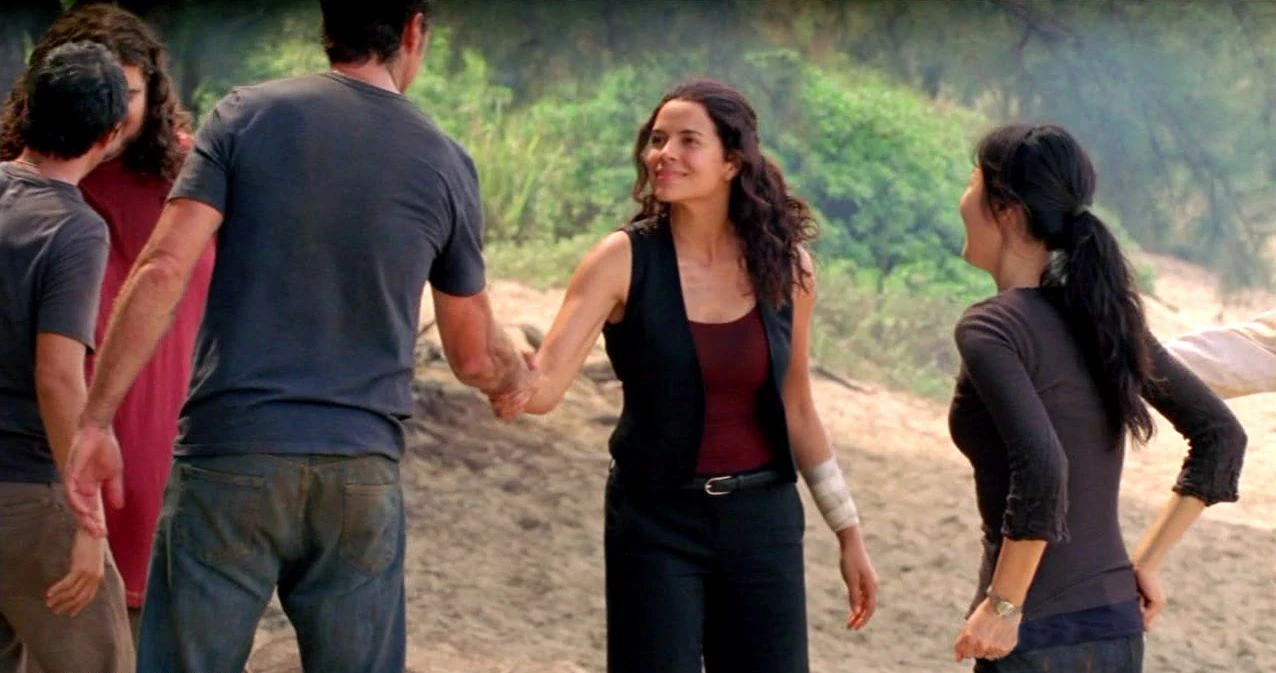
The "A-Team," minus Sayid, discuss a response to the attack on Sun. Ana Lucia is seen as the Tailie equivalent of an "A-Team member."
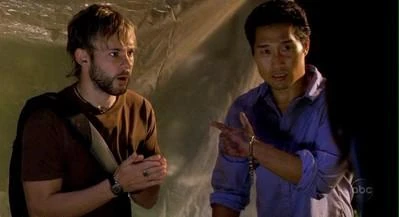
| “ |
LOCKE: You want to tell me why you've been following me, Charlie? |
” |
Definition
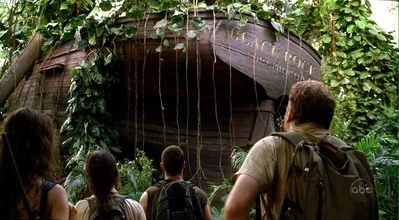
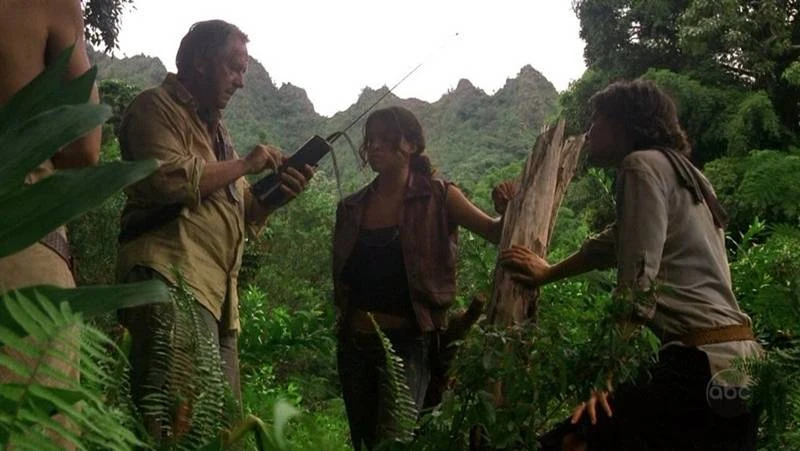
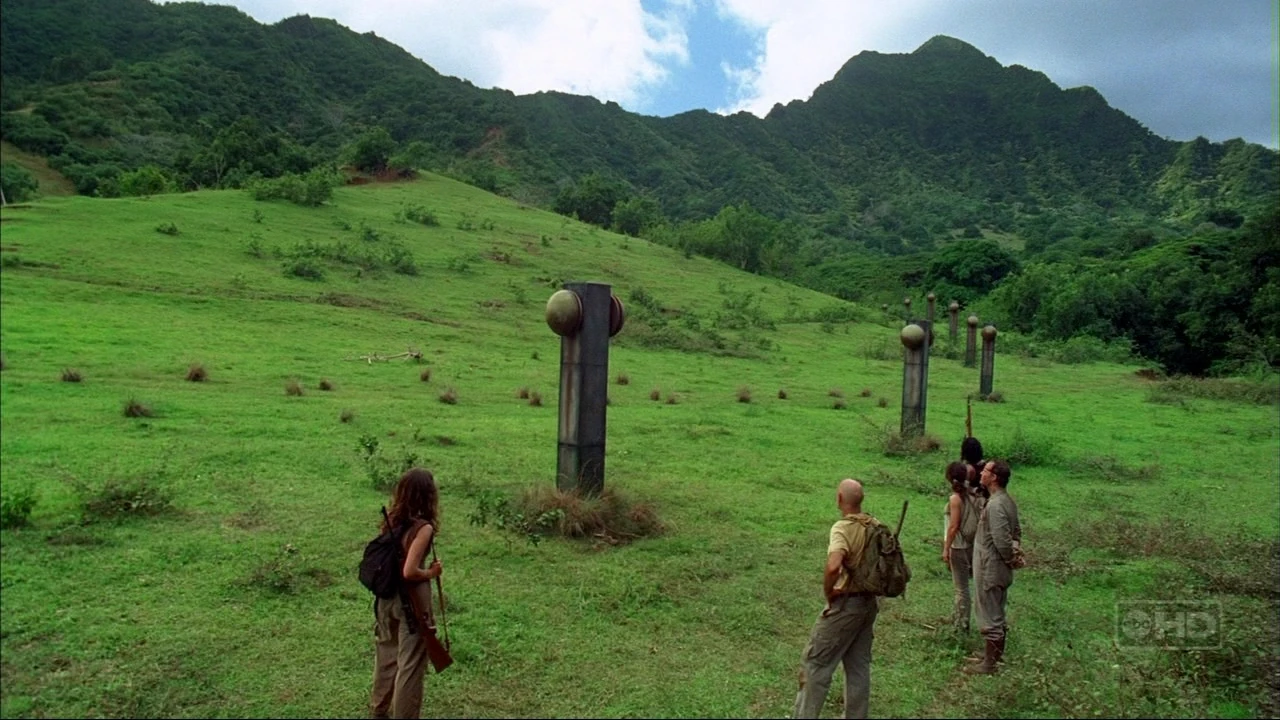
The remnants of the "A-Team," return to the Island on Ajira 316 to find their destiny.
Charlie's definition is used for the purposes of this article. To be considered an "A-Mission", at least one "A-Team" member must be present for the entirety of the mission. The "A-Team" consists initially of Jack, Kate, Sawyer, Locke and Sayid. Sun became powerful after the Oceanic 6 and soon began to participate more actively in the off-Island "A-Missions." Ana Lucia, Ben, Juliet, Charlotte, Miles, Daniel, and Ilana soon joined them from the Tailies, the Others, the Freighter, and Jacob's bodyguards, respectively.
An "A-Mission" is further defined here as a quest which departs from the main body of the survivors and involves either rescue, assistance to another, or betterment of the survivor community as a whole. Therefore, missions such as when Sawyer went hunting for the boar or tree frog do not fall on the term "A-Mission" as these were personal quests.
A mission by supportive or independent survivors is a "B-Mission"; an Others mission is an "O-Mission"; a Freighter mission is an "F-Mission", and a mission by Widmore's team in Season 6 is an S-Mission. All are interpreted as reactions in the form of supplements or responses to the "A-Missions".
Members
| Picture | Name | Status | Role | Overview |
 |
Kate | Alive | Semi-leader, tracker | Kate has been on the most "A-Team" missions, but as a secondary to Jack, Locke or Sayid. She has proved a most skilled tracker and the nature of her missions has typically been to help Jack in some way. |
 |
Sawyer | Alive | Leader, con artist | Sawyer goes on missions when he wants to and, unlike the rest of the A-Team, he doesn't do it for the good of the camp (though he will help out Kate from time to time). Sawyer is a valuable member as he will kill if he needs to and can lead lesser survivors if the dominant members of the "A-Team" are indisposed. |
 |
Hurley | Alive | Semi-leader, cook | A former member of B-Team, Hurley has also been in several A-Missions. He is one of the last three canditates. Became an A-member in Season 6. He is currently the only one who can communicate with Jacob. |
 |
Jack | Dead | Leader, doctor/surgeon | Jack acted as leader of the survivors for the entire 108 days spent surviving on the Island due to his highly-desired skills with medicine and protective tendencies. He has a habit of taking the leadership role on every mission he goes on and this sometimes makes him clash with Locke. |
 |
Sayid | Dead | Semi-leader, technical skills, interrogator, soldier | Sayid was a very active member of the "A-Team," always providing support to the leaders. He had many skills that helped in the missions. These included technological knowledge, diplomacy, torture, and fixing technical equipment. |
 |
Sun | Dead | Semi-leader, corporate power, translator | Initially a subordinate translator to her husband Jin, Sun became a prominent member of the "A-Team" over the false belief that Jin had perished on the Freighter. Her goal in more recent "A-missions" was re-uniting with her long-lost husband; she was aided by her cold demeanor and hostile takeover of her father's corporate industry. |
 |
Locke | Dead | Leader, hunter, tracker | Locke kept his own agenda as a leader and joined "A-Team" missions with input and advice but originally delegated his power to Jack. After tensions flared over control, Locke started to break away from the survivors and lead in his own fashion. He assumed control of the survivors when most of the "A-Team" was captured by Michael's betrayal, but joined the Others soon after and realized his potential to the Island, though never formally led them. |
 |
Juliet | Dead | Semi-leader, doctor/fertility researcher, former-Other | Juliet defected to the survivors when she grew tired of Ben's lies and machinations that had plagued her life on the Island for the last three years. Being a doctor and having a relatively intimate knowledge of the Others' facilities on the Island, she provided strong support for the leader of most "A-Missions." |
 |
Ana Lucia | Dead | Leader, interrogator | Ana Lucia assumed authoritarian control of the tail section survivors and endured aggressive tactics by the Others to kidnap her people. She eventually merged her tribe with the middle section survivors' beach camp, during which time she played an active role in "A-Team" planning and preparation. |
Season 1
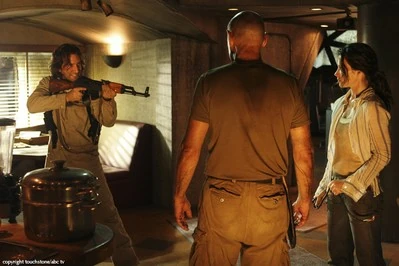
The 1st Season established the "A-Mission" as being one of an exploratory or survival nature being undertaken by strictly the middle section survivors of Oceanic Flight 815. This began the inception of the "A-Team" comprised of Jack, Kate, Locke, Sawyer, and Sayid.
Find the Cockpit
| Find the Cockpit | |||||||||||
|
  |
Send a Transmission
| Send a Transmission | |||||||||||
  |
|
Hunt for Boar
| Hunt for Boar | |||||||||||
|
  |
Triangulate the French Transmission
| Triangulate the French Transmission | |||||||||||
  |
|
Explore the Shoreline of the Island
| Explore the Shoreline of the Island | |||||||||||
|
  |
Rescue Charlie and Claire
| Rescue Charlie and Claire | |||||||||||
|
  |
Trap Ethan
| Trap Ethan | ||||||||||||
  |
|
Get a Battery for the Raft
| Get a Battery for the Raft | |||||||||||
|
  |
Search for the Beechcraft
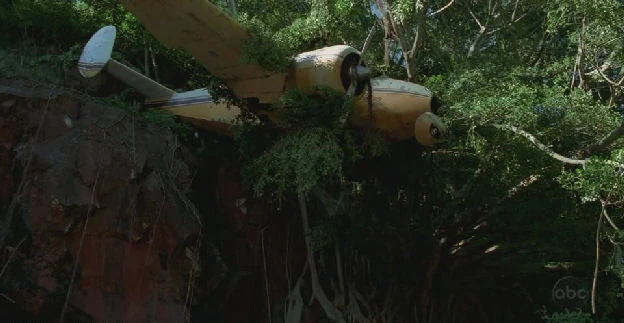
| Search for the Beechcraft | |||||||||||
  |
|
Save Boone's Life
| Save Boone's Life | |||||||||||
|
  |
Give Birth to Aaron
| Give Birth to Aaron | |||||||||||
  |
|
Travel to the Black Rock
| Travel to the Black Rock | |||||||||||
|
  |
Journey by Raft
| Journey by Raft | |||||||||||
  |
|
Rescue Aaron
| Rescue Aaron | |||||||||||
|
  |
Open the Hatch
| Open the Hatch | |||||||||||
  |
|
Season Breakdown
- Season 1 - Percentage Successful
53.3% (8/15)
- Season 1 - Percentage Half-accomplished
20.0% (3/15)
- Season 1 - Percentage Failed
26.7% (4/15)
Season 2
The beginning of Season 2 ties up the transition from Season 1. The mission "Journey by Raft" is the aftermath of the previous season's encounter with the Others, and also serves to introduces the Tailies, who are featured centrally in Season 2, as Ana Lucia joins the A-Mission squad through virtue of leading the Tailies for 48 days. The entry into the Hatch serves to introduce the survivors to the DHARMA Initiative as they are forced to push a button every 108 minutes for an indefinite amount of time, leading to Locke's destiny being jeopardized. Furthermore, Walt's abduction from the raft sets the stage for several attempts made by Michael to rescue Walt from the Others. Also, the rivalry between the survivors and the Others gains momentum.
Explore the Hatch
| Explore the Hatch | |||||||||||
|
  |
Push the Button
| Push the Button | |||||||||||
  |
|
Escape from “the Others”
| Escape from “the Others” | |||||||||||
|
  |
Return to the Beach Camp
| Return to the Beach Camp | |||||||||||
  |
|
Tail Section (Pt. 1): Survive on the Beach
| Tail Section (Pt. 1): Survive on the Beach | |||||||||||
|
  |
Tail Section (Pt. 2): Maintain the Signal Fire
| Tail Section (Pt. 2): Maintain the Signal Fire | |||||||||||
  |
|
Tail Section (Pt. 3): Imprison the Spy
| Tail Section (Pt. 3): Imprison the Spy | |||||||||||
|
  |
Tail Section (Pt. 4): Explore the Arrow
| Tail Section (Pt. 4): Explore the Arrow | |||||||||||
  |
|
Tail Section (Pt. 5): Test the Short-Wave Radio
| Tail Section (Pt. 5): Test the Short-Wave Radio | |||||||||||
|
  |
Retrieve Shannons Body
| Retrieve Shannon's Body | |||||||||||
  |
|
Track Michael
| Track Michael | |||||||||||
|
  |
Interrogate "Henry Gale"
| Interrogate "Henry Gale"" | |||||||||||
  |
|
Piece Together Claire's Memory
| Piece Together Claire's Memory | |||||||||||
|
  |
Search for “Henry's” Balloon
| Search for Henry's Balloon | |||||||||||
  |
|
Resolve the Lockdown Situation
| Resolve the Lockdown Situation | |||||||||||
|
  |
Trade “Henry” for Walt
| Trade “Henry” for Walt | |||||||||||
  |
|
Save Libby’s Life
| Save Libby’s Life | |||||||||||
|
  |
Hunt for "Henry"/Search for the Question Mark
| Hunt for "Henry"/Search for the Question Mark | |||||||||||
  |
|
Explore the New Station
| Explore the New Station | |||||||||||
|
  |
Investigate the Boat
| Investigate the Boat | |||||||||||
  |
|
Stake Out the Others’ Camp
| Stake Out the Others’ Camp | |||||||||||
|
  |
Let the Swan Timer Reach Zero
| Let the Swan Timer Reach Zero | |||||||||||
  |
|
Rescue Walt
| Rescue Walt | |||||||||||
|
  |
Season Breakdown
- Season 2 - Percentage Successful
43.5% (10/23)
- Season 2 - Percentage Half-accomplished
43.5% (10/23)
- Season 2 - Percentage Failed
14.0% (3/23)
Season 3
Season 3 marked a more aggressive stand by the "A-Team" against the survivors than during the previous 67 days on the Island.
Ambush the Others
| Ambush the Others | |||||||||||
|
  |
Save Mr. Eko
| Saving Mr. Eko | |||||||||||
  |
|
Locate Jack, Kate, and Sawyer
| Locate Jack, Kate, and Sawyer | |||||||||||
|
  |
Murder Ben
| Killing Ben | |||||||||||
|
  |
Escape Hydra Island
| Escaping Hydra Island | |||||||||||
  |
|
Rescuing Jack Part I: The Flame
| Rescuing Jack Part I: The Flame | |||||||||||
|
  |
Rescuing Jack Part II: Sonar Fence
| Rescuing Jack Part II: Sonar Fence | |||||||||||
  |
|
Rescuing Jack Part III: The Barracks
| Rescuing Jack Part III: The Barracks | |||||||||||
|
  |
Defeating the Others
| Defeating the Others | |||||||||||
  |
|
Contacting Naomi's ship
| Contacting Naomi's Ship | |||||||||||
|
  |
Season Breakdown
- Season 3 - Percentage Successful
66.7% (6/9)
- Season 3 - Percentage Half-accomplished
22.2% (2/9)
- Season 3 - Percentage Failed
11.1% (1/9)
Season 4
Track Naomi
| Tracking Naomi | |||||||||||
  |
|
Finding Daniel's Team
| Searching for the freighter Team | |||||||||||
|
  |
Finding Jacob's Cabin Part I
| Finding Jacob's Cabin Part I | |||||||||||
  |
|
Retrieving Charlotte
| Retrieving Charlotte from the Barracks | |||||||||||
|
  |
Kate's Identity Secret
| Kate's Inquisition | |||||||||||
  |
|
Investigating the Freighter
| Investigating the freighter | |||||||||||
|
  |
Interfering with Daniel and Charlotte
| Tracking Daniel and Charlotte | |||||||||||
  |
|
Defending the Barracks
| Defending the Barracks | |||||||||||
  |
|
Finding Jacob's Cabin Part II
| Finding Jacob's Cabin Part II | |||||||||||
|
  |
Escaping the Island
| Chasing the Helicopter, Disarming the freighter bomb, Fighting the Mercenaries and Escaping the Island | |||||||||||
  |
|
Moving the Island
| Moving the Island | |||||||||||
|
  |
Season Breakdown
- Season 4 - Percentage Successful
45.5% (5/11)
- Season 4 - Percentage Half-accomplished
45.5% (5/11)
- Season 4 - Percentage Failed
9.9% (1/11)
Season 5
On-Island (Pt. 1): Find an Island Landmark
| On-Island (Pt. 1): Find an Island Landmark | |||||||||||
  |
|
On-Island (Pt. 2): Infiltrate the Hostile’s Camp
| On-Island (Pt. 2): Infiltrate the Hostile’s Camp | ||||||||||
  |
|
On-Island (Pt. 3): Re-Set the Frozen Wheel
| On-Island (Pt. 3): Re-Set the Frozen Wheel | |||||||||||
  |
|
Off-Island (Pt. 1): Regroup at the Safe House
| Off-Island (Pt. 1): Regroup at the Safe House | |||||||||||
  |
|
Off-Island (Pt. 2): Assemble at the Lamp Post
| Off-Island (Pt. 2): Assemble at the Lamp Post | |||||||||||
  |
|
Off-Island (Pt. 3): Return to the Island
| Off-Island (Pt. 3): Return to the Island | ||||||||||
  |
|
Assimilate Into the DHARMA Initiative (1977)
| Assimilate into the DHARMA Initiative (1977) | ||||||||||
  |
|
Protect the Survivors’ Return (1977)
| Protect the Survivors’ Return (1977) | ||||||||||
  |
|
Search for Jin (2007)
| Search for Jin (2007) | |||||||||||
  |
|
Save Young Ben’s Life (1977)
| Save Young Ben’s Life (1977) | |||||||||||
  |
|
Locate the Jughead (1977)
| Locate the Jughead (1977) | |||||||||||
  |
|
Detonate the Jughead (1977)
| Detonate Jughead (1977) | |||||||||||
  |
|
Season Breakdown
- Season 5 - Percentage Successful
45.5% (5/11)
- Season 5 - Percentage Half-accomplished
36.4% (4/11)
- Season 5 - Percentage Failed
18.2% (2/11)
Season 6
Save Juliet
| Save Juliet | |||||||||||
  |
|
Save Sayid
| Save Sayid | |||||||||||
  |
|
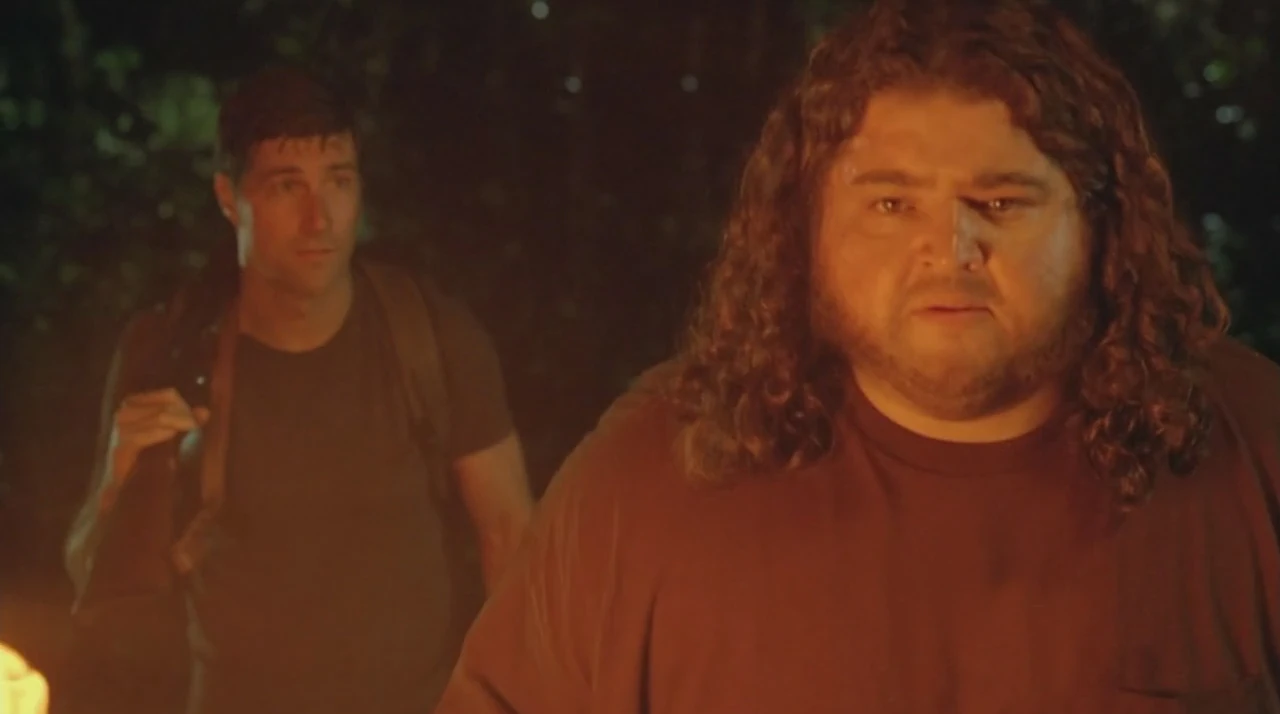
Find Sawyer
| Find Sawyer | |||||||||||
  |
|
Find the Lighthouse
| Find the Lighthouse | |||||||||||
|
  |
Explore the Lighthouse
| Explore the Lighthouse | |||||||||||
|
  |
Return to the Beach Camp
| Return to the Beach Camp | |||||||||||
  |
|
Stop Richard from joining MIB
| Stop Richard from Joining MIB | |||||||||||
  |
|
Retrieve the Package
| Retrieve the Package | |||||||||||
  |
|
Destroy the Plane
| Destroy the Plane | |||||||||||
  |
|
Go talk to "Locke"
| Go talk to "Locke" | |||||||||||
  |
|
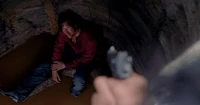
Kill Desmond
| Kill Desmond | |||||||||||
  |
|
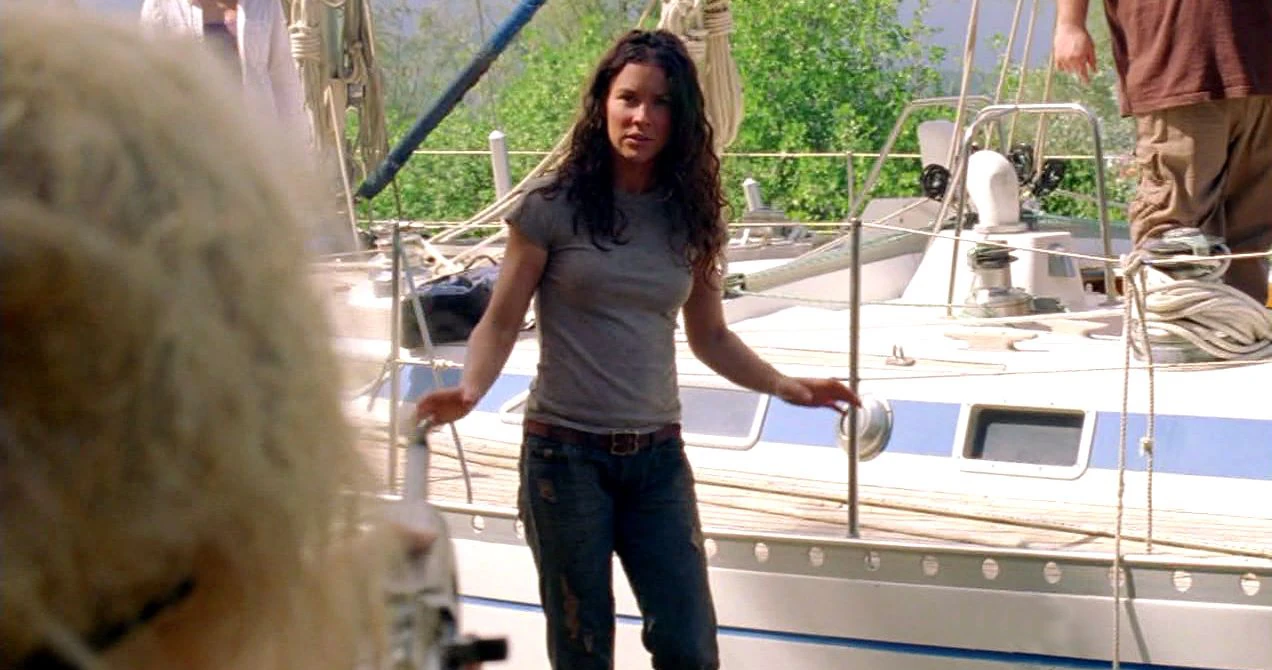
Escape to Widmore's camp
| Escape to Widmore's Camp | |||||||||||
  |
|
Rescue Widmore's Captives
| Rescue Widmore's Captives | |||||||||||
  |
|
Capture Widmore's Sub
| Capture Widmore's Sub | |||||||||||
  |
|
Defuse the Bomb
| Defuse the Bomb | |||||||||||
  |
|
Save Sun
| Save Sun | |||||||||||
  |
|
Find Desmond
| Find Desmond | |||||||||||
  |
|
Kill Man in Black
| Kill Man in Black | |||||||||||
  |
|
Leave the Island
| Leave the Island | |||||||||||
  |
|
Save the Island
| Save the Island | |||||||||||
  |
|
Season Breakdown
- Season 6 - Percentage Successful
70.0% (14/20)
- Season 6 - Percentage Half-accomplished
5.0% (1/20)
- Season 6 - Percentage Failed
25.0% (5/20)
Overall Breakdown
- Percentage Successful
53.9% (48/89)
- Percentage Half-accomplished
28.1% (25/89)
- Percentage Failed
18.0% (16/89)
External links
- LOST Music Video - Storm The Gate! - Montage of Lost scenes with some of the Season 3 A-Team missions (To 'Storm The Gate' by Tenacious D)
| |||||