Szablon:Infobox Stacja DHARMA
The Pearl (Perła) to stacja numer 5 Inicjatywy DHARMA, odkryta przez Locke'a i Mr. Eko. Jest to stacja monitorująca The Swan (prawdopodobnie nie tylko). Obsługa stacji miała za zadanie rejestrowanie poczynań użytkowników innych stacji i zapisywanie spostrzeżeń w specjalnych dziennikach, które po zapisaniu mieli wysłać za pomocą pneumatycznej rury. Prawdopodobnie nikt tych notatników nie czytał, o czym świadczyć może stos, na którym leżały pojemniki z dziennikami. W stacji znajduje się także ukryta kamera, co pozwala twierdzić, iż nie tylko rezydenci Łabędzia są poddawani eksperymentowi. Wnętrze stacji stanowi ośmiokatny korytarz prowadzący w dół po drabinie oraz wielki ośmiokątny pokój, w którym zamontowanych jest 9 telewizorów. Stacja nie posiada żadnych pomieszczeń mieszkalnych dla personelu, ponieważ pracownicy pracowali na 8-godzinne zmiany.
Znak zapytania

Znak zapytania
Więcej: The ?
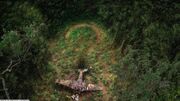
Wejście do Perły znajdowało się pod wrakiem samolotu przemytników na końcu gigantycznego znaku zapytania (zobacz obrazek).
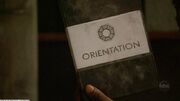
Film instruktażowy dla Perły

Instruktaż dla Perły
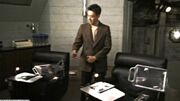
Na jednym ze stołów znaleziono film instruktażowy dla Perły. Z filmu dowiadujemy się, iż personel stacji pracował tu przez 3 tygodnie i miał za zadanie obserwowanie mieszkańców innych stacji na monitorze, w czasie 8-godzinnych zmian. Po każdej zmianie mieli zostać przetransportowani do baraków, nieopodal Pala Ferry. Gdy dziennik obserwacji został zapisany, musiał zostać umieszczony w specjalnej pneumatycznej tubie i wysłany, jak to powiedziano w filmie do nas. W filmie wystepuje mężczyzna przedstawiający się jako Dr. Mark Wickmund; aczkolwiek wygląda identycznie jak Dr. Marvin Candle z filmu instruktażowego dla stacji Łabędź z jedną tylko różnicą, iż nie miał protezy ręki i nosił inny strój. Na filmie instruktażowym można również zauważyć dwóch tajemniczych naukowców.
Więcej Instruktaż dla Perły
Centrum monitoringu

Centrum monitoringu
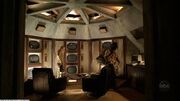
W stacji znajdowało się centrum monitoringu z dziewięcioma ekranami zamontowanymi na ścianie. Ekrany zamontowano w konfiguracji 3x3 i ponumerowano, według kolumn. Każdy monitor posiadał trzy okrągłe przełączniki w pionowej kolumnie. Górne dwa były do siebie podobne, ale ten dolny różnił się znacząco od pozostałych, był dwa razy większy. Do włączenia ekranów Locke użył dużego włącznika do uruchomienia od jednego do trzeciego i górnego małego do włączenia siódmego monitora. Ekran ten pokazywał obraz z kamery zamontowanej w kuchni Łabędzia. Na pozostałych monitorach nic się nie wyświetliło. Monitor numer 5 posłużył do odtworzenia filmu instruktażowego dla Perły. Nad monitorami zamontowane były trzy głośniki. Prawdopodobnie do transmitowania dźwięków z obserwowanych stacji.
Komputer
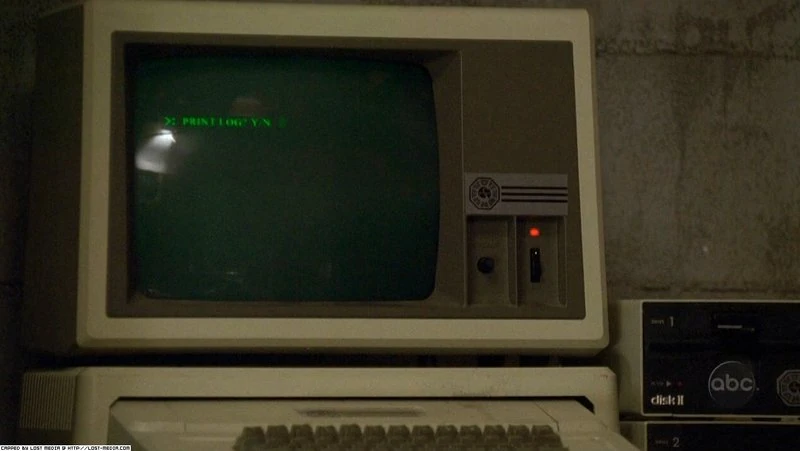
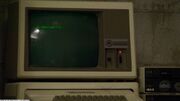
Komputer w Perle
Więcej: Komputer z Perły
W Perła znajduje się komputer, podobny do komputera ze stacji Łabędź, z podłączoną do niego drukarką (Dharma-rebranded Apple ImageWriter II). Locke odkrył iż na ekranie wyświetlony był komunikat Wydrukować raport? Y/N. Po wydaniu polecenia Y drukarka zaczęła drukować raport, który był powtarzającą się serią liczbowego kodu, zakończonego słowem zaakceptowany, np. 41602064:41 zaakceptowany 41602086:29 zaakceptowany, itd. Te liczby to czasy poszczególnych uaktywnień komputera z Łabędziu przez użytkowników stacji, wpisujących liczby i wyciskających Wykonaj. Ale nie tylko liczby są rejestrowane, ostrzeżenie Błąd systemu, także wspomniane jest w raporcie. Najbardziej prawdopodobnie, wszystko co wprowadzane jest do komputera w Łabędziu, zostaje zarejestrowane. W ostatnim odcinku 2. sezonu Desmond odkrywa w wydruku raportu z komputera Perły (dał mu go Locke), że ostatnia awaria systemu miała miejsce 22 września, czyli wtedy, kiedy rozbił się lot Oceanic 815.
Krzesła

Stanowiska
There are two viewing seats each with a table and a magnifying viewing lens mounted on an adjustable arm assembly. Controls on the arms of the chairs seem to be made from spare parts. On the left arm of the left chair, a rocker switch similar to older style power windows can be seen. On the right arm of the right chair, Locke used the conventional stove dial to un-dim the lights in the room. On the dial these words can be read, starting on the right and moving counterclockwise: "HIGH", "MEDIUM", "WARM", and "OFF". On the table there's also a cigarette and debris that fell from the room's ceiling (this would be consistent with the minor structural damage seen elsewhere in this room). In an official LOST Podcast, writer Damon Lindelof stated that the cigarettte was still burning when Locke and Eko made their entrance.
Pneumatyczna rura

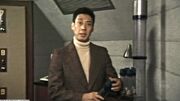
Dr. Mark Wickman i pneumatyczna rura
Artykuł główny: Tuba pneumatyczna
Znajduje sie tu ciągle działająca Tuba pneumatyczna. Personel stacji był zobowiązany do wysyłania swych zeszytów w specjalnych pojemnikach za pomocą tuby. Zeszyty miały być dostarczone do zwierzchników eksperymentu. Jak okazało się w odcinku "Live Together, Die Alone" pojemniki wraz z zawartością leżaly na pustej polanie, prawdopodobnie nigdy nie były czytane. Znajdowała się tam też stworzona przez Locke'a mapa, wysłana za pomocą tuby w odcinku "?".
Kamera

Kamera
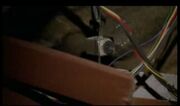
W jednym z uszkodzonych czesci sufitu jest widoczna kamera, filmujaca perle i jego personel. Jest presumed, ze personel Perly nie wiedzial o tej kamerze, w zwiazku z tym, ze byla ona ukryta w suficie. Ale z powodu obrazen, zadanych stacji, zostala ujawniona, pozwalajac Locke'owi ja zauwazyc
Znaleziska z Perły
Teorie
- In Orientation, Desmond fires his rifle after Kate hits him over the head. The bullet might have hit the camera watching the computer in The Swan; thus creating the static on one of the monitors.
- The Swan orientation film was made after the Pearl orientation film. This can be observed by looking at the video feed in the background while "Marvin Candle/Wickmund" is talking. The feed shows two men working in the dome of the Swan station, and the tape-drive computers can be seen in the background, however the lit computer bank in the center we see in the present is missing. Later, when "Candle" is giving the orientation speech during the Swan film, you can see this bank of computers in the small model he uses as a visual aid. Assuming that it isn't simply a mistake on the part of the show's set department, this shows that the new bank of computers was added later, perhaps as a result of needing to manage the "Incident".
- The Pearl is not the central question mark on the Blast Door Map.
- The Pearl could be CV IV on the Blast Door Map. Since on the map, next to CV IV "The Pearl?" is written. Plus there is a reference to RVS (Remote Viewing Station?) next to CV IV on the map. The viewing of other stations may connect to that reference.
- Right above the Swan on the Blast Door Map there is a closer, smaller question mark. This might be the Pearl station.
- If the wavy lines on the map correspond to the cliff, then the Pearl is on the wrong side.
- The mapmakers (Kelvin and Radzinsky) could also simply have been wrong.
- The video feeds that are sent to The Pearl may also be viewable at another station, as one must assume the video being shot inside The Pearl is being sent somewhere else.
- When Locke initially explored The Pearl, he noticed cigarette butts (perhaps smoke rising from them). This shows that someone was watching all the activities within the hatch at some recent point, possibly even when Locke and Eko broke in.
- The Pearl's hatch, however, had been covered by the plane since Boone knocked it off the cliff, and even then it was not visible (covered in dirt) suggesting that it actually was abandoned.
- However, for a station of its design, there's likely to be more than just one point of entry.
- The Pearl's hatch, however, had been covered by the plane since Boone knocked it off the cliff, and even then it was not visible (covered in dirt) suggesting that it actually was abandoned.
- Henry Gale knew The Others were aware he was locked in The Swan, because they had people gathering information in this way.
- The Pearl is where the messages from "Walt" were sent.
- Assuming The Others spied on The Swan, they could have sent the messages knowing Michael was at the computer.
- The video may have been edited at the point when Dr. Mark Wickmund instructs the workers to return to the barracks on the Pala Ferry. This may be another modification by previous inhabitants from the Pearl Station. This may prove difficult though, as the orientation is in an enclosed tape cassette unlike the swan orientation filmstrip, but this could be done. This could also explain the change in pitch of Dr. Candle's voice at the end when he instructs the workers to send the notes through the pneumatic tube. The interference is similar to the that of the Swan video where it was cut. The biggest clue that the video has been cut is that the camera and Mark Wickmund's position changes very rapidly after the heavy interference and picture loss. After this interference, the DHARMA initiative theme tune becomes slightly distorted, perhaps an effect of the manual tape editing.
- That is highly unlikely since all old VHS players collect dust and can cause a VHS tape to change the pitches of the audio and change the picture of the film. The same problem could happen to a cassette tape played in an old cassette player. Plus if this were true, there would have been signs of the reflection from scratch tape in the video.
- Henry Gale was the one inhabiting the Pearl and left somehow and began his walk to the beach or the Swan when Rousseau caught him and was locked in the guns vault. Or it was his plan to get caught.
- It is possible that the two people who left the Pearl were the same two Others that followed Michael, Jack, Sawyer, Kate, and Hurley as the Pearl was discovered in "?" which was only 2 episodes before Live Together, Die Alone.
- This may not be the complete Pearl station. Assuming the classic "behind the bookshelves" theory, there may be a completely different section of the station that is blocked off by the bookshelves. This is where the station's inhabitants may have run before Eko and Locke arrived.
- Every station has two entrances/exits. One entrance that can be accessed from above but is buried and another side entrance that is concealed.
- Whoever was in the Pearl when Locke and Eko entered, hid in the hole in the roof of the monitor chamber. This hole may explain the rocks scattered around the hatch, as it may have been dug out previously for someone to hide in.
- The placement of the material around the burning cigarette (and the position of the cigarette itself)seems less than random. We're given a long and clear shot of the table. Could there be a map or clue hidden in the material?
- The placement of the material could be a representation of the island itself. Sand and rocks in a "sea" of blue seems like it can't be a random placement. Could the burning cigarette (especially its smoke) represent either the Monster or the signal smoke Sayid is supposed to set off later? Perhaps the Others created a map to plan something, or someone else left a map for Eko and Locke to find?
- The burning cigarette suggests that there may have been recent inhabitants of the hatch, but that they were off shift.
- In Live Together, Die Alone when Locke tells Desmond of the Pearls Orientation film, Desmond makes a point that Locke has it all backwards. That it is really the Pearls inhabitents that are the subject of observation rather then the Swan. This is proven by the fact that all the tubes end up at the Capsule Dump.
- It monitored The Hydra but, like the intercom, the camera no longer works in the cell where Jack is held.
- This Pearl is not the real Pearl, but a fake one. The real Pearl observes the occupants of the fake Pearl.
Galeria
")
")
")
")
")
")
")
")
| Ten artykuł jest tylko zalążkiem Możesz pomóc Lostpedii rozszerzając go |